 Add Row
  Add
Add 


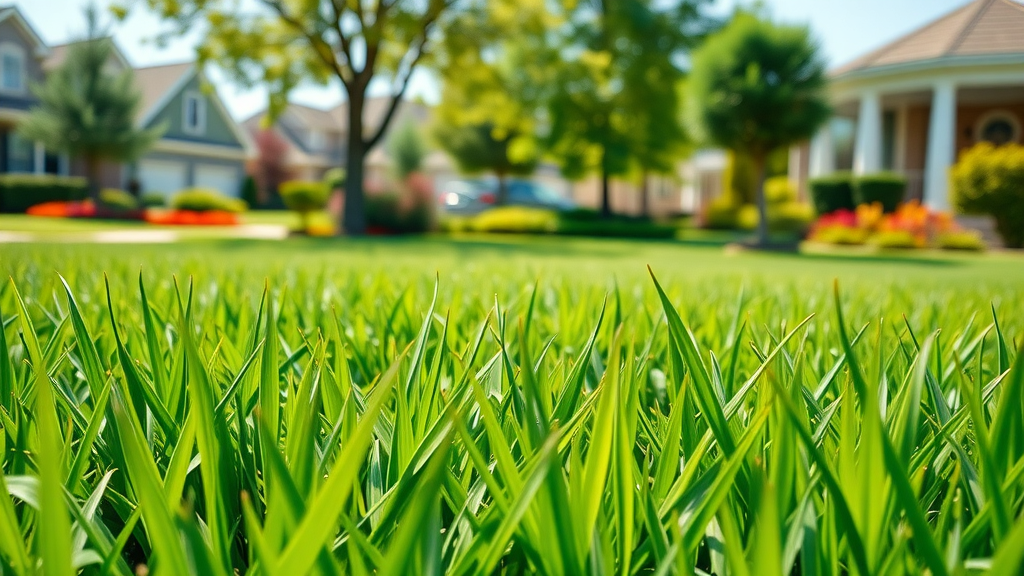
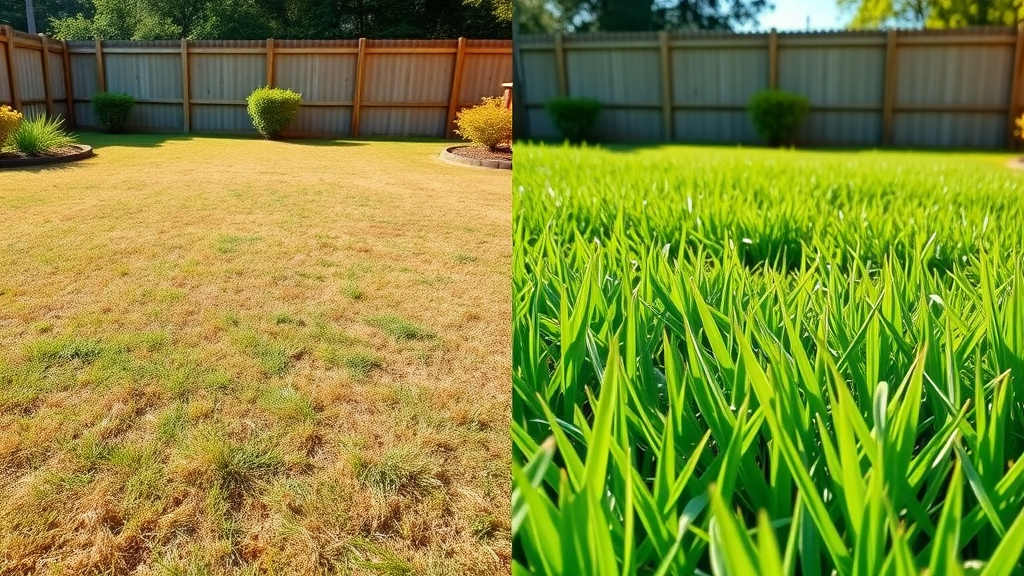
Did you know? Nearly 70% of lawn problems in U.S. homes can be traced to hidden soil compaction—yet most homeowners skip lawn aeration altogether! Ignoring this step can transform your lush backyard into a patchy, distressed plot. If you want vibrant, resilient grass year-round, understanding and applying lawn aeration is your secret weapon. This comprehensive guide dives deep into why, how, and when to aerate your lawn, debunking the myths and arming you with practical steps you can use immediately.
The Startling Truth About Lawn Aeration Most Homeowners Ignore
Lawn aeration isn’t just a fancy extra; it’s the backbone of maintaining a healthy, green lawn. Too often, homeowners assume their grass struggles because of inadequate watering or fertilizing, but the real culprit is often compacted soil. When you don’t aerate your lawn , it can quickly become a breeding ground for decline—grass roots suffocate, nutrients can’t penetrate, and water pools on the surface, never reaching where it matters.
For homeowners striving for the envy-inducing, greenest patch on the street, the main keyword —lawn aeration—should become a cornerstone of your lawn care calendar. This is especially important if your yard faces heavy foot traffic, clay soil, or you’ve never tried aerating your lawn. Ignoring aeration now can lead to costly fixes and wasted efforts down the road.
Why Skipping Lawn Aeration Can Ruin Your Lawn's Health
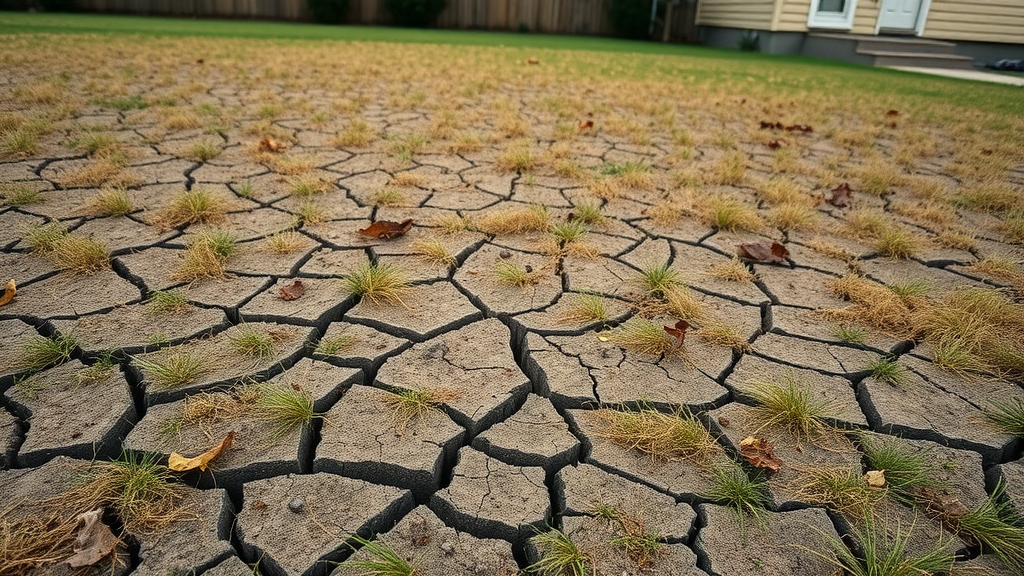
Compacted soil blocks the flow of air, water, and nutrients to grass roots . When you don’t aerate your lawn , the hard-packed earth puts your turf under stress. Lawns with compacted soil are more vulnerable to drought, disease, and weed invasion. Aeration helps—by creating holes in the ground, the right tools like a core aerator or plug aerator allow your lawn’s root system to breathe and expand. Over time, skipping aeration results in a patchy, lackluster lawn and intensified lawn care headaches for homeowners. Whether you’re working with heavy clay soil or sandy loam, proper aeration is the lifeline your grass needs.
What You'll Gain from Mastering Lawn Aeration
- Understand core aeration and spike aeration techniques
- Identify the best time to aerate your lawn for optimal results
- Avoid costly lawn care mistakes due to compacted soil
- Compare and choose between spike aerator, core aerator, and plug aerator tools
- Debunk common myths about aerating your lawn
Lawn Aeration Explained: Your Foundation for Greener Grass
Defining Lawn Aeration: What It Is and Why It Matters
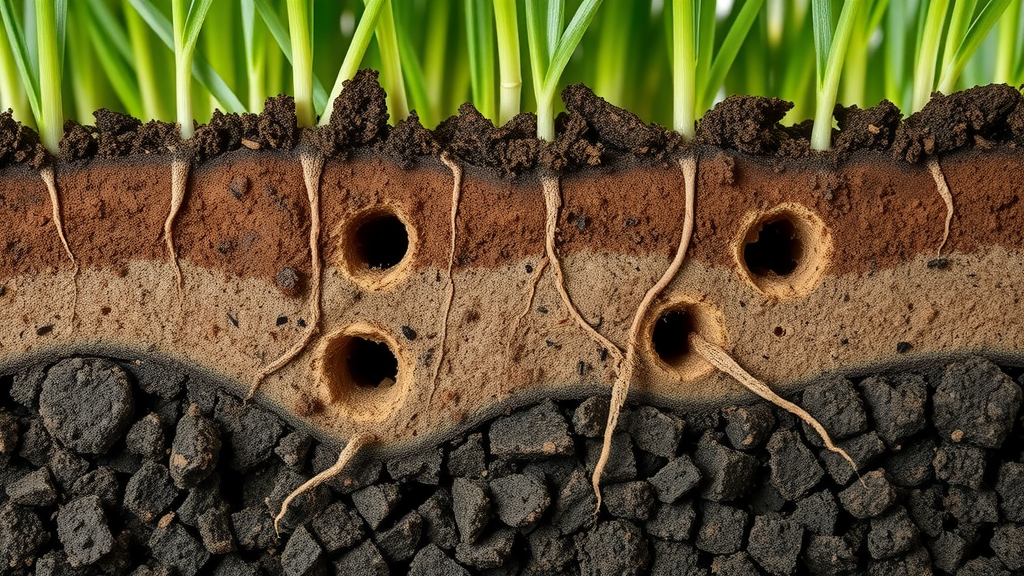
Lawn aeration is the process of perforating your lawn’s soil with small holes to allow air, water, and essential nutrients to reach the roots of your grass. By using a core aerator, spike aerator, or plug aerator, you open up the earth, alleviating soil compaction and giving the root system much-needed breathing room. Regular aeration helps the organic matter in your lawn break down more efficiently, reducing layers of dead material and thatch that choke your grass.
Why does this matter? A well-aerated lawn supports deeper, healthier roots, encourages lush and resilient grass, and boosts the lawn’s natural defenses. Especially in areas with heavy clay soil, regular lawn aeration prevents water runoff, reduces pooling, and lowers the risk of turf diseases caused by suffocated roots. If you want truly vibrant grass, aerate your lawn to let every drop of water and bit of fertilizer count!
How Lawn Aeration Works: The Science Behind Strong Roots
The science of lawn aeration revolves around relieving soil compaction. When the soil beneath your lawn becomes packed tightly, grass roots fight for space, water, and air. Tools like a core aerator remove plugs of soil from the lawn, creating channels for moisture, nutrients, and oxygen to infiltrate down to the root system . By using hollow tines, these aerators ensure that even dense, heavy clay soil gets the relief needed for robust grass growth.
This process also stimulates the breakdown of lawn thatch and encourages stronger turf that can outcompete weeds. In contrast, using a spike aerator creates holes by pushing into the soil, which helps in lighter soils but can sometimes worsen compaction in clay-heavy yards. The goal is to create enough space for roots to expand, water to penetrate the soil, and nutrients to be fully absorbed, resulting in a greener, healthier lawn.
Recognizing the Signs: When Does Your Lawn Need Aeration?
- Symptoms of compacted soil: pooling water, patchy grass, and slow growth
- How lawn aeration addresses root suffocation
- Easy at-home tests to determine if aerating your lawn is needed
Knowing when to aerate your lawn starts with vigilance. Pooling water after rain, yellowing or patchy grass bursts, and noticeably slow lawn growth are key indicators of compacted soil. When roots struggle to penetrate the soil or water stubbornly sits atop the grass, your turf is screaming for relief.
Conduct a simple at-home test: push a garden fork or screwdriver into your lawn. If it’s difficult to insert more than a couple of inches, or you pull up a plug with a thin matting of grass roots, it’s time for core aeration . Regular lawn care that includes aeration not only revives sickly grass but also prevents future soil compaction, keeping roots strong and healthy year-round.
Aeration helps address these issues by breaking up dense soil. It allows air to reach the roots, reduces standing water, and provides pathways for fertilizer and nutrients. The sooner you identify these warning signs and act, the faster you’ll restore your lawn’s natural resilience and rich green color.
Understanding Compacted Soil and the Role of Lawn Aeration
What Causes Compacted Soil?
Compacted soil is the main enemy of healthy lawns. It develops from repeated foot traffic, heavy equipment, or natural settling—especially when you’re working with heavy clay soil. Over time, soil particles are pressed so tightly together that there’s little room left for air, water, or the growth of grass roots. The result? Grass struggles, water pools, and bare patches creep in, no matter how much you water or fertilize.
Lawn aeration is the solution—by removing soil plugs using a core aerator or creating channels with spike aerators, you reverse this suffocating effect. The right tools break through the blanket of compacted earth, giving your grass roots renewed access to essential resources. Without regular aeration, your efforts at fertilization or overseeding may go to waste, as nutrients get locked above the dense soil layer and never reach the hungry roots beneath.
How Core Aeration, Spike Aeration, and Plug Aeration Restore Lawn Health
Core aeration involves pulling actual plugs of soil out of the ground, leaving small holes behind. This method is especially effective for heavy clay or severely compacted lawns. The hollow tines of a core aerator allow for the removal of soil plugs , quickly increasing airflow and encouraging water and nutrient penetration, leading to rapid improvement in lawn health.
In comparison, spike aeration uses solid tines to poke holes in the soil, which is quicker but less effective in dense or clay-dominated lawns—it can sometimes actually increase compaction in heavy clay. Plug aerators function similarly to core aerators, offering the advantage of deeper soil opening for significant, long-term relief. Choosing the right aeration method is crucial, as it directly influences how well your lawn recovers and thrives, especially when dealing with persistent soil compaction or thatch problems.
Regardless of the method, the overarching goal is to create enough open space within the soil for air, water, fertilizer, and organic matter to nourish the roots. Whether you use a core aerator, spike aerator, or plug aerator , the improvement in grass resilience and lushness will be clear within a single growing season.
Lawn Aeration Methods: Comparing Core Aeration Vs. Spike Aeration
| Lawn Aeration Method | Pros | Cons | Recommended Use Case |
|---|---|---|---|
| Core Aerator | Removes soil plugs, best for severe compaction, boosts root growth | Can leave temporary soil plugs on lawn, requires equipment rental | Heavy clay soil, annual lawn renovation |
| Spike Aerator | Quick and easy to use, ideal for minor compaction | Might worsen compaction in clay soils, less effective for deep roots | Lightly compacted sandy or loam soil |
| Plug Aerator | Deep, long-lasting results, allows maximum oxygen and nutrient flow | Labor-intensive, similar to core aerator in effect | Persistent compaction, dense thatch buildup |
Choosing the Right Lawn Aerator: Manual, Mechanical, and Rental Options
When it’s time to aerate your lawn , you can choose between manual aerator tools, mechanical aerators, and rental equipment. Manual aerators, including hand-held core or spike aerators, are cost-effective for small yards or spot treatments. They allow you to target trouble spots but are time-consuming for larger lawns. Mechanical options, such as walk-behind core or plug aerators, cover large properties quickly and reduce physical effort.
For most homeowners, renting a professional-grade lawn aerator from a garden center offers the best of both worlds: deep aeration and time efficiency. Be sure to match your tool to your soil type—heavier, compacted soils demand core or plug aeration, while sandy or less-compacted lawns can benefit from spike aeration.
Investing in the right tool ensures your lawn aeration efforts yield visible, longer-lasting improvements—dense, green turf that’s ready for whatever nature or backyard traffic throws its way!
Step-by-Step Guide: How to Aerate Your Lawn for Maximum Benefit
- Preparing your lawn for aeration: Mow your grass short (1-1.5”) and water the lawn 1-2 days before aerating. This softens the soil, making holes or soil plug removal easier. Clear your yard of debris and mark any underground utilities or sprinklers.
- Selecting the ideal aeration method: Decide between core, spike, or plug aeration based on lawn size, soil compaction, and available equipment. Use a core aerator for clay soils and severe compaction, while spike aerators work for lighter maintenance in sandy soils.
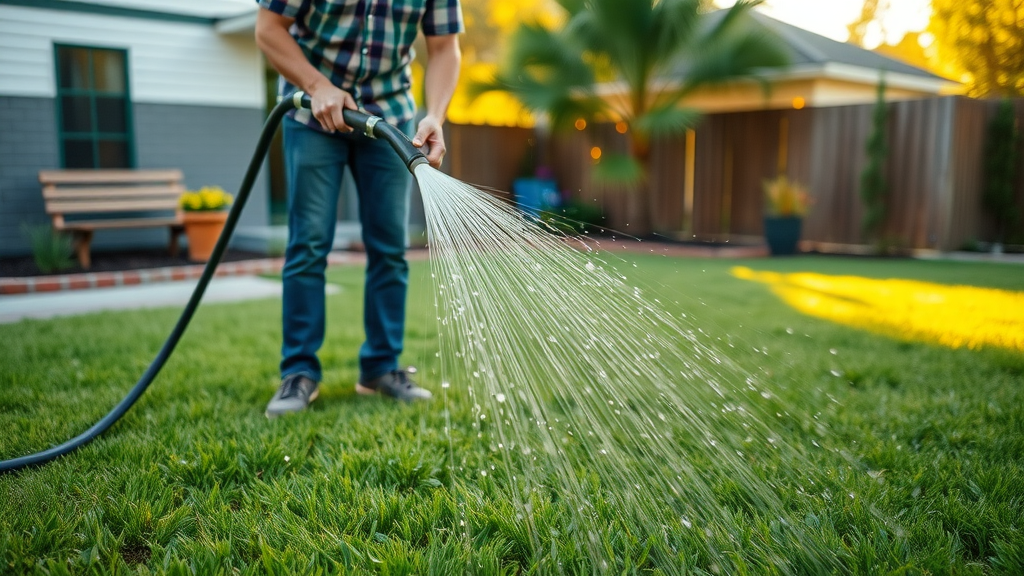
- Executing proper lawn care after aeration: Immediately after aerating, leave soil plugs on the lawn—they break down quickly and enhance soil structure. Reseed any bare spots with grass seed, and apply fertilizer or organic matter to take full advantage of the soil’s improved absorption. Water thoroughly to help new seeds and roots establish.
Follow this process at the ideal time to aerate —typically early or late spring for cool-season grasses and late spring to early summer for warm-season grasses—for optimum results.
Mistakes to Avoid During Lawn Aeration
- Avoid aerating during drought or over-saturated soil conditions
- Common errors in handling lawn aerators
- Ignoring the importance of post-aeration lawn care
Timing is everything. Never aerate your lawn when the soil is bone-dry or waterlogged—both make penetration difficult and reduce aeration effectiveness. Wet soil can tear or smear, while dry soil resists penetration. Ideally, aim for moist but not soggy conditions. Common mistakes also include making only a single pass with the aerator on compacted areas—multiple passes lead to better results in high-traffic or clay-heavy zones.
Another frequent error is forgetting the crucial post-aeration care. Skipping overseeding, watering, or fertilizing means you miss out on the prime opportunity to boost your lawn’s health. With proper timing, equipment, and aftercare, your lawn aeration routine becomes an investment that pays dividends in thick, healthy grass year-round.
Maintaining Results: Best Lawn Care Practices After Aerating Your Lawn
Critical Steps for Continued Lawn Health
After successful lawn aeration , your lawn is in prime condition—and also in need of a little extra TLC for maximum benefit. Start by letting soil plugs decompose naturally; this returns essential organic matter to your yard. Next, spread premium grass seed over thin patches to fill in your lawn’s weak spots, then water thoroughly to encourage new growth. Applying a balanced fertilizer, especially one aimed at root development, helps new and existing grass thrive as the open channels direct nutrients deep into the soil.
It’s also crucial to reduce foot traffic on newly aerated lawns for a week or two. This gives the root system time to expand without compaction setbacks. Maintain a regular watering schedule, especially if you have newly seeded areas, and keep mowing height a bit higher than usual to protect fragile new growth. With these aftercare steps, you’ll lock in the benefits of aeration and set the stage for a resilient, weed-resistant, and vibrant green yard all season long.
Seasonal Strategies: Timing Your Lawn Aeration Right
| Region / Grass Type | Best Time to Aerate | Notes |
|---|---|---|
| Cool-Season Grasses (Fescue, Bluegrass) | Early spring (March-April) or early fall (September-October) | Maximize root growth before summer heat or winter cold |
| Warm-Season Grasses (Bermuda, Zoysia, St. Augustine) | Late spring to early summer (May-June) | Aerate once green-up has fully begun and growth is vigorous |
| Heavy Clay or High-Traffic Regions | Spring and/or Fall | May require aeration twice per year for best results |
"Regular lawn aeration is the secret weapon behind every vibrant, resilient lawn," says a certified turfgrass specialist.
People Also Ask: Popular Questions About Lawn Aeration
When should you aerate your lawn?
You should aerate your lawn when grass is actively growing and soil moisture is ideal—not too wet or dry. For cool-season lawns, aim for early spring or fall. Warm-season grasses benefit from aeration in late spring to early summer, once the grass is fully out of dormancy and growing robustly.
Expert Answer: Ideal Lawn Aeration Timing for Different Climates
For northern regions with cool-season grasses (like fescue and bluegrass), aeration is best in early spring or fall. Southern lawns with warm-season grasses (such as Bermuda or zoysia) respond best to late spring or early summer aeration after they green up and enter peak growth. Local weather and soil type should also factor into your schedule for the healthiest lawn possible.
Does lawn aeration actually work?
Absolutely! Studies and years of professional lawn care prove that lawn aeration significantly improves water and nutrient uptake, stimulates root growth, and addresses compacted soil. Homeowners consistently notice thicker, healthier grass and fewer bare patches after routine aeration, especially in high-traffic or clay-dominant lawns.
Expert Answer: Evidence and Studies on the Effectiveness of Lawn Aeration
Research from turf universities demonstrates that core aeration and plug aeration restore oxygen flow, alleviate compaction, and decrease the risk of turf diseases. Lawns receiving annual aeration boast deeper roots, better drought resilience, and more rapid recovery from damage. These proven results make aeration an indispensable part of expert lawn care management.
When should you aerate your lawn in Pennsylvania?
For most Pennsylvania lawns, which feature cool-season grasses, the best times to aerate are early fall (September to mid-October) or early spring (late March to April). Avoid aeration during heatwaves or drought, as stress can inhibit grass recovery and growth after the procedure.
Expert Answer: Regional Guidance on Lawn Aeration in Pennsylvania
Pennsylvania’s climate means cool-season grasses thrive in moderate temperatures. Aerate in early fall for best root development before winter or in early spring after the last frost, when grass is actively growing. Regular fall aeration is recommended for lush lawns with heavy clay or high-traffic areas.
How to tell if a lawn needs aeration?
If your lawn shows pooling water, patchiness, or has hard, compact soil difficult to poke with a screwdriver, it likely needs aeration. Additional clues include persistent weed invasions, stagnant growth despite proper watering, and thick, spongy thatch layers.
Expert Answer: Simple Methods to Diagnose If Your Lawn Needs Aeration
Try the screwdriver test—if it won’t slide easily into the soil, compaction is present. Observe grass color and growth—faded, slow-growing grass over compacted soil can’t access essential nutrients. Consistent foot traffic, pets, or heavy clay indicate an even higher need for regular lawn aeration .
Frequently Asked Questions on Lawn Aeration
-
Is it possible to over-aerate your lawn?
Yes, but it’s rare. Over-aeration can disturb soil structure or damage the root system if done excessively—once or twice per year is generally ideal for most lawns. -
What is the difference between a plug aerator and a spike aerator?
Plug (core) aerators remove actual plugs of soil for lasting compaction relief, while spike aerators poke holes without removing soil, which can sometimes compact the soil further in clay-heavy yards. -
How soon after lawn aeration can you mow?
Wait at least one to two days after aerating your lawn , allowing soil plugs to break down and the grass to recover before mowing. -
Does aerating your lawn reduce thatch?
Yes, especially with core or plug aerators. Lawn aeration helps break up thick thatch layers and promote decomposition, giving new grass seed the chance to thrive.
Key Takeaways: Ensuring Your Lawn Aeration Success
- Lawn aeration alleviates compacted soil and boosts root growth
- Choose the right aeration method for your soil and grass type
- Plan your lawn aeration according to grass seasonality and local conditions
- Maintain your lawn properly after aeration for best results

Transform Your Yard: Start Your Lawn Aeration Journey Today
Don’t let your lawn fall victim to hidden soil compaction. Start your lawn aeration journey now to unlock healthier roots, thicker turf, and year-round green—your future self (and neighborhood) will thank you!
To further enhance your understanding of lawn aeration, consider exploring these authoritative resources:
-
The article “ How to Aerate Your Lawn (and When to Do It for Best Results) ” from Almanac.com provides detailed guidance on the optimal timing and methods for aerating your lawn, tailored to different grass types and climates.
-
The University of Maryland Extension’s resource “ Lawn Aeration ” offers insights into the benefits of mechanical aeration, including alleviating soil compaction and encouraging root growth, along with practical tips on the aeration process.
By delving into these resources, you’ll gain a comprehensive understanding of lawn aeration, enabling you to implement effective practices for a healthier, more resilient lawn.


Write A Comment