Add Row
Add Element
American Yard and Home Logo
update
American Yard & Home
American Yard & Home Logo
update
Add Element
  • Home
  • Categories
    • Ask an Expert
    • DIY Projects & Repairs
    • Featured Businesses
    • Home Renovation & Remodeling
    • Interior Design & Styling
    • Landscaping & Curb Appeal
    • Outdoor Living
    • Smart Home & Tech
July 19.2025
1 Minute Read

DIY Plumbing vs Professional: When to Call the Experts

"Is tackling your own plumbing repairs a smart move, or are you risking more trouble than it's worth?"

Are you hesitating over whether to attempt a DIY plumbing fix or to call a professional plumber? Homeowners everywhere face this crucial question when a leaky faucet or clogged drain disrupts daily life. While a diy fix can save you time and money, improper repairs can put your entire plumbing system—and wallet—at risk. This comprehensive guide dives into everything you need to know about the diy plumbing vs professional debate. By the end, you’ll be empowered to recognize which plumbing repairs are in your wheelhouse—and when to trust expert plumbing services for your home’s safety and long-term performance.

What You'll Learn

  • How to identify plumbing repairs you can safely handle as a homeowner

  • The reality of risks and costs in DIY plumbing vs professional help

  • Red flags that mean it’s time to hire a professional plumber

  • How improper repairs put your plumbing system, finances, and home at risk

  • The right tools and strategies for effective, safe plumbing repair

Understanding DIY Plumbing vs Professional Options: What’s at Stake?

When facing a plumbing issue, the decision between diy plumbing vs professional is about much more than convenience. Understanding the difference is vital for homeowners hoping to save money while protecting their home from water damage. DIY plumbing covers simple upkeep, like fixing a leaky faucet, using a drain snake for a clogged drain, or tightening fittings. However, when plumbing repairs move beyond basic fixes, the stakes increase dramatically. An improper repair can escalate into costly problems—water damage, voided warranties, or even structural issues.

The allure of a do-it-yourself plumbing fix is powerful: You can address minor plumbing repairs at your convenience, evade expensive service calls, and gain a sense of personal accomplishment. Yet, each DIY repair you undertake must be weighed against possible risks, from subtle leaks causing long-term damage to exacerbating a complex plumbing system issue. These decisions ultimately impact your home’s value, comfort, and overall safety.

Homeowner examining a leaking pipe under a sink, diy plumbing vs professional situation
  • The difference between diy plumbing and professional plumbing services: DIY focuses on minor tasks; professional plumbing is essential for complex or hidden issues.

  • Potential risks and benefits for homeowners: DIY can reduce costs but raises the risk of costly mistakes and water damage if done incorrectly.

  • How plumbing repairs can impact your plumbing system: Proper assessment and repair are crucial; mistakes can lead to future failures, big expenses, and even insurance headaches.

Expert Guidance: When to Use DIY Plumbing for Plumbing Repairs

Many homeowners wonder if a diy plumbing repair is the way to go when facing routine issues. Choosing to take on minor plumbing repairs yourself can indeed save you time and help your household budget stretch a little further. Recognizing which plumbing tasks are suitable for a DIY fix is the first step in maintaining your home safely and efficiently. If you confine your efforts to simple, non-invasive fixes, you can often resolve the problem without professional plumbing services.

It’s not just about saving time and money with a diy fix—having the right knowledge and essential tools is critical. Most routine plumbing repairs, like replacing a showerhead or unsticking a drain, require just basic tools and a bit of patience. But even with simple jobs, always assess your confidence level and tool supply before getting started.

Simple Plumbing Repairs You Can Do Yourself

There are several plumbing repairs that nearly any homeowner can attempt safely with minimal risk. These routine tasks don’t generally require specialized tools or expert knowledge. If you’re comfortable following instructions and using basic hand tools, these are the projects you should consider addressing independently. Keeping up with these basic tasks can help prevent small problems from becoming plumbing emergencies down the line.

Some examples where a diy repair is completely reasonable include fixing a leaky faucet, swapping out a worn showerhead, or using a drain snake to dislodge a clogged drain. Adjusting water pressure, tightening connections, and handling minor toilet repairs also make the list. These straightforward jobs typically aren’t hazardous and don’t affect your main plumbing system—so the risk of water damage is very low if you follow directions closely.

  • Fixing leaky faucets: Replace washers or cartridges to stop irritating drips and prevent wasted water.

  • Replacing showerheads: Enhance your shower experience, optimize water pressure, and even save on utilities by upgrading fixtures.

  • Unclogging drains using basic tools: Use a plunger or a drain snake to clear blockages in sinks, tubs, and showers without harsh chemicals.

  • Adjusting water pressure: Easily fix low pressure by removing and cleaning aerators or adjusting a pressure regulator.

  • Minor toilet repairs: Swap out flappers, fill valves, or handles to solve running or non-flushing issues quickly.

Flat lay of essential diy plumbing tools like pipe wrench, plunger, plumber

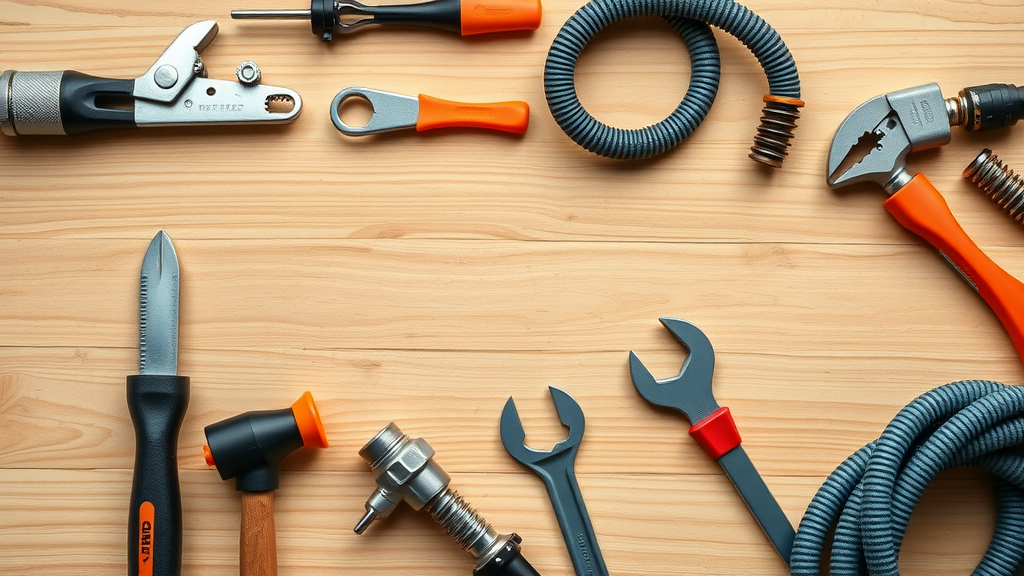
Essential Tools for Safe DIY Plumbing Repair

To reliably and safely perform diy plumbing, every homeowner should stock their toolkit with certain key tools. These tools are essential not only for speedy repairs but also for preventing common mishaps like over-tightening or under-sealing connections. Investing in the right equipment boosts your confidence and reduces the risk of costly mistakes that can happen during a diy fix. Keeping these handy means you’ll be prepared for the most common plumbing repairs any time they happen.

Remember, safety is paramount. Using specialized tools rather than makeshift solutions can ensure that your plumbing system remains intact, your repairs are effective, and your home avoids water damage in the long run.

  • Pipe wrench: For securely gripping, tightening, or loosening pipes and fittings.

  • Plunger: Unblock toilets and drains without chemicals or harsh dismantling.

  • Adjustable spanner: Tackle various nut and bolt sizes in tight spaces.

  • Plumber’s tape: Ensure watertight connections and prevent leaks in threaded joints.

  • Drain snake: Clear tough blockages that a plunger can’t reach, addressing clog-prone pipes and fixtures.

Recognizing the Limits of DIY Plumbing vs Professional Plumbing Service

Even experienced DIYers must know their limits when it comes to plumbing repair . Simple tasks are manageable, but modern plumbing systems are complex—and making mistakes on the wrong project can multiply repair costs or cause major water damage. Recognizing when to stop and call a professional plumbing service safeguards your home’s infrastructure. Don’t let pride or the desire to save a buck push you into risky territory; know when the risks outweigh the rewards of a DIY approach and hire a professional plumber before your diy repair spirals out of control.

It’s important to stay alert for warning signs that indicate your plumbing system is facing bigger problems than you can safely tackle alone. Professional plumbers bring years of experience and have the specialized tools necessary to diagnose and fix these more complex issues. If you encounter persistent problems, don’t hesitate—hiring a professional is always the safest course.

Signs It's Time to Hire a Professional Plumber

Some plumbing issues go beyond the reach of even the most ambitious homeowner. Certain red flags are clear signals that a routine diy repair just won’t cut it. When you notice recurring leaks, unexplained dampness, or sewer odors in your home, it’s time to bring in expert help. Not only do these issues threaten your home with water damage, they can indicate underlying problems in your plumbing system that only a professional can address.

Additional signs you need a professional plumbing service include problems with overall water pressure, mysterious increases in your water bill, or visible stains and patches on walls or ceilings. Take note: The longer you wait on certain repairs, the more likely you’ll incur bigger expenses in the long run—sometimes even requiring extensive system replacements.

  • Persistent leaks after attempted fixes: Indicates a deeper issue within pipes or joints.

  • Recurrent low water pressure: Could be a sign of blockage, pipe deterioration, or problems with the main water line.

  • Sewer odors or unexplained dampness (possible water damage): Warns of sewer line breaks or plumbing system failure.

  • Extensive and complex plumbing system issues: Systemic concerns or anything involving main water supply or sewage should always be handled by professional plumbers.

Risks and Consequences of Improper Repairs

Many homeowners underestimate the true risks associated with improper plumbing repairs. While a quick diy fix might seem like a money saver, it can easily backfire, resulting in water damage or voided warranties. Small mistakes—like poorly sealed connections or incorrectly installed fixtures—might go unnoticed, slowly causing expensive problems behind the scenes. This is why understanding the dangers of improper repairs is critical to managing the long-term health of your plumbing system.

Improper repairs often turn a simple plumbing repair into a costly nightmare. Not only do you risk causing problems that will require professional attention to resolve, but you might also face denied insurance claims or be left liable for damages that extend beyond your immediate plumbing issue. When in doubt, it’s wiser to err on the side of caution and turn the job over to a professional plumber .

Water pooling on bathroom floor from diy plumbing gone wrong, homeowner worried, plumbing repair caution
  • Water damage: Can originate from slow leaks, causing rot, mold growth, and expensive structural repairs.

  • Voided warranties: Many product and home warranties require professional plumbing installation.

  • Increased repair costs: Mistakes during a diy repair can result in larger, more expensive repairs later.

  • Damage to plumbing systems: Incorrectly installed components can reduce the lifespan of your entire system.

"Improper repairs to your plumbing system can end up costing more in the long run and expose your home to water damage." — Professional Plumber

Factors to Weigh: Save You Time and Money with DIY Plumbing vs Professional Help

Before grabbing your wrench or calling a professional plumbing repair service, weigh what’s truly at stake—not just cash but also your time, stress, and potential exposure to water damage. It’s easy to eye simple repairs as an opportunity to save money with a diy fix, but the reality can be less straightforward. Homeowners need to calculate not only the upfront cost of tools and materials against what professionals charge but also the time, risk, and expertise required for a safe and successful fix.

It’s not just a bottom-line calculation—the peace of mind you get from hiring a professional plumber is invaluable, especially when it comes to complex systems or urgent repairs. Evaluate the cost and time trade-offs honestly; sometimes, spending a little more up front with a professional plumbing service will save you time and money in the long run by preventing repeat issues or serious water damage.

Comparing Costs: DIY Plumbing vs Professional Plumbing Repair

DIY plumbing vs professional infographic, tools and equipment comparison for plumbing repair

Task

DIY Cost

Professional Cost

Fixing a faucet

$20–$50

$100–$250

Replacing a toilet

$80–$150

$200–$400

Unclogging a drain

$10–$30

$100–$200

Leak detection

$25 (DIY kit)

$100–$350

DIY plumbing vs professional infographic, tools and equipment comparison for plumbing repair

Time Investments: What to Expect

Plumbing repairs rarely happen on your schedule. Understanding the time commitment for both diy repairs and professional fixes helps manage expectations and make an informed choice. While the average diy fix can stretch into hours—especially if you’re learning as you go—a professional plumber can often complete even tricky plumbing repairs in a fraction of the time. This speed means less inconvenience, and for urgent issues, less exposure to water damage risk.

Don’t forget that a simple repair can mushroom into a whole-day affair if you discover additional issues or don’t have specialized tools on hand. While a professional plumbing service dispatches fully equipped technicians, as a homeowner you’ll likely make extra trips to the store or research solutions on the fly. Consider the value of your time as you decide which route to take for your next plumbing issue.

  • Faucet fix: 30-60 minutes (DIY), 20 mins (pro)

  • Toilet replacement: 2–4 hours (DIY), 1–2 hours (pro)

Plumbing System Complexities: Why Some Plumbing Fixes Demand Professional Plumbing Services

Modern homes are full of intricate plumbing systems that depend on careful design and quality installation. When facing a serious plumbing repair, a professional plumber brings not just expertise but the specialized tools and technology needed to diagnose and fix issues efficiently. DIY plumbing has its place, but for anything involving main water lines, complex water pressure problems, or hidden leaks, professional plumbing services are non-negotiable for protecting your plumbing system and your investment.

Plumbing fixes sometimes require not just skill, but an understanding of the legal and insurance implications tied to your home’s water infrastructure. A licensed plumber ensures all work meets code and satisfies warranty or insurance requirements—a crucial peace of mind factor homeowners often overlook until it’s too late.

How Professional Plumbers Handle Specialized Plumbing Systems

Dealing with advanced or aging plumbing systems poses unique challenges that require a trained eye and the proper equipment. Professional plumbers excel at identifying root causes of plumbing issues—whether it's a subtle water pressure imbalance or a hidden leak threatening water damage. Their training enables them to manage main water lines, replace sewer lines, and even handle intricate water heater repairs safely and legally.

When diagnosing issues, professional plumbers use years of experience to spot red flags, address code violations, and anticipate secondary issues. They approach complex jobs methodically, ensuring your home’s water flow, drainage, and pressure are restored and protected for the long run. This attention to detail can mean the difference between a one-time repair and recurring, expensive problems.

  • Identifying hidden plumbing system issues: Specialized training is crucial for catching what homeowners might miss.

  • Managing main water lines: These high-stakes repairs are best left to the pros to avoid catastrophic water damage.

  • Diagnosing systemic water pressure problems: Subtle imbalances that can strain your entire plumbing system are swiftly managed with professional tools.

Professional Plumbing Tools vs Homeowner Tools

Professional plumbers rely on an impressive arsenal of high-tech equipment to quickly and accurately diagnose plumbing problems. While drain snakes and pipe wrenches serve most DIY repairs, advanced gear—like sewer line cameras and hydro-jetting machines—make a night-and-day difference when addressing serious clogs or leaks. Using the right tool for the job keeps your plumbing repairs on track, prevents further damage, and ensures safe operation for years to come.

Investing in professional-grade diagnostic tools is usually cost-prohibitive for homeowners, making it more practical to rely on expert plumbing services for difficult or persistent issues. Don’t underestimate the gap between a well-meaning diy fix and the effectiveness of a professional plumbing repair performed with cutting-edge equipment and specialized tools.

  • Advanced leak detection equipment: Finds leaks inside walls or under floors without invasive demolition.

  • Sewer line cameras: Inspect underground and concealed lines safely and efficiently.

  • Hydro-jetting machines: Blast away tough clogs deep in pipes, restoring full flow where household drain snakes fail.

Professional plumber using high-tech diagnostic equipment for specialized plumbing repair

Protecting Your Home: Water Damage and Other Avoidable Hazards in DIY Plumbing vs Professional Repairs

Protecting your home from water damage is perhaps the most compelling reason to recognize the limits of diy plumbing vs professional help. Even a seemingly trivial drip can escalate, leading to mold, warped wood, and corroded pipes. When tackling repairs on your own, every connection and turn carries risk. That’s why weighing the hazards—and knowing when to call a plumber—can prevent disaster and preserve your home’s long-term value.

Professional plumbing services not only save you time and money in repairs but can also make the difference between a small inconvenience and having to file a major insurance claim for water damage. The peace of mind that comes from trusted experts is priceless in these situations.

Assessing Water Damage Risks

Improper repairs can introduce subtle but destructive forms of water damage that may go undetected for months or even years. Persistent leaks, loose pipes, or missed cracks often start as harmless issues but can ruin flooring, cabinetry, and even structural supports over time. Water damage is notorious for its ability to cause hidden destruction—and homeowners often pay thousands in repairs and remediation because of overlooked diy mistakes.

Common culprits include overtightened fittings causing thread failure, poorly sealed joints leading to drip-by-drip leaks, and missed leak locations in hidden pipes. Taking the time to thoroughly check all connections and quickly address any new signs of moisture is vital to safeguarding your investment.

  • Loose pipes: Cause vibrations and leaks that slowly deteriorate plumbing and adjacent materials.

  • Faulty connections: Often the result of rushed or misaligned DIY repairs.

  • Missed leaks: Concealed issues in walls or floors may spill hundreds of gallons unnoticed.

Insuring Against DIY Mistakes

Did you know home insurance policies often stipulate that covered plumbing repairs must be completed by a professional plumber ? If your DIY repair goes sideways and causes damage, your insurer might deny your claim, leaving you solely responsible for the cost. In contrast, hiring a licensed professional often provides documentation and warranties that guarantee compliance and make claim approval a smooth process.

Always review your policy before attempting significant plumbing repairs, and don’t hesitate to consult your insurer about what is or isn’t covered. Knowing your legal and financial protections ahead of time can save you from major headaches (and expenses) in the aftermath of a botched repair.

  • How policies treat self-repair: Many insurers exclude damages from DIY plumbing gone wrong.

  • When professional plumbing repair is required for coverage: Repairs involving water mains, sewer lines, or structural plumbing demand a pro for both compliance and eligibility.

People Also Ask: Your DIY Plumbing vs Professional Questions Answered

What plumbing repairs should never be attempted by amateurs?

  • Amateurs should never attempt repairs or modifications to sewer mains, major pipe replacements, gas lines, or any work that requires municipal permits. These repairs demand expertise, specialized tools, and strict adherence to codes. Mistakes can result in catastrophic water damage, health hazards, or even legal trouble. When in doubt, always call for professional plumbing services to protect your home and safety.

Can DIY plumbing save you money long-term?

  • DIY plumbing can definitely save money on minor repairs such as fixing a leaky faucet or unclogging simple drains. However, attempting complex plumbing repairs without expertise increases the risk of improper repairs, leading to hidden leaks or severe water damage. In these situations, the initial savings are quickly erased by the long-run costs of remediation, restoration, and professional re-repair.

How do I know when to contact professional plumbing services?

  • Contact a professional plumber when the repair exceeds your experience, you lack the necessary specialized tools, water is leaking uncontrollably, or health hazards like sewage and mold are present. It’s always safer to rely on expert plumbing services for issues involving your home’s main plumbing system or when compliance and coverage are on the line.

Friendly certified plumber using a tablet to assess plumbing, reassurance for homeowners

Expert Insights: Quotes from Professional Plumbers on DIY vs Professional Plumbing

"Neglecting the right tools or experience can quickly turn a simple fix into a plumbing nightmare."

"When in doubt, always consult a professional plumbing service. Your home’s safety is worth the investment."

Frequently Asked Questions about DIY Plumbing vs Hiring a Professional Plumber

  • Which plumbing repairs are safe for beginners? Beginners should stick to basic tasks: replacing washers in leaky faucets, unclogging drains with a plunger or snake, adjusting water pressure, and changing out showerheads or toilets with full instructions.

  • What are the signs I need professional plumbing repairs? Call a professional plumber if problems persist after attempted fixes, you see water stains or smell odors from pipes, or you face reduced water pressure throughout your home.

  • Are there risks to DIY plumbing I might miss? Yes—improper repairs can introduce hidden leaks, void warranties, lead to insurance claim denials, and enable long-term water damage.

  • Will hiring a professional plumber help prevent future issues? Absolutely. Licensed plumbers spot warning signs early, fix root causes, and ensure all work meets code—protecting your home and budget in the long run.

Making the Right Plumbing Repair Choice for Your Home

  • To recap: Weigh the difficulty, costs, time, and risks when deciding between diy plumbing and professional plumbing repair. Always prioritize safety and the long-term health of your plumbing system.

Need clear, expert advice? When in doubt about your next plumbing repair, contact a professional plumbing service for peace of mind.

DIY Projects & Repairs

Write A Comment

*
*
Related Posts All Posts
12.13.2025

DIY Faux Frost Greenery: The Two-Ingredient Trick Instagram Is Obsessed With

Did you know that social media DIY trends for faux frost have surged 300% this holiday season? If you’re scrolling through Instagram or TikTok, chances are you've seen gorgeous, sparkly greenery draped over mantels and interwoven into wreaths—crafted not in expensive studios, but in everyday living rooms with a clever two-ingredient hack. Curious how to capture this viral magic for your own holiday decor? You’re about to discover the simple secret fueling the internet’s most dazzling holiday trend: DIY faux frost greenery that looks luxe, lasts all season, and is completely customizable. Whether you’re a seasoned crafter or a holiday enthusiast, this guide will teach you everything from supplies to expert styling tips, ensuring your décor sparkles with festive flair."Did you know that social media DIY trends for faux frost have surged 300% this holiday season?"Transforming Holiday Decor: The DIY Faux Frost Greenery CrazeThe landscape of holiday decor is rapidly changing, thanks to a creative and accessible trend: DIY faux frost greenery. Across social media, crafters and home stylists are showcasing their take on frosted pine branches, shimmering garlands, and crystallized wreaths. What sets this movement apart is its do-it-yourself nature, offering an affordable, authentic-looking alternative to pricey store-bought decorations. This approach not only allows you to personalize your space with unique, textured arrangements that add depth and sparkle but also makes it easier to adapt to evolving trends—without breaking the bank. Imagine being able to adjust the intensity of the frost, choose the shimmer of your choice, and create centerpieces for your holiday wreath or dining table that express your unique style.This surge in creativity is also a response to the push for sustainability and reuse. Many opt for reusable faux greenery as a base, giving them the freedom to refresh or update their decor annually, all while keeping costs and environmental impact low. Whether you’re transforming pine branches into icy works of art for garlands you hang or laying shimmering sprigs across the top of your mantle, the DIY faux frost method puts you in control—no specialized skills required. With this guide, you’ll get step-by-step instructions, essential supply checklists, pro secrets for achieving the most realistic faux frost finish, and safety guidelines so your projects are not just beautiful, but also safe for children and pets.What You'll Learn About DIY Faux Frost GreeneryHow to craft realistic diy faux frost greenery with two simple, inexpensive ingredientsProven techniques to add texture and depth to faux frost arrangementsExpert insights on the best products and applications for holiday decorCreative styling ideas and professional secrets for flawless resultsThe Best Two-Ingredient DIY Faux Frost Greenery MethodWhen it comes to achieving that magical, dewy winter look, the internet’s favorite two-ingredient method reigns supreme. The real beauty of this diy faux frost greenery trick is its simplicity: just Epsom salts or coarse glitter for the icy texture, and a clear-drying craft glue or spray adhesive to keep your frost securely in place. Whether you want to frost pine branches for a holiday wreath or give your tabletop centerpieces a glistening touch, you’ll find this approach both effective and budget-friendly. With these everyday items in hand, you’ll be set to create jaw-dropping, customizable decor that far surpasses what you’ll find on store shelves. Let’s unpack the essentials and walk through the simple steps to bring a winter wonderland vibe into any room.Essential Supplies for Faux Frost and Holiday DecorIngredient 1: Epsom salts or coarse glitterIngredient 2: Clear-drying craft glue or spray adhesiveOptional supplies: Faux greenery, paintbrushes, protective glovesStep-by-Step Tutorial: How to Make DIY Faux Frost GreeneryPrepare your workspace for easy cleanup. Lay down newspaper or a disposable tablecloth to catch stray salts or glitter. Make sure your supplies are within reach and set up in a well-lit area so you can see all the details.Apply adhesive generously to your selected faux greenery. Use a paintbrush for even, detailed coverage, especially around leaf edges and branch tips where natural frost tends to gather. Spray adhesive can speed things up for larger branches or garlands you hang along banisters.Sprinkle the faux frost mixture (Epsom salts or glitter) evenly to add texture. Hold the greenery over a tray, then gently sprinkle your chosen frost material, rotating the branch for a natural, random look that mimics real snowflakes before dipping.Let pieces dry thoroughly, then shake off any excess. Allow at least 1–2 hours, longer if you’ve used thicker glue. Hold your frosted item upside down and gently tap to remove loose crystals, ensuring the result looks like authentic, crystalized greenery and not overly clumped.Style directly into your holiday decor arrangements. Simply lift the dowel or branch and integrate into wreaths, centerpieces, or garlands for an instant wintry ambiance—perfect for christmas decorations to bring your space to life.Table: DIY Faux Frost Greenery Tools and AlternativesRequired ItemWhy It WorksPossible SubstitutesEpsom saltsCreates icy, crystalline effectCoarse sugar, clear glitterClear glueAdheres frost securelyMod Podge, spray adhesiveFaux greeneryRealistic baseReal branches (with caution)PaintbrushPrecise applicationFoam brush, fingersExpert Insight: Why DIY Faux Frost Outshines Store-Bought OptionsAccording to home decor specialists, nothing compares to the handcrafted touch in diy faux frost greenery. Not only does it look more natural and integrate seamlessly with your unique holiday decor, but it also empowers you to add texture, dial up (or down) the shimmer, and experiment with sparkle intensity to fit your style. Plus, making your own pieces is a perfect way to create lasting memories and traditions with family and friends, and offers the satisfaction of knowing you crafted something truly your own. Bonus: You’re able to control the safety and quality of materials, avoiding questionable chemicals sometimes found in mass-produced decorations. Whether you lean toward subtle, snowy touches or crave full-on, glitzy glamour, this technique lets you custom-blend results tailored precisely to your taste and home aesthetic."Handmade diy faux frost greenery not only looks more authentic, but allows you to tailor texture and shimmer intensity exactly how you want it." – Amanda Lee, Interior Styling SpecialistChoosing the Best Greenery for DIY Faux Frost ProjectsPopular faux plants: pine, eucalyptus, boxwoodHow to select greenery for maximum realism and longevityWhile pine branches may be the classic choice for frosted holiday decor, don’t overlook other faux foliage options such as eucalyptus or boxwood. Each plant offers unique shapes and leaf textures, allowing you to create arrangements that pop with visual contrast and realism. When selecting greenery for diy faux frost greenery projects, prioritize branches with sturdy stems and flexible leaves, as these hold adhesive and salts or glitter more effectively. Realistic detailing in faux greenery, such as subtle green variations and natural leaf veining, enhances the final frosted look, making it nearly impossible to distinguish from nature’s own handiwork—from garlands you hang on staircases to ornaments or hanging decor for your front door. Opt for high-quality faux materials to ensure your projects last from year to year, minimizing the need for frequent replacements and reducing waste compared to disposable, single-season decorations.Watch our short, step-by-step video for a clear visual guide to crafting your own diy faux frost greenery—supplies, technique, and expert styling tips included. Bright holiday setting and engaging pacing make this the perfect visual companion!Creative Ways to Use DIY Faux Frost Greenery in Holiday DecorWreaths and swags for doors and mantelsCenterpieces and tabletop arrangementsFestive garlands for staircases and banistersOutdoor planters for a wintry touchThe applications for diy faux frost greenery in holiday decor are truly endless. A frosted pine wreath or festive swag can instantly transform your front door or living room mantel into a winter wonderland. For a cozy dining table, design lush, frosted centerpieces that glimmer in candlelight, making every meal feel like a special occasion. Draping frosted garlands on banisters or open shelving adds elegant, snowy charm, especially when paired with metallic ornaments or soft twinkling lights. Don’t hesitate to extend your creativity outdoors: Arrange frosted branches in porch planters or along windowsills for curb appeal that’s both sophisticated and inviting. Each project presents an opportunity to showcase your personal style and spread festive cheer—all while controlling the color, texture, and placement of your faux frost.Safety Tips When Crafting DIY Faux Frost GreeneryMake sure to use non-toxic ingredients for indoor use.Work in a ventilated space if using spray adhesives.Keep faux frost greenery away from open flames or heat sources.Safety matters, especially when creating decorations that may be touched by children and pets or displayed near heat. Choose adhesive products and “frost” ingredients labeled as non-toxic to reduce the risk of accidental ingestion or allergic reactions. Always craft in a well-ventilated room when using spray adhesives, and consider wearing gloves to protect your skin from irritation. For households with small kids, avoid areas where food will be served and keep diy faux frost greenery out of reach to avoid accidentally ingesting any materials. Finally, since many adhesives and decorative elements are flammable, never position your frosted creations near candles, open flames, or heating vents—this care using these frosted pieces keeps the season safe and festive for everyone.How to Create Fake Frost?Creating fake frost is simple with the right ingredients: Epsom salts or coarse glitter for natural sparkle, plus clear-drying glue or spray adhesive for secure, even coverage. Just brush adhesive over your chosen greenery, sprinkle on your sparkling frost, and allow it to dry before using. For extra realism, blend a sprinkle of clear glitter with your salts or add tiny hints of light blue dye to mimic the blue glint of real ice—just remember: a little goes a long way. This technique is quick and easy and doesn’t require hot water, a borax solution, or any complicated steps—perfect for anyone from beginners to seasoned crafters looking to make the frost in under an hour.How to Frost Artificial Leaves?For the most lifelike, frosted effect on artificial leaves, use a paintbrush to coat edges and surfaces with a thin layer of clear glue or Mod Podge. While still sticky, softly dust with Epsom salts or a mixture of clear glitter, focusing on spots where snowflakes or frost would naturally form. Gently shake to remove extra material after drying. This is especially effective for eucalyptus and boxwood, where the texture and contour allow you to add texture and shimmer that’s easily customized, whether you prefer a heavy snowy look, or a subtle, glistening accent that will eventually fall gracefully for cleanup at season’s end.How to Make Icy Branches?Transforming branches into icy decor is a fun and accessible holiday project. For faux or real branches, lightly brush clear glue along each twig, making sure to cover the tips where frost typically collects. Generously sprinkle Epsom salts or clear glitter for a crystalized, frosty look. Let dry completely, then tap off the excess. For added dimension, try temporarily dipping your branches into a borax solution—this will form larger, striking crystals that catch light for true wintry magic. Whether you want to shape small twigs into standalone ornaments or incorporate icy branches into large centerpieces for your holiday table, this method offers the perfect way to create festive, custom decor.How to Make Fake Snow for Outdoor Decorations?Creating safe, realistic fake snow for outdoor use calls for durability. Mix Epsom salts and coarse sugar—this combination withstands moisture and can be easily cleaned up. Adhere the mixture to faux greenery or outdoor-safe branches with a robust outdoor adhesive, ensuring it can handle the elements. If you need bulk quantity for large displays or planters, look for biodegradable snow alternatives at craft stores. Always keep away from real fruit or greenery where children and pets might have access, and avoid placing near entryways where slipping could occur. The results? Outdoor displays with wintry elegance and minimal environmental impact.FAQs: DIY Faux Frost GreeneryWill faux frost greenery last year to year?Yes! If stored in a cool, dry place and handled gently, most faux frost decorations will last multiple seasons. To prolong life, store each piece in a protective container to avoid crushing and periodically refresh any frost or glitter that might wear off.Are the materials pet and child safe?When you use non-toxic glue and salts or craft glitter, the method is generally safe for homes with children and pets. However, always display out of reach and avoid using in areas where food will be served. Supervise any craft activities with younger kids.Can I use this method on real plants?While the focus is on faux greenery, you can frost real branches if you avoid harsh adhesives that could damage the plant. Real branches are best for short-term display only, as organic material will eventually fall or degrade.What is the best base for diy faux frost greenery?Durably constructed faux greenery—especially pine, eucalyptus, or boxwood—offers the best base for longevity and realism. Choose stems with varied shades and natural veining for the most life-like results.Learn what to avoid! See the five most common mistakes crafters make with faux frost—from overapplication to incorrect glue use—and how to fix them for flawless results.Key Takeaways: Mastering the DIY Faux Frost Greenery TrendDIY faux frost greenery is simple, affordable, and fully customizable.The two-ingredient trick delivers stunning, realistic results.With the right materials, you can transform any holiday decor with effortless elegance.Elevate Your Holiday Decor—Share Your DIY Faux Frost Greenery CreationsReady to transform your home with festive sparkle and handmade charm? Try out these tips, and don’t forget to share your diy faux frost greenery ideas and results on social media to inspire fellow holiday decorators.To enhance your DIY faux frost greenery projects, consider exploring the following resources:“This DIY Faux Frost Is the Easiest Holiday Decor Hack (It’s Just Two Ingredients!)” offers a straightforward method using Borax to create realistic frosted effects on various decorations. (shopping.yahoo.com)“DIY Frosted Greenery Floral Arrangement” provides a step-by-step guide to crafting elegant frosted floral displays, complete with a video tutorial for visual learners. (bloomsbythebox.com)

11.21.2025

Prepare Your Home for the Holidays: Essential Tips for Hosts

Update Getting Your Home Ready for Holiday Gatherings The holiday season is fast approaching, bringing with it a flurry of guests, cooking, and the much-anticipated festivities. For homeowners, this period can bring a mix of excitement and stress. To help alleviate that stress, it's crucial to prepare your home for entertaining. In the recent episode of the Money Pit podcast, Leslie Segretti and Jim Kenzie delve into effective strategies for prepping your kitchen and dining areas while ensuring your space is warm and welcoming for guests.In #2566 – Holiday Kitchen Prep | Refresh Your Dining Room | Making Space for Guests | Winterize Pipes, the discussion dives into essential strategies for preparing your home for the bustling holiday season. Sprucing Up the Kitchen for Holiday Cooking Your kitchen often becomes the hub of holiday activity, so it's important to keep it organized and functional. Start by deep cleaning your kitchen appliances, ensuring they are ready for the hustle. A clean oven before Thanksgiving can save you last-minute panic. Clear out expired items from your fridge and pantry, restock essential ingredients like spices and baking supplies, and reorganize for easy access during meal prep. Consider designating a 'holiday zone' for cooking tools and serving dishes. This simple act can streamline your cooking experience, allowing you to efficiently whip up your favorite meals without rummaging through clutter. By being proactive about kitchen organization, you set yourself up for success and enjoyment during the busy holiday season. Transforming Your Dining Room into a Festive Gathering Space The dining room often serves as the focal point—whether for Thanksgiving dinner or casual gatherings. To refresh this space quickly and affordably, start with the lighting. Warm, cozy lighting can transform the atmosphere; consider adding battery-operated puck lights or stylish floor lamps. A simple centerpiece, like a bowl of seasonal fruits or a cluster of mini pumpkins, can also add a festive touch without the need for expensive decorations. Also, don’t overlook repairs and updates. Tighten loose chairs, address squeaks, and perhaps reupholster or cover old dining chairs to breathe new life into them. These minor adjustments can instantly enhance your dining experience, making guests feel welcomed and comfortable. Creating Cozy Guest Spaces Without a Spare Room If you’re short on guest rooms, you can still make visitors feel at home. With a little creativity, even a corner of your living room can be transformed into a cozy sleeping space. Consider using a high-quality air mattress or a sleeper sofa to provide comfort. Adding a folding screen or curtain can create a sense of privacy that guests will appreciate. Ensure guests have bedside essentials like a small side table, a charging station for devices, and water. Adding decorative touches like cozy throws or holiday-themed decorations can enhance their experience, demonstrating your hospitality and thoughtfulness. Preparing Your Exterior for Winter and Holiday Guests As guests arrive, the exterior of your home is the first impression. Spend some time sprucing up your entryway. Clean your front door, add a fresh coat of paint if necessary, and consider seasonal decorations that welcome guests in style. Ensure outdoor areas are well-lit and safe; fix any cracks in walkways and check outdoor faucets to prevent winter freeze damage. These exterior preparations not only improve curb appeal but also contribute to a warm welcome that sets the tone for the entire holiday experience. By taking these steps, you can ease the stress of the holiday season while making your home an inviting and functional space. With careful preparation of your kitchen, dining room, and guest areas, you can focus on what really matters—spending quality time with friends and family during this festive time. So, roll up your sleeves, start planning, and turn your home into the perfect holiday haven! If you're unsure where to begin with your preparations, consider reaching out to local home improvement experts. They can provide additional insights tailored to your specific needs, ensuring your holiday preparations go off without a hitch.

11.14.2025

Last-Minute Halloween Décor Ideas: Affordable Yard Frights to Impress

Update Transform Your Home with Last-Minute Halloween Décor Ideas If Halloween seems to have crept up on you this year, fear not! With a few household items and a little creativity, it's still possible to produce terrifyingly delightful decorations that impress trick-or-treaters and neighbors alike.In #2565 – Last-Minute Halloween Décor, the discussion dives into budget-friendly decoration techniques and spooky lighting ideas, exploring key insights that sparked deeper analysis on our end. Spooktacular Decoration Hacks Using Everyday Items One easy yet frighteningly effective method involves making floating ghosts. All you need are cheesecloth and balloons. Simply drape the cheesecloth over a balloon, spray it with starch or diluted glue, and let it dry. Once completed, pop the balloon, and you have a ghostly form to hang from branches or doorways—add black felt eyes for an extra eerie touch! Another tried-and-true Halloween favorite is the homemade spider and spiderwebs. Cut black trash bags into large web shapes and stick them to your windows or porch railings. To make it even spookier, create a spider using rolled socks or newspapers wrapped in black duct tape. This guarantees you’ll have an eye-catching display without resorting to expensive store-bought options. Lighting to Set the Mood The power of lighting can elevate any spooky décor. Create glowing eyes in bushes using toilet paper rolls lined with colored cellophane and equipped with small battery-operated lights. These simple additions can transform your yard into a chilling nighttime wonderland, providing just the right amount of creepiness. Want to dazzle your visitors? Consider using glow sticks or LED tea lights in mason jars or painted containers. Wrap them in gauze for a mummy effect, which can illuminate your pathway and guide trick-or-treaters. Post-Halloween Cleanup Made Easy Once Halloween is over, it’s time to pack it all away. But don't rush—your decorations deserve proper care. Start by sorting the decorations into categories, such as indoor and outdoor. Lights should be wrapped carefully around cardboard to prevent tangling. When it comes to pumpkins, consider composting if they’re rotten, while uncut ones can serve as natural décor for Thanksgiving. For inflatable decorations, ensure they are completely dry before storing to avoid mildew. Batteries should be removed from any decorations that light up to extend their lifespan. Utilizing clear bins with labels can help make future decorating swift and effortless. DIY Projects to Engage the Family Beyond just decorating, these DIY projects offer a great way for families to bond while getting into the Halloween spirit. They can also provide opportunities to teach younger members about crafting and decorating on a budget. In the throes of spooky season, getting crafty can be as important as outfitting your home to look haunted. By using what you have on hand mixed with a little imagination, you can create unforgettable Halloween magic in virtually no time. As fall gives way to winter, tackle the cleanup and prepare your home for the holidays. Halloween may be wrapping up, but your décor lifestyle doesn’t have to end! This time of year is about creativity, family participation, and having a little fun along the way. Packing Up for Next Year: A Smart Move Remember, with just a few smart tricks and a seasonal mindset, you can make future Halloweens even more efficient and enjoyable. Take these decorative tips to heart and enjoy a frightfully fun Halloween this year!

Terms of Service

Privacy Policy

Core Modal Title

Sorry, no results found

You Might Find These Articles Interesting

T
Please Check Your Email
We Will Be Following Up Shortly
*
*
*