Add Row
Add Element
American Yard and Home Logo
update
American Yard & Home
American Yard & Home Logo
update
Add Element
  • Home
  • Categories
    • Ask an Expert
    • DIY Projects & Repairs
    • Featured Businesses
    • Home Renovation & Remodeling
    • Interior Design & Styling
    • Landscaping & Curb Appeal
    • Outdoor Living
    • Smart Home & Tech
August 28.2025
1 Minute Read

Fix Your Duct Cleaning Issues in 24 Hours or Less

Did you know that the average home can harbor up to 40 pounds of dust in its air ducts each year? If you’re feeling uneasy about the air you breathe indoors, there’s good news: proper duct cleaning can transform your home’s air quality—fast. This complete guide reveals how you can address duct cleaning issues within 24 hours or less, securing fresher, healthier air in record time.

Modern sunlit living room with happy family, swirling clean air, visible HVAC vents and dust motes, photorealistic, duct cleaning benefits

What You’ll Learn

  • Why duct cleaning is crucial for healthy, comfortable indoor air
  • How to identify the signs that demand immediate air duct cleaning
  • Step-by-step breakdown of professional duct cleaning service
  • The cost, frequency, and effectiveness of certified vs. DIY approaches
  • Top tips for efficient, same-day duct cleaning solutions
  • Expert answers to the most common air duct cleaning questions

Transform Your Indoor Air Quality Fast: Surprising Facts About Duct Cleaning

  • Did you know that up to 40 pounds of dust can collect in the average home’s air ducts each year? Discover how duct cleaning can dramatically improve your indoor air quality and comfort in just one day.

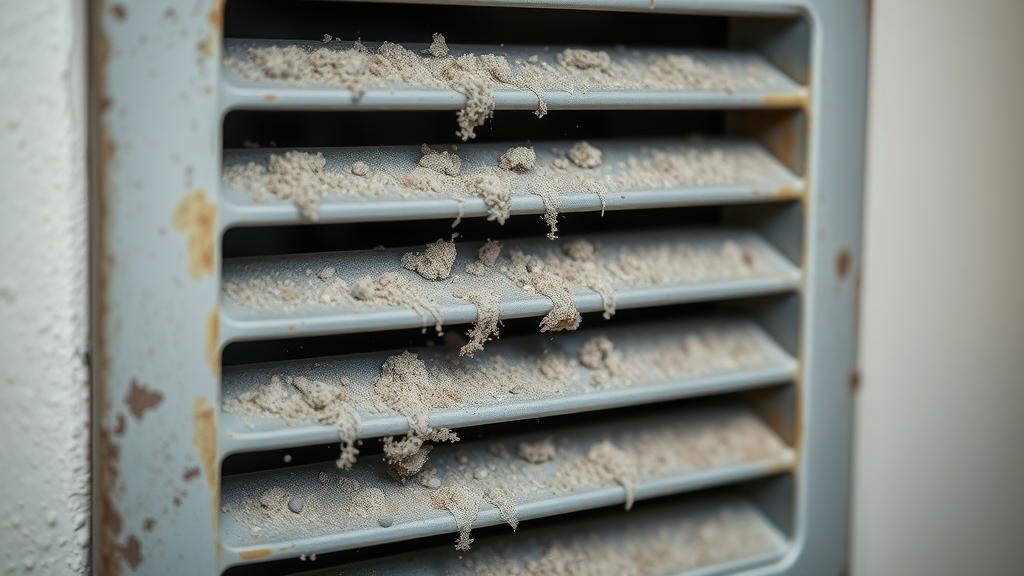
Every time your heating and cooling system runs, it circulates air—and airborne debris—through your duct system . Over months and years, layers of dirt and dust , allergens, pet hair, and even mold spores can accumulate inside the air duct network. Studies show families spend 90% of their time indoors, making indoor air quality crucial for health and comfort.

A quick and thorough air duct cleaning can eliminate these contaminants within 24 hours. The result? Cleaner air, less dust piling up on surfaces, reduced allergy symptoms, smoother air flow , and even lower energy bills. Prioritizing duct cleaning doesn’t just freshen the air—it safeguards your home’s comfort and your family’s health, all with a same-day turnaround .

How Duct Cleaning Impacts Indoor Air Quality and Health

When we talk about the impact of duct cleaning , we’re really talking about a dramatic upgrade to your indoor air quality . Your home’s heating and cooling system relies on a network of air ducts that move air throughout every room. If left unchecked, these ducts can quietly become a source of dust, allergens, and even dangerous biological contaminants. Regular cleaning ser—including professional air duct cleaning service —removes these health threats and improves how your HVAC system functions.

A freshly cleaned duct system dramatically reduces airborne particles that can trigger allergies and asthma. Even residents without allergies report sharper mental clarity, less household dust, and a long-lasting sense of cleanliness. The difference is especially noticeable if you have pets, smokers in the home, or if you’ve done recent renovations. Duct cleaning service can transform both the quality and comfort of your indoor environment—often overnight.

Understanding the Role of Air Ducts in Your HVAC System

Your air ducts are like the lungs of your home’s heating and cooling system . They move heated or cooled air throughout the house, maintaining consistent temperatures and controlling humidity. However, over time, their inner surfaces collect dust, pet dander, pollen, and sometimes even mold. If left unattended, these substances recirculate via your hvac system , impacting air quality and energy efficiency.

A clog or buildup in your duct system can force the cooling system to work harder than necessary. This not only raises energy costs but can reduce system lifespan. Periodic duct cleaning ensures the path is clear, optimizing airflow and maintaining the central role of the system: delivering healthy, comfortable, and clean air throughout your home.

Cutaway HVAC system in house, air ducts highlighted, flow of clean air post duct cleaning

Biological Contaminants: Identifying Hidden Dangers Within Air Ducts

Hidden within the recesses of your air duct system may lurk biological contaminants like mold spores, bacteria, and even tiny pests. Moisture intrusion or fluctuating humidity can create an environment inside ductwork that fosters growth. Once those spores become airborne, they are distributed into every room by your hvac system , where you and your family breathe them in.

Regular duct cleaning targets these hidden dangers. A certified duct cleaner will identify, remove, and treat affected areas, helping prevent respiratory issues and persistent illnesses. By relying on duct cleaning service that follows national air duct cleaners association standards, you ensure the hidden threats in your airways are truly evicted, not just temporarily masked.

Connection Between Duct Cleaning and Allergies

If you or your loved ones suffer from allergies or asthma, dirty air ducts can intensify symptoms. Dust mites, pollen, pet dander, and mold accumulate in ducts, only to be recirculated with every cycle of the heating and cooling system . The result? Increased sneezing, coughing, watery eyes, and other symptoms whenever your HVAC kicks on.

Professional air duct cleaning service can break this cycle almost immediately. By removing allergens and biological contaminants from your duct system , you enhance air purity. Many allergy sufferers report rapid relief after a comprehensive duct cleaning , making it one of the most effective steps for managing indoor air quality .

"Proper duct cleaning can reduce airborne contaminants and lower the risks linked to poor indoor air quality." – National Air Duct Cleaners Association

Signs You Need Duct Cleaning Service Now

  • Key indicators include persistent dust, odd odors, worsening allergies, uneven air flow, and rising energy bills.

Knowing when to schedule a duct cleaning service can make all the difference in home comfort and health. If you notice dusty vents or find that surfaces get dirty soon after cleaning, it may signal significant buildup inside your ducts. Unpleasant, musty odors that worsen when the HVAC system operates also suggest possible mold or pest infestation.

Increased allergy symptoms, headaches, or sinus problems—especially after starting the heating and cooling system —are warnings that the air in your home is not as healthy as it should be. Uneven airflow, rooms that feel stuffy, and higher-than-normal energy bills can all result from blockages or leaks in the duct system that only proper duct cleaning can resolve.

Common Problems Possible Cause Solution
Dusty vents Dirty air ducts Professional duct cleaning
Mold growth Moisture in ducts Cleaning and leak repair
Unpleasant odor Debris or infestations Full duct cleaning service

Close-up dusty HVAC vent, dust particles, proof of dirty air ducts

Understanding the Professional Duct Cleaning Process

Investing in a professional duct cleaning service ensures that not only are visible contaminants removed, but hidden dangers are thoroughly addressed. Certified air duct cleaners use specialized equipment and proven methodologies that go well beyond what simple household vacuums can achieve. A professional service restores true cleanliness from deep inside your air duct system, setting a fresh baseline for healthier indoor living.

The cleaning process often includes a thorough inspection, use of powerful vacuums and rotary brushes, and may even involve antimicrobial treatments if mold or bacteria are detected. Reputable companies, especially those certified by the National Air Duct Cleaners Association (NADCA) , follow industry best practices designed to safeguard both your property and your air quality—delivering comfort, confidence, and peace of mind.

Step-By-Step Air Duct Cleaning Service Guide

A comprehensive air duct cleaning service typically follows these critical steps. First, technicians will assess your heating and cooling system for any visible buildup or blockages. They will carefully protect floors and furniture before accessing vents and major duct trunk lines. Using high-powered rotary brushes and industrial-strength vacuums, every square inch of your duct system is systematically cleaned.

Dirt, dust, mold spores, and allergens are all extracted into sealed containment units to avoid contaminating your home’s air. The duct cleaner may apply EPA-approved antimicrobial treatments if necessary. Finally, after a second inspection, all vents and system components are reassembled and tested. The whole process is usually complete within a few hours, delivering an immediate improvement in indoor air quality .

What to Expect: Tools, Techniques, and Duct Cleaners at Work

Professional air duct cleaners arrive equipped with advanced tools: flexible rotary brushes, high-CFM vacuums (often truck-mounted), compressed air whips, inspection cameras, and HEPA filtration units to capture the smallest particulates. The team’s expertise means they can adapt to every twist and turn in your ductwork, ensuring no spot is missed.

Expect a rundown of the process before work begins—including what rooms will be accessed and any preparatory steps needed. The team will work methodically and efficiently, minimizing disruption and dust escape. Experience, equipment, and strict attention to standards set by bodies like the national air duct cleaners association make all the difference. You’re not just paying for a cleaning—you’re investing in a safer, more efficient home.

Professional duct cleaner at work, vacuum and rotary brush tools in duct cleaning action

Ensuring a Thorough Cleaning: National Air Duct Cleaners Association Standards

When choosing an air duct cleaning service , look for companies adhering to the strict guidelines of the National Air Duct Cleaners Association (NADCA) . Their standards cover every aspect of the process, including safety procedures, equipment calibration, and post-cleaning customer checks. A NADCA-certified duct cleaner guarantees that contaminants are not just loosened, but fully removed from the ductwork.

NADCA standards ensure your home receives a comprehensive clean—reducing future dust accumulation, maintaining optimal air quality , and avoiding accidental damage to the hvac system . Their member companies undergo regular audits and ongoing education, so you’re assured of best-in-class service supported by the latest knowledge and techniques.

Choosing the Right Duct Cleaning Service for Your Home

Not all air duct cleaning services are created equal. The difference between a satisfying result and disappointment is the provider’s credentials and methods. Prioritizing a qualified, experienced, and well-reviewed duct cleaning service ensures that you get real improvements to your indoor air quality and avoid unnecessary costs or damage.

Certification, insurance, and a transparent cleaning process should be your baseline requirements. Look for membership in reputable organizations—such as the National Air Duct Cleaners Association —and always ask for references and before-and-after photos. With the right partner, you’ll see (and breathe) the difference within a single day.

Qualifications to Look For in Air Duct Cleaning Service Providers

Before hiring an air duct cleaner , verify their credentials. NADCA certification proves adherence to national best practices and advanced knowledge of HVAC systems and contaminants. Insurance protects you from liability in case of property damage. Years of experience, ongoing staff training, and clear, honest communication all signal a reputable cleaning service .

Top-notch duct cleaning companies will willingly share their certifications, insurance, and documentation from cleaners association directories. They should also provide up-front pricing estimates and answer questions about their cleaning process and equipment. A team that is diligent with documentation is likely to be just as thorough when cleaning your home’s airways.

Certified duct cleaner, NADCA badge, beside service van, proof of professional duct cleaning qualifications

Questions to Ask Before Hiring Air Duct Cleaners

  • Checklist: Licensing and insurance, NADCA membership, experience, explained cleaning process, customer reviews

A few key questions can quickly separate professional air duct cleaners from unreliable companies:

  • Are you licensed, insured, and NADCA-certified?
  • How long have you provided air duct cleaning services ?
  • What methods and equipment will you use in my home?
  • Can you explain your cleaning process step by step?
  • Do you have before and after photos or references from satisfied clients?

Comparing DIY vs. Professional Duct Cleaning: Pros and Cons

You might wonder if a hardware store vacuum and a flexible brush can match a professional duct cleaning service . While DIY duct cleaning can remove some visible debris (and may suffice for lightly used systems), there are significant risks—and limitations—that make certified professionals worth considering for most homes.

DIY jobs often lack the power, reach, and filtration to thoroughly clean your duct system . Professional air duct cleaning service does more than vacuum: it identifies hidden hazards, treats biological contaminants, and protects your hvac system components from accidental damage. Choosing the right method comes down to the scope of your needs, your home’s layout, and your family’s health priorities.

When DIY Duct Cleaning Makes Sense

If your air ducts are easily accessible and you only notice a minor accumulation of dust at the vent grates, a careful DIY cleaning can help maintain light cleanliness between professional services. Changing air filters regularly and vacuuming vent openings may reduce surface debris and slightly improve immediate air flow.

DIY methods are cost-effective and provide fast results for cosmetic concerns. However, it’s essential to recognize that even the most thorough home vacuum won’t reach deep inside your duct system or remove microbial growth. For more than light maintenance, or when dealing with odd odors or allergy flare-ups, stick with an experienced air duct cleaning service .

Homeowner attempting DIY air duct cleaning, vacuum and vent, warm home scene

Risks and Limitations of DIY Approaches

Attempting a full cleaning process with household vacuums and basic tools may not address deep-seated dust, debris, or biological contaminants . There’s also a risk of breaking seals, damaging delicate hvac system parts, or inadvertently dislodging more dust into your living space.

Inadequate cleaning can even worsen indoor air quality , circulate irritants, and lead to costly duct system repairs. For most homeowners, DIY should be reserved for light maintenance, while complex or overdue cleaning is best left to certified air duct cleaners who guarantee their results.

Benefits of Certified Professional Duct Cleaning

Opting for professional duct cleaning service delivers quantifiable benefits. Certified technicians have the expertise to spot mold, leaks, and insulation issues—preventing air leaks and energy losses. High-powered equipment, coupled with advanced filtration, removes even microscopic particles, restoring airflow and minimizing allergens.

Only a qualified air duct cleaning service can ensure your home’s system is healthy from the inside out. With a same-day service, the improvement in your home’s air quality, comfort, and HVAC efficiency is practically immediate—a worthwhile investment in your property’s well-being.

How Often Should Air Ducts Be Cleaned?

A common question: How often do you actually need your air ducts cleaned ? The answer depends on several key variables—such as the presence of pets, allergy sufferers, or smokers in the home, as well as local air quality and recent construction or renovation activities. According to industry experts, most homeowners should have a professional air duct cleaning service every 3-5 years, with more frequent service for homes with special circumstances.

Sticking to a maintenance schedule tailored to your family’s needs ensures peak indoor air quality , maximum HVAC efficiency, and lower long-term cleaning costs. Regular checkups can also catch problems—like leaks or mold—early, avoiding both health issues and emergency repairs.

Factors That Determine Cleaning Frequency

Several factors influence how often you should schedule a professional air duct cleaning . Pet owners, for example, will need more frequent cleaning due to constant shedding. Allergy sufferers or asthmatics benefit from annual cleanings, while households with no special risk factors can extend the interval.

Other considerations include living in areas with high pollen counts or air pollution, having infants or elderly residents, and experiencing recent water damage. Staying aware of these variables helps homeowners prioritize timely duct cleaning to maintain healthy indoor air quality .

Infographic showing air duct cleaning schedules by household type: pet owners, allergy sufferers, standard families

Maintenance Tips to Extend Results of Duct Cleaning Service

The benefits of duct cleaning service last longest with a few simple maintenance steps:

  • Replace HVAC filters every 1-3 months, or as recommended by your system
  • Keep vents and returns free from blockages (move furniture or rugs away)
  • Address water leaks immediately to prevent mold
  • Vacuum and dust your home regularly to minimize airborne debris
  • Schedule annual system checkups, even if your air duct cleaning schedule is less frequent
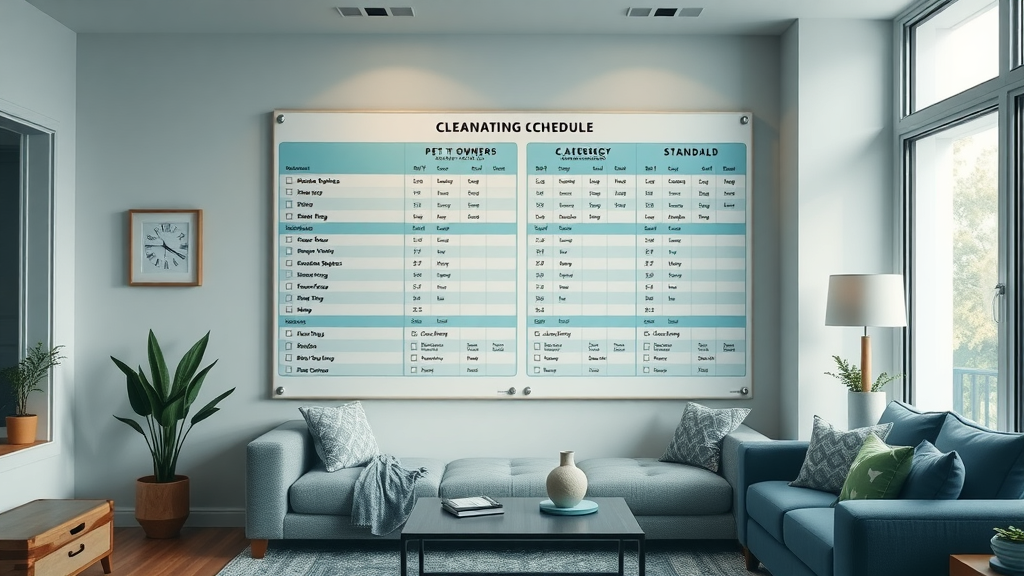
Home Factors Recommended Frequency
Pet Owners Every 2 years
Allergy sufferers Annually
Standard household Every 3–5 years

Cost of Duct Cleaning: What to Expect

Budgeting for air duct cleaning means understanding the scope and variables affecting price. Standard duct cleaning service for an average-sized home usually ranges from $300 – $500 . More comprehensive cleanings, including deep sanitization or antimicrobial treatments, may cost from $500 – $1,000 . Homes with multiple HVAC systems, long or difficult-to-access ductwork, or severe contamination will pay at the higher end of the scale.

Always confirm if quoted prices are per HVAC unit or for the entire home system, and ask for a full written estimate. Factor in your family’s health, HVAC system efficiency, and potential for energy savings—not just the upfront expense—when determining value.

Service Type Average Cost Range
Standard air duct cleaning $300–$500
Comprehensive duct cleaning service $500–$1,000
Antimicrobial treatment $150–$300

Homeowner reviews stack of invoices for air duct cleaning services, calculator and coffee, cost assessment

Is Duct Cleaning Worth the Cost?

Regular air duct cleaning is an investment that pays off with enhanced home comfort, improved air quality, lower utility costs, and reduced risk of HVAC breakdowns. For homes with allergy sufferers, pets, or recent mold issues, the benefits compound even further—offering peace of mind and healthier living spaces. Knowing your system is free of hidden contaminants justifies every dollar spent.

"Consistent duct cleaning service can create long-term energy savings and health benefits for homeowners."

Frequently Asked Questions About Duct Cleaning

What is the average cost for air duct cleaning?

The average air duct cleaning cost typically ranges from $300 to $500 for most single-family homes. More complex jobs—such as those requiring antimicrobial treatment or servicing larger properties—can run up to $1,000 or more. Always request a written estimate specifying the scope of work.

Is it worth it to do duct cleaning?

If your home shows signs of heavy dust, musty odors, or increased allergy symptoms, air duct cleaning is a smart, worthwhile investment. It not only improves indoor air quality but can also boost energy efficiency and extend your hvac system’s lifespan—all contributing to better comfort and cost savings.

Do you actually need to get your ducts cleaned?

While some light dustiness is normal, ducts should be cleaned if you observe visible mold, excessive dust, evidence of pests, or unexplained illness symptoms. Homes with pets, recent renovations, or high allergy risks benefit most from regular duct cleaning service .

Top Tips to Get Your Air Ducts Cleaned in 24 Hours or Less

  • 1. Contact a certified local air duct cleaning service early in the day
  • 2. Prepare your home by moving furniture away from vents
  • 3. Confirm equipment and team size with provider for efficient service
  • 4. Request same-day or expedited services if available

When you need a duct cleaning service fast, these tips can help you secure a same-day or next-day appointment. Be proactive: reputable companies can often accommodate urgent bookings if called early. Preparing your home—clearing access to vents and informing family members—streamlines the process, allowing for a fast, effective clean and immediate improvement in indoor air quality .

Your Complete Duct Cleaning Action Plan: Healthy Air Starts Now

  • • Assess the signs your home needs duct cleaning
  • • Choose certified duct cleaning professionals
  • • Schedule your service for a 24-hour turnaround
  • • Maintain air quality with regular system checks

Duct cleaning checklist in stylish home, clean hands checking off tasks, bright vent in the background
"Take control of your indoor environment today – breathe easier by prioritizing expert duct cleaning."

Essential Resources and Associations for Air Duct Cleaning

  • • National Air Duct Cleaners Association (NADCA)
  • • EPA Indoor Air Quality Guidelines
  • • Local duct cleaners association directories

Logos for NADCA and EPA, official association resources for air duct cleaning

Additional FAQs: Expert Answers About Duct Cleaning Service

  • • How long does duct cleaning take?
  • • Does duct cleaning improve HVAC efficiency?
  • • Can duct cleaning reduce energy costs?
  • • What are the biggest myths about air duct cleaning?

A typical duct cleaning service takes 2-5 hours depending on home size and system complexity. Yes, duct cleaning improves HVAC efficiency and reduces energy costs by removing obstructions and allowing air to flow freely. Common myths include the belief that duct cleaning is only cosmetic or only necessary for older homes—both are false, as all systems accumulate contaminants over time.

Satisfied homeowner shaking hands with duct cleaning technician, completed professional air duct cleaning

Next Steps: Secure Professional Duct Cleaning for a Healthier Home Today

  • Don’t wait to enjoy better indoor air! Contact a certified air duct cleaning service now for a same-day or next-day appointment and experience the difference within 24 hours.

Act now : Schedule your duct cleaning, prepare your home, and breathe easier—fresher air is just hours away!

To further enhance your understanding of air duct cleaning and its impact on indoor air quality, consider exploring the following resources:

  • The U.S. Environmental Protection Agency’s article, “Should You Have the Air Ducts in Your Home Cleaned?” , provides insights into when duct cleaning is necessary and its potential benefits.

  • HGTV’s guide, “All About Air Duct Cleaning | Should You Clean Your Air Ducts?” , offers practical advice on maintaining your HVAC system and recognizing signs that professional cleaning may be needed.

These resources will equip you with the knowledge to make informed decisions about maintaining your home’s air quality and HVAC efficiency.

DIY Projects & Repairs

Write A Comment

*
*
Related Posts All Posts
12.13.2025

DIY Faux Frost Greenery: The Two-Ingredient Trick Instagram Is Obsessed With

Did you know that social media DIY trends for faux frost have surged 300% this holiday season? If you’re scrolling through Instagram or TikTok, chances are you've seen gorgeous, sparkly greenery draped over mantels and interwoven into wreaths—crafted not in expensive studios, but in everyday living rooms with a clever two-ingredient hack. Curious how to capture this viral magic for your own holiday decor? You’re about to discover the simple secret fueling the internet’s most dazzling holiday trend: DIY faux frost greenery that looks luxe, lasts all season, and is completely customizable. Whether you’re a seasoned crafter or a holiday enthusiast, this guide will teach you everything from supplies to expert styling tips, ensuring your décor sparkles with festive flair."Did you know that social media DIY trends for faux frost have surged 300% this holiday season?"Transforming Holiday Decor: The DIY Faux Frost Greenery CrazeThe landscape of holiday decor is rapidly changing, thanks to a creative and accessible trend: DIY faux frost greenery. Across social media, crafters and home stylists are showcasing their take on frosted pine branches, shimmering garlands, and crystallized wreaths. What sets this movement apart is its do-it-yourself nature, offering an affordable, authentic-looking alternative to pricey store-bought decorations. This approach not only allows you to personalize your space with unique, textured arrangements that add depth and sparkle but also makes it easier to adapt to evolving trends—without breaking the bank. Imagine being able to adjust the intensity of the frost, choose the shimmer of your choice, and create centerpieces for your holiday wreath or dining table that express your unique style.This surge in creativity is also a response to the push for sustainability and reuse. Many opt for reusable faux greenery as a base, giving them the freedom to refresh or update their decor annually, all while keeping costs and environmental impact low. Whether you’re transforming pine branches into icy works of art for garlands you hang or laying shimmering sprigs across the top of your mantle, the DIY faux frost method puts you in control—no specialized skills required. With this guide, you’ll get step-by-step instructions, essential supply checklists, pro secrets for achieving the most realistic faux frost finish, and safety guidelines so your projects are not just beautiful, but also safe for children and pets.What You'll Learn About DIY Faux Frost GreeneryHow to craft realistic diy faux frost greenery with two simple, inexpensive ingredientsProven techniques to add texture and depth to faux frost arrangementsExpert insights on the best products and applications for holiday decorCreative styling ideas and professional secrets for flawless resultsThe Best Two-Ingredient DIY Faux Frost Greenery MethodWhen it comes to achieving that magical, dewy winter look, the internet’s favorite two-ingredient method reigns supreme. The real beauty of this diy faux frost greenery trick is its simplicity: just Epsom salts or coarse glitter for the icy texture, and a clear-drying craft glue or spray adhesive to keep your frost securely in place. Whether you want to frost pine branches for a holiday wreath or give your tabletop centerpieces a glistening touch, you’ll find this approach both effective and budget-friendly. With these everyday items in hand, you’ll be set to create jaw-dropping, customizable decor that far surpasses what you’ll find on store shelves. Let’s unpack the essentials and walk through the simple steps to bring a winter wonderland vibe into any room.Essential Supplies for Faux Frost and Holiday DecorIngredient 1: Epsom salts or coarse glitterIngredient 2: Clear-drying craft glue or spray adhesiveOptional supplies: Faux greenery, paintbrushes, protective glovesStep-by-Step Tutorial: How to Make DIY Faux Frost GreeneryPrepare your workspace for easy cleanup. Lay down newspaper or a disposable tablecloth to catch stray salts or glitter. Make sure your supplies are within reach and set up in a well-lit area so you can see all the details.Apply adhesive generously to your selected faux greenery. Use a paintbrush for even, detailed coverage, especially around leaf edges and branch tips where natural frost tends to gather. Spray adhesive can speed things up for larger branches or garlands you hang along banisters.Sprinkle the faux frost mixture (Epsom salts or glitter) evenly to add texture. Hold the greenery over a tray, then gently sprinkle your chosen frost material, rotating the branch for a natural, random look that mimics real snowflakes before dipping.Let pieces dry thoroughly, then shake off any excess. Allow at least 1–2 hours, longer if you’ve used thicker glue. Hold your frosted item upside down and gently tap to remove loose crystals, ensuring the result looks like authentic, crystalized greenery and not overly clumped.Style directly into your holiday decor arrangements. Simply lift the dowel or branch and integrate into wreaths, centerpieces, or garlands for an instant wintry ambiance—perfect for christmas decorations to bring your space to life.Table: DIY Faux Frost Greenery Tools and AlternativesRequired ItemWhy It WorksPossible SubstitutesEpsom saltsCreates icy, crystalline effectCoarse sugar, clear glitterClear glueAdheres frost securelyMod Podge, spray adhesiveFaux greeneryRealistic baseReal branches (with caution)PaintbrushPrecise applicationFoam brush, fingersExpert Insight: Why DIY Faux Frost Outshines Store-Bought OptionsAccording to home decor specialists, nothing compares to the handcrafted touch in diy faux frost greenery. Not only does it look more natural and integrate seamlessly with your unique holiday decor, but it also empowers you to add texture, dial up (or down) the shimmer, and experiment with sparkle intensity to fit your style. Plus, making your own pieces is a perfect way to create lasting memories and traditions with family and friends, and offers the satisfaction of knowing you crafted something truly your own. Bonus: You’re able to control the safety and quality of materials, avoiding questionable chemicals sometimes found in mass-produced decorations. Whether you lean toward subtle, snowy touches or crave full-on, glitzy glamour, this technique lets you custom-blend results tailored precisely to your taste and home aesthetic."Handmade diy faux frost greenery not only looks more authentic, but allows you to tailor texture and shimmer intensity exactly how you want it." – Amanda Lee, Interior Styling SpecialistChoosing the Best Greenery for DIY Faux Frost ProjectsPopular faux plants: pine, eucalyptus, boxwoodHow to select greenery for maximum realism and longevityWhile pine branches may be the classic choice for frosted holiday decor, don’t overlook other faux foliage options such as eucalyptus or boxwood. Each plant offers unique shapes and leaf textures, allowing you to create arrangements that pop with visual contrast and realism. When selecting greenery for diy faux frost greenery projects, prioritize branches with sturdy stems and flexible leaves, as these hold adhesive and salts or glitter more effectively. Realistic detailing in faux greenery, such as subtle green variations and natural leaf veining, enhances the final frosted look, making it nearly impossible to distinguish from nature’s own handiwork—from garlands you hang on staircases to ornaments or hanging decor for your front door. Opt for high-quality faux materials to ensure your projects last from year to year, minimizing the need for frequent replacements and reducing waste compared to disposable, single-season decorations.Watch our short, step-by-step video for a clear visual guide to crafting your own diy faux frost greenery—supplies, technique, and expert styling tips included. Bright holiday setting and engaging pacing make this the perfect visual companion!Creative Ways to Use DIY Faux Frost Greenery in Holiday DecorWreaths and swags for doors and mantelsCenterpieces and tabletop arrangementsFestive garlands for staircases and banistersOutdoor planters for a wintry touchThe applications for diy faux frost greenery in holiday decor are truly endless. A frosted pine wreath or festive swag can instantly transform your front door or living room mantel into a winter wonderland. For a cozy dining table, design lush, frosted centerpieces that glimmer in candlelight, making every meal feel like a special occasion. Draping frosted garlands on banisters or open shelving adds elegant, snowy charm, especially when paired with metallic ornaments or soft twinkling lights. Don’t hesitate to extend your creativity outdoors: Arrange frosted branches in porch planters or along windowsills for curb appeal that’s both sophisticated and inviting. Each project presents an opportunity to showcase your personal style and spread festive cheer—all while controlling the color, texture, and placement of your faux frost.Safety Tips When Crafting DIY Faux Frost GreeneryMake sure to use non-toxic ingredients for indoor use.Work in a ventilated space if using spray adhesives.Keep faux frost greenery away from open flames or heat sources.Safety matters, especially when creating decorations that may be touched by children and pets or displayed near heat. Choose adhesive products and “frost” ingredients labeled as non-toxic to reduce the risk of accidental ingestion or allergic reactions. Always craft in a well-ventilated room when using spray adhesives, and consider wearing gloves to protect your skin from irritation. For households with small kids, avoid areas where food will be served and keep diy faux frost greenery out of reach to avoid accidentally ingesting any materials. Finally, since many adhesives and decorative elements are flammable, never position your frosted creations near candles, open flames, or heating vents—this care using these frosted pieces keeps the season safe and festive for everyone.How to Create Fake Frost?Creating fake frost is simple with the right ingredients: Epsom salts or coarse glitter for natural sparkle, plus clear-drying glue or spray adhesive for secure, even coverage. Just brush adhesive over your chosen greenery, sprinkle on your sparkling frost, and allow it to dry before using. For extra realism, blend a sprinkle of clear glitter with your salts or add tiny hints of light blue dye to mimic the blue glint of real ice—just remember: a little goes a long way. This technique is quick and easy and doesn’t require hot water, a borax solution, or any complicated steps—perfect for anyone from beginners to seasoned crafters looking to make the frost in under an hour.How to Frost Artificial Leaves?For the most lifelike, frosted effect on artificial leaves, use a paintbrush to coat edges and surfaces with a thin layer of clear glue or Mod Podge. While still sticky, softly dust with Epsom salts or a mixture of clear glitter, focusing on spots where snowflakes or frost would naturally form. Gently shake to remove extra material after drying. This is especially effective for eucalyptus and boxwood, where the texture and contour allow you to add texture and shimmer that’s easily customized, whether you prefer a heavy snowy look, or a subtle, glistening accent that will eventually fall gracefully for cleanup at season’s end.How to Make Icy Branches?Transforming branches into icy decor is a fun and accessible holiday project. For faux or real branches, lightly brush clear glue along each twig, making sure to cover the tips where frost typically collects. Generously sprinkle Epsom salts or clear glitter for a crystalized, frosty look. Let dry completely, then tap off the excess. For added dimension, try temporarily dipping your branches into a borax solution—this will form larger, striking crystals that catch light for true wintry magic. Whether you want to shape small twigs into standalone ornaments or incorporate icy branches into large centerpieces for your holiday table, this method offers the perfect way to create festive, custom decor.How to Make Fake Snow for Outdoor Decorations?Creating safe, realistic fake snow for outdoor use calls for durability. Mix Epsom salts and coarse sugar—this combination withstands moisture and can be easily cleaned up. Adhere the mixture to faux greenery or outdoor-safe branches with a robust outdoor adhesive, ensuring it can handle the elements. If you need bulk quantity for large displays or planters, look for biodegradable snow alternatives at craft stores. Always keep away from real fruit or greenery where children and pets might have access, and avoid placing near entryways where slipping could occur. The results? Outdoor displays with wintry elegance and minimal environmental impact.FAQs: DIY Faux Frost GreeneryWill faux frost greenery last year to year?Yes! If stored in a cool, dry place and handled gently, most faux frost decorations will last multiple seasons. To prolong life, store each piece in a protective container to avoid crushing and periodically refresh any frost or glitter that might wear off.Are the materials pet and child safe?When you use non-toxic glue and salts or craft glitter, the method is generally safe for homes with children and pets. However, always display out of reach and avoid using in areas where food will be served. Supervise any craft activities with younger kids.Can I use this method on real plants?While the focus is on faux greenery, you can frost real branches if you avoid harsh adhesives that could damage the plant. Real branches are best for short-term display only, as organic material will eventually fall or degrade.What is the best base for diy faux frost greenery?Durably constructed faux greenery—especially pine, eucalyptus, or boxwood—offers the best base for longevity and realism. Choose stems with varied shades and natural veining for the most life-like results.Learn what to avoid! See the five most common mistakes crafters make with faux frost—from overapplication to incorrect glue use—and how to fix them for flawless results.Key Takeaways: Mastering the DIY Faux Frost Greenery TrendDIY faux frost greenery is simple, affordable, and fully customizable.The two-ingredient trick delivers stunning, realistic results.With the right materials, you can transform any holiday decor with effortless elegance.Elevate Your Holiday Decor—Share Your DIY Faux Frost Greenery CreationsReady to transform your home with festive sparkle and handmade charm? Try out these tips, and don’t forget to share your diy faux frost greenery ideas and results on social media to inspire fellow holiday decorators.To enhance your DIY faux frost greenery projects, consider exploring the following resources:“This DIY Faux Frost Is the Easiest Holiday Decor Hack (It’s Just Two Ingredients!)” offers a straightforward method using Borax to create realistic frosted effects on various decorations. (shopping.yahoo.com)“DIY Frosted Greenery Floral Arrangement” provides a step-by-step guide to crafting elegant frosted floral displays, complete with a video tutorial for visual learners. (bloomsbythebox.com)

11.21.2025

Prepare Your Home for the Holidays: Essential Tips for Hosts

Update Getting Your Home Ready for Holiday Gatherings The holiday season is fast approaching, bringing with it a flurry of guests, cooking, and the much-anticipated festivities. For homeowners, this period can bring a mix of excitement and stress. To help alleviate that stress, it's crucial to prepare your home for entertaining. In the recent episode of the Money Pit podcast, Leslie Segretti and Jim Kenzie delve into effective strategies for prepping your kitchen and dining areas while ensuring your space is warm and welcoming for guests.In #2566 – Holiday Kitchen Prep | Refresh Your Dining Room | Making Space for Guests | Winterize Pipes, the discussion dives into essential strategies for preparing your home for the bustling holiday season. Sprucing Up the Kitchen for Holiday Cooking Your kitchen often becomes the hub of holiday activity, so it's important to keep it organized and functional. Start by deep cleaning your kitchen appliances, ensuring they are ready for the hustle. A clean oven before Thanksgiving can save you last-minute panic. Clear out expired items from your fridge and pantry, restock essential ingredients like spices and baking supplies, and reorganize for easy access during meal prep. Consider designating a 'holiday zone' for cooking tools and serving dishes. This simple act can streamline your cooking experience, allowing you to efficiently whip up your favorite meals without rummaging through clutter. By being proactive about kitchen organization, you set yourself up for success and enjoyment during the busy holiday season. Transforming Your Dining Room into a Festive Gathering Space The dining room often serves as the focal point—whether for Thanksgiving dinner or casual gatherings. To refresh this space quickly and affordably, start with the lighting. Warm, cozy lighting can transform the atmosphere; consider adding battery-operated puck lights or stylish floor lamps. A simple centerpiece, like a bowl of seasonal fruits or a cluster of mini pumpkins, can also add a festive touch without the need for expensive decorations. Also, don’t overlook repairs and updates. Tighten loose chairs, address squeaks, and perhaps reupholster or cover old dining chairs to breathe new life into them. These minor adjustments can instantly enhance your dining experience, making guests feel welcomed and comfortable. Creating Cozy Guest Spaces Without a Spare Room If you’re short on guest rooms, you can still make visitors feel at home. With a little creativity, even a corner of your living room can be transformed into a cozy sleeping space. Consider using a high-quality air mattress or a sleeper sofa to provide comfort. Adding a folding screen or curtain can create a sense of privacy that guests will appreciate. Ensure guests have bedside essentials like a small side table, a charging station for devices, and water. Adding decorative touches like cozy throws or holiday-themed decorations can enhance their experience, demonstrating your hospitality and thoughtfulness. Preparing Your Exterior for Winter and Holiday Guests As guests arrive, the exterior of your home is the first impression. Spend some time sprucing up your entryway. Clean your front door, add a fresh coat of paint if necessary, and consider seasonal decorations that welcome guests in style. Ensure outdoor areas are well-lit and safe; fix any cracks in walkways and check outdoor faucets to prevent winter freeze damage. These exterior preparations not only improve curb appeal but also contribute to a warm welcome that sets the tone for the entire holiday experience. By taking these steps, you can ease the stress of the holiday season while making your home an inviting and functional space. With careful preparation of your kitchen, dining room, and guest areas, you can focus on what really matters—spending quality time with friends and family during this festive time. So, roll up your sleeves, start planning, and turn your home into the perfect holiday haven! If you're unsure where to begin with your preparations, consider reaching out to local home improvement experts. They can provide additional insights tailored to your specific needs, ensuring your holiday preparations go off without a hitch.

11.14.2025

Last-Minute Halloween Décor Ideas: Affordable Yard Frights to Impress

Update Transform Your Home with Last-Minute Halloween Décor Ideas If Halloween seems to have crept up on you this year, fear not! With a few household items and a little creativity, it's still possible to produce terrifyingly delightful decorations that impress trick-or-treaters and neighbors alike.In #2565 – Last-Minute Halloween Décor, the discussion dives into budget-friendly decoration techniques and spooky lighting ideas, exploring key insights that sparked deeper analysis on our end. Spooktacular Decoration Hacks Using Everyday Items One easy yet frighteningly effective method involves making floating ghosts. All you need are cheesecloth and balloons. Simply drape the cheesecloth over a balloon, spray it with starch or diluted glue, and let it dry. Once completed, pop the balloon, and you have a ghostly form to hang from branches or doorways—add black felt eyes for an extra eerie touch! Another tried-and-true Halloween favorite is the homemade spider and spiderwebs. Cut black trash bags into large web shapes and stick them to your windows or porch railings. To make it even spookier, create a spider using rolled socks or newspapers wrapped in black duct tape. This guarantees you’ll have an eye-catching display without resorting to expensive store-bought options. Lighting to Set the Mood The power of lighting can elevate any spooky décor. Create glowing eyes in bushes using toilet paper rolls lined with colored cellophane and equipped with small battery-operated lights. These simple additions can transform your yard into a chilling nighttime wonderland, providing just the right amount of creepiness. Want to dazzle your visitors? Consider using glow sticks or LED tea lights in mason jars or painted containers. Wrap them in gauze for a mummy effect, which can illuminate your pathway and guide trick-or-treaters. Post-Halloween Cleanup Made Easy Once Halloween is over, it’s time to pack it all away. But don't rush—your decorations deserve proper care. Start by sorting the decorations into categories, such as indoor and outdoor. Lights should be wrapped carefully around cardboard to prevent tangling. When it comes to pumpkins, consider composting if they’re rotten, while uncut ones can serve as natural décor for Thanksgiving. For inflatable decorations, ensure they are completely dry before storing to avoid mildew. Batteries should be removed from any decorations that light up to extend their lifespan. Utilizing clear bins with labels can help make future decorating swift and effortless. DIY Projects to Engage the Family Beyond just decorating, these DIY projects offer a great way for families to bond while getting into the Halloween spirit. They can also provide opportunities to teach younger members about crafting and decorating on a budget. In the throes of spooky season, getting crafty can be as important as outfitting your home to look haunted. By using what you have on hand mixed with a little imagination, you can create unforgettable Halloween magic in virtually no time. As fall gives way to winter, tackle the cleanup and prepare your home for the holidays. Halloween may be wrapping up, but your décor lifestyle doesn’t have to end! This time of year is about creativity, family participation, and having a little fun along the way. Packing Up for Next Year: A Smart Move Remember, with just a few smart tricks and a seasonal mindset, you can make future Halloweens even more efficient and enjoyable. Take these decorative tips to heart and enjoy a frightfully fun Halloween this year!

Terms of Service

Privacy Policy

Core Modal Title

Sorry, no results found

You Might Find These Articles Interesting

T
Please Check Your Email
We Will Be Following Up Shortly
*
*
*