Add Row
Add Element
American Yard and Home Logo
update
American Yard & Home
American Yard & Home Logo
update
Add Element
  • Home
  • Categories
    • Ask an Expert
    • DIY Projects & Repairs
    • Featured Businesses
    • Home Renovation & Remodeling
    • Interior Design & Styling
    • Landscaping & Curb Appeal
    • Outdoor Living
    • Smart Home & Tech
July 22.2025
1 Minute Read

DIY Home Maintenance for Appliances: Save Time and Money

Family admiring spotless kitchen appliances after DIY home maintenance for appliances
A welcoming family gathers in a bright, spotless kitchen to appreciate their well-maintained appliances—proof that DIY home maintenance for appliances pays off in both comfort and savings.
"Did you know that homeowners can save up to 30% on appliance costs annually with DIY home maintenance for appliances?" — Home Improvement Experts

In a world that moves fast and finances feel unpredictable , few household habits can empower you as much as taking the time for DIY home maintenance for appliances. Not only does learning these simple routines help you feel more in control of your home and budget , but data shows they can save you hundreds—or even thousands—of dollars every year.

This guide will show you exactly how to achieve small victories in everyday life by mastering everyday acts of maintenance. You’ll discover expert-backed checklists, money-saving strategies, and practical steps to extend the life of your appliances , all without the need to call a professional for every little problem.

What You'll Learn in This Guide

  • The foundational benefits of DIY home appliance care
  • Step-by-step checklists for every major household appliance
  • Expert tips for troubleshooting and extending appliance life
  • Actionable strategies for saving money while improving efficiency
  • How to recognize when a professional repair is necessary

Why DIY Home Maintenance for Appliances is Essential for Saving Money and Extending Appliance Lifespan

Regular DIY home maintenance for appliances is more than a way to cut costs—it’s a proven strategy to maximize the efficiency and lifespan of every major device in your home. By taking better care of your appliances, you’re investing in greater long-term value from your home décor and furnishings. When you proactively maintain appliances—like refrigerators, washing machines, or dishwashers—you minimize the likelihood of sudden breakdowns, which means fewer expensive emergency calls and less disruption to your daily life.

Home maintenance empowers homeowners with everyday acts of maintenance that truly pay off. Regular upkeep not only keeps appliances running smoothly but can also enhance your home’s energy efficiency, directly leading to saving money on monthly utility bills. As you start finding small victories in fixing things around the house, you’ll feel more confident, realizing that caring for your home doesn’t always require professional help or massive investments.

  • Minimizes costly repairs by catching problems early
  • Prevents unexpected breakdowns, keeping your household routine uninterrupted
  • Maximizes appliance efficiency, so you spend less on energy and water bills
Estimated Yearly Cost Savings from Regular DIY Home Maintenance for Appliances (compared to professional repairs)
Appliance Average Professional Repair Cost (per year) DIY Maintenance Cost (per year) Estimated Savings
Washing Machine $150 - $300 $20 - $40 $130 - $260
Refrigerator $200 - $400 $25 - $50 $175 - $350
Dishwasher $125 - $250 $10 - $30 $115 - $220
Oven/Stove $100 - $200 $5 - $15 $95 - $185

Understanding Home Maintenance: The Foundation of Appliance Longevity

At its core, home maintenance lays the groundwork for durable, reliable appliances that stand the test of time. Rather than waiting for a breakdown—which often leads to costly, unexpected repairs—adopting a DIY approach allows you to anticipate issues and resolve them before they escalate. This mindset shift not only helps you save money , but also boosts the overall efficiency of your household.

Consistent upkeep, like filter replacements and coil cleaning, is proven to reduce the strain on motors and sensitive components, often extending appliance lifespan by several years. Products like lemi shine , citric acid , and even common items like baking soda are powerful allies in your regular maintenance toolkit. By keeping a regular schedule, you create a reliable routine, ensuring that your appliances continue to contribute to your home décor and daily comfort.

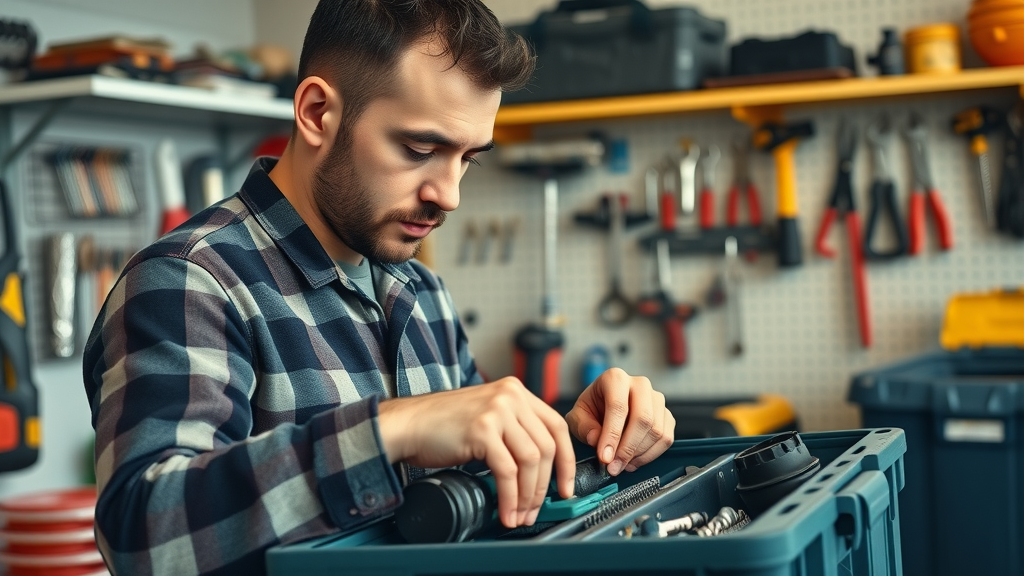
What Is DIY Repair? Home Maintenance Techniques to Prevent Appliance Issues

DIY repair refers to tackling minor appliance issues yourself before they become major problems. It’s about understanding the basics of how your washing machine, refrigerator, or coffee maker works, and using easily accessible tools and cleaners to maintain them. Techniques include regular cleaning, monitoring for unusual noises, and checking gaskets and seals. Not only do DIY repairs prevent unnecessary expenses, but they also empower you to feel confident about everyday home maintenance tasks.

Step-by-Step DIY Home Maintenance for Appliances: Checklist for Every Homeowner

Creating an actionable checklist is vital for successful diy home maintenance for appliances . Each household device has unique needs, but there are universal steps that can prolong its life and enhance efficiency. Incorporating regular tasks on a monthly, quarterly, or annual basis ensures nothing slips through the cracks. Taking the time for these simple actions can translate into substantial savings—and a more resilient home in uncertain economic times. Check off each item to prevent costly issues and maintain an energy-efficient household.

Focused homeowner checking tools for DIY home maintenance for appliances
A well-organized toolbox and a focused homeowner are the keys to effective home maintenance. Preparation empowers you to spot and solve appliance issues before they become big problems.
  • Inspect and clean air filters (HVAC, refrigerators, dryers)
  • Examine and descale washing machines using products such as citric acid or lemi shine
  • Check seals and gaskets on doors to prevent energy loss
  • Test appliance electrical connections for safety
  • Keep appliances free from dust and debris, especially around vents and motors

Regular Maintenance Tips to Save Money on Utility Bills and Repairs

Regular maintenance lies at the heart of saving money with home appliances. By establishing a routine—like checking filters or cleaning coils—you reduce the appliance’s workload and avoid spikes in utility bills. For example, a clogged refrigerator coil can cause the compressor to overwork, leading to higher energy use and increased risk of failure.

Using items such as citric acid or baking soda for cleaning removes mineral deposits and grime, keeping machines like dishwashers and washing machines in peak shape. Additionally, monitoring for leaks and odd sounds allows you to spot and address issues—often at little or no cost—before expensive parts fail. Adopting these everyday maintenance habits lets you feel more in control , empowers you to find small victories, and ensures essential appliances don’t let you down in emergencies.

"Performing regular maintenance lets you detect minor appliance issues before they become costly repairs." — Certified Appliance Technician

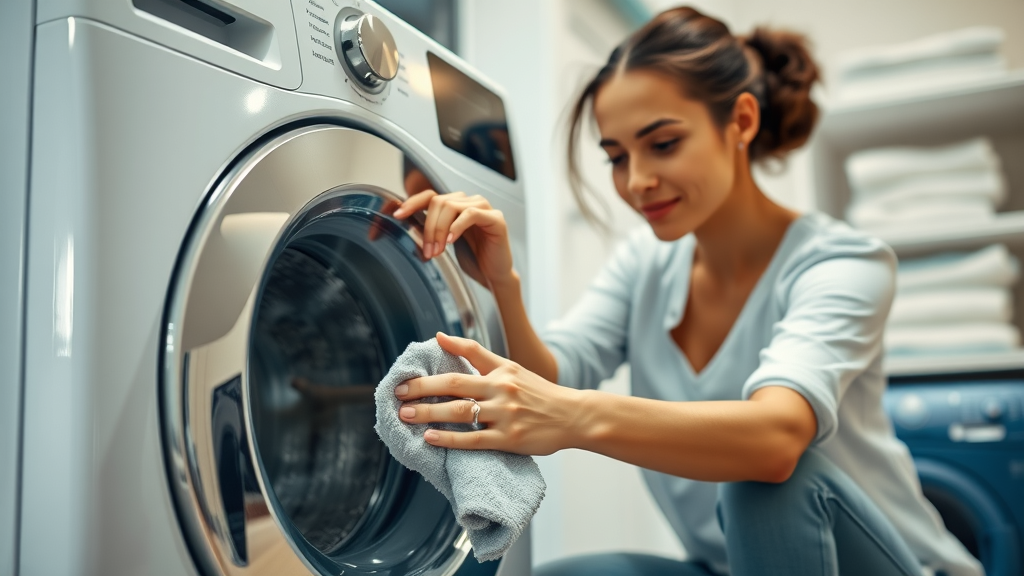
DIY Home Maintenance for Washing Machines: How to Increase Efficiency and Appliance Life

The washing machine is a cornerstone for any busy household, and diy home maintenance for appliances is especially crucial for its longevity. Lint buildup, calcium deposits, and worn seals are common culprits behind underperforming machines. By using citric acid or trusted cleaning products like lemi shine , you remove residue that can cause odor, vibration, and ultimately, expensive repairs or even breakdowns.

With the cost of washing machines rising, taking better care of your laundry workhorse helps you avoid major replacement expenses and keeps your clothing or textiles looking their best. Simple acts, like leaving the door open after each cycle to prevent mildew or regularly tightening hose connections, go a long way toward saving money in the long run.

Homeowner cleaning washing machine drum as part of DIY home maintenance for appliances
Routine cleaning of your washing machine’s drum with gentle products extends appliance life and keeps clothing fresh—a key DIY home maintenance task for appliances.

Washing Machine Care: Cleaning, Descaling, and Leak Prevention

For peak performance, run a cleaning cycle with citric acid or lemi shine once a month to dissolve buildup and prevent odors. Wipe down door gaskets and check them for mold or damage, which can lead to leaks. Clean detergent dispensers with a mild, non-abrasive solution to prevent clogs that cause overflow.

Also, periodically examine hoses for cracks or bulges and ensure all connections are tight. Keeping the exterior and vent areas free of dust allows the motor and controls to cool properly, extending the life of sensitive electronics within the washing machine. These best practices not only keep water bills in check but also save you money by eliminating the need for expensive service calls.

Troubleshooting Common Washing Machine Problems for DIY Repair Success

Troubleshooting begins with attention to detail—unusual noises, vibration, or poor spinning often signal minor problems you can remedy. Check for balanced loads, make sure the machine is level, and inspect the drain hose for blockages. Clearing a clogged pump filter is a frequent DIY repair that restores function and prevents water damage.

If clothes emerge soapy or the cycle doesn’t finish, clean the water inlet filter and ensure detergent dispensers aren’t clogged. When leaks or error codes appear, consult the manual, as many issues—like stuck floats or kinked hoses—can be solved without a professional. These expert strategies help you feel confident about finding small, attainable victories in home maintenance.

DIY Home Maintenance for Kitchen Appliances: Extend the Life of Ovens, Refrigerators, and Dishwashers

The kitchen harbors several high-value appliances that benefit from routine DIY care. Refrigerators, ovens, and dishwashers are essential to daily life, and skipping regular maintenance can shorten their lifespan and rack up significant repair bills. Cleaning fridge coils, replacing water filters, and ensuring oven doors seal tightly are just a few ways to maximize performance and save money .

Even simple steps, like inspecting a dishwasher’s filter or gently scrubbing your dishwasher with vinegar or lemi shine, ensure that grime and mineral buildup don’t cause blockages or lead to bigger malfunctions. These basic tasks bring big returns—reduced energy consumption, improved performance, and the confidence that comes from taking proactive control over your home’s essential systems.

Vacuuming refrigerator coils for DIY home maintenance for appliances
Cleaning refrigerator coils and inspecting door gaskets improve efficiency and help prevent surprise breakdowns—key steps in kitchen appliance maintenance.

Quick DIY Repair for Ovens and Stoves: Safety and Efficiency First

Ovens and stoves are core to home life, but their longevity hinges on proper DIY care. Always unplug electric models and turn off gas lines before attempting any repair. Clean stovetop burners, oven racks, and use citric acid or specialized cleaners to remove tough stains for better heat distribution.

Check that door seals remain tight, so heat doesn’t escape during cooking, which otherwise wastes energy. Replace burnt-out indicator lights and test oven thermostats by comparing them to an oven thermometer. By doing these simple repairs, you boost efficiency and extend the appliance’s service life—true small victories in home care.

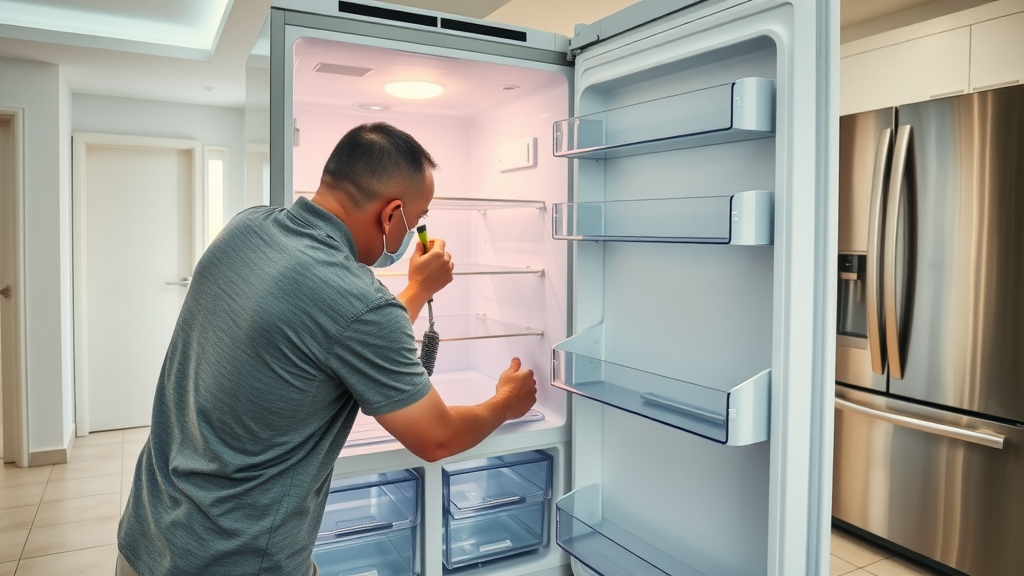
Refrigerator Maintenance: Cleaning Coils, Replacing Water Filters, and Sealing Doors

One of the most impactful DIY home maintenance for appliances steps is cleaning refrigerator coils , which you should do every six months. Unplug the fridge and use a coil brush or vacuum to clear dust, allowing the compressor to run more efficiently and reducing the risk of breakdown. Regularly inspect and replace water filters for better water and ice quality, and check gaskets for airtight seals.

If doors don’t close properly or if you notice condensation, wipe seals clean or replace them. These straightforward tasks not only prevent energy loss but also ensure fresh food storage and save money by staving off costly repairs. You’ll soon notice the benefits on your electric bill, too.

Dishwasher DIY Care: Prevent Blockages and Maximize Performance

Dishwashers are susceptible to buildup from hard water, food debris, and soap scum, which can impede performance. Remove and clean filters monthly, run an empty cycle with vinegar or citric acid to break down deposits, and check the spray arms for clogs. Ensuring that the door seal is intact helps prevent leaks that cause water damage or floor issues.

  • Remove and clean filters monthly
  • Run empty cleaning cycles with vinegar
  • Check spray arms for clogs
  • Inspect door seal integrity

By adopting these household routines, you guarantee your dishwasher remains effective and reliable. Everyday diligence in cleaning and inspection translates into finding small victories in appliance longevity and home savings.

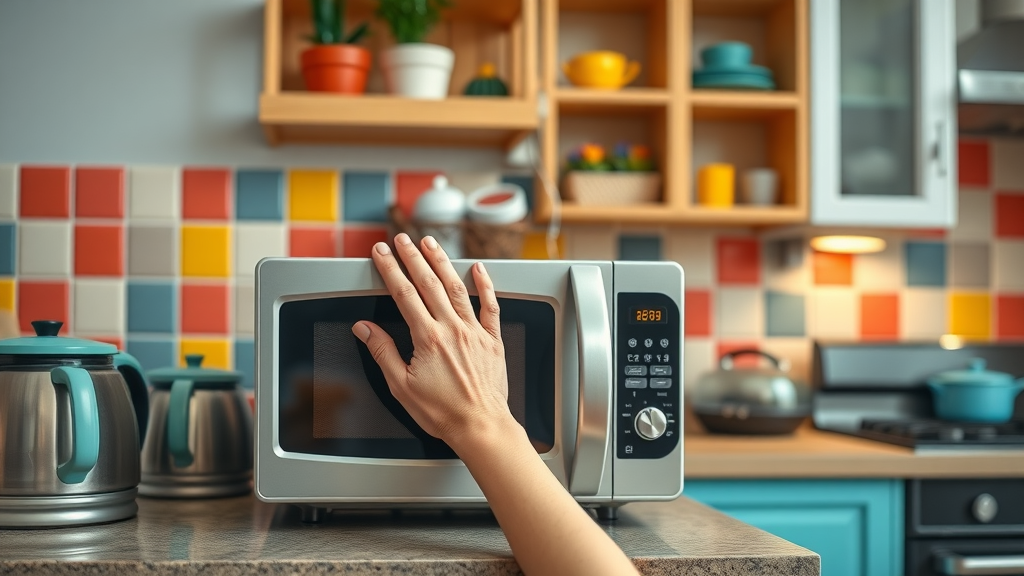
DIY Home Maintenance for Small Appliances: Toasters, Microwaves, and More

It’s easy to overlook small appliances like toasters, microwaves, or coffee makers, but their frequent use makes upkeep just as important. A neglected microwave, for example, can harbor stubborn stains or odors, while a poorly cleaned toaster can become a fire hazard. Simple, regular cleaning and visual inspection ensure these aids stay safe, efficient, and ready for daily use.

Wiping down microwave as part of DIY home maintenance for appliances
Proactive cleaning of small appliances boosts efficiency, safety, and everyday enjoyment—a key pillar of practical DIY home maintenance.

Safety Tips and Cleaning Hacks for Frequent-Use Appliances

Always unplug appliances before cleaning or maintenance. Use gentle cleaners like diluted vinegar or water with citric acid to wipe down interiors, and a toothbrush for tough-to-reach areas. Regularly empty crumb trays in toasters and ensure that microwave turntables are removed and washed to avoid buildup.

For coffee makers, run a descaling cycle with citric acid or vinegar to ward off mineral deposits that can affect brewing. These habits not only keep appliances hygienic but also avert electrical shorts or fire risks associated with neglected home maintenance routines.

When to DIY Repair and When to Consult a Professional for Appliance Maintenance

While most routine tasks can be safely handled by diligent homeowners, some repairs cross into dangerous territory—especially for high-voltage or gas-powered devices. If your appliance requires opening sealed units, handling refrigerants, or involves any wiring or gas lines, call in a certified professional. Erring on the side of caution ensures your safety and the integrity of your home.

Attempting complicated fixes on your own may void warranties or create bigger, costlier issues down the line. By knowing your limits, you streamline your home maintenance, ensuring you only take on what truly makes sense for a DIY repair.

The Role of Regular Maintenance in Saving Money and Increased Home Efficiency

Developing a regular maintenance schedule is a powerful way to take control over your household costs and keep appliances running efficiently. Every bit of time you put into proactive appliance care multiplies your savings—not just in dollars, but in convenience, peace of mind, and avoidance of stressful emergencies. In the era of uncertain economic times, data shows regular DIY home maintenance for appliances to be an investment that pays dividends month after month.

How Home Maintenance Strategies Help You Save Money Over Time

Routine maintenance reduces energy consumption, extends appliance lifespan, and minimizes the risk of costly, last-minute repairs. As you feel more in control of your daily routine, you’ll notice more time for things like home décor, family, or even sharing social media wins about your latest DIY repair. Through small, regular acts, you’re investing in the longevity and efficiency of all your household systems.

  • Lower electricity consumption
  • Reduces need for costly replacements
  • Prevents energy loss from worn parts
  • Minimizes emergency repair calls
Common Appliance Problems Prevented by Regular DIY Home Maintenance
Appliance Potential Problem Preventive Maintenance Task
Refrigerator Overheating, Inefficient Cooling Clean coils, replace water filter
Dishwasher Blockages, Foul Odors Clean filters, inspect spray arms
Washing Machine Mold Growth, Leaks Descale drum, check door gasket
Oven/Stove Poor Heat Distribution Clean burners, inspect seals

PAA: What Are the Most Important DIY Home Maintenance Tasks for Appliances?

Essential DIY Home Maintenance Tasks: Filter changes, gasket checks, cleaning ducts, and monitoring unusual noises

For most appliances, prioritizing filter replacements, seal inspections, and clearing dust from motors offers the highest return on time invested and contributes to the longevity of your devices. Attending to these details prevents small issues from snowballing into major, costly repairs. Monitoring for strange sounds or irregular functioning also lets you address problems before they cause real damage.

PAA: How Often Should You Do Regular Maintenance on Home Appliances?

DIY home maintenance for appliances is generally performed monthly, quarterly, and annually depending on the type of application

Most manufacturers recommend monthly filter checks, quarterly cleaning, and annual inspections for optimal appliance performance. By following this schedule, you maximize efficiency, detect problems early, and help your appliances operate as cost-effectively as possible. Maintaining consistency can greatly enhance your overall savings.

PAA: Can DIY Home Maintenance for Appliances Really Save Money?

The Financial Impact of DIY Repair Compared to Professional Appliance Maintenance

Yes. Performing your own home maintenance can reduce the likelihood of unexpected breakdowns and prolong appliance life, regularly saving you hundreds of dollars each year. With access to information, cleaning products, and easy-to-follow guides, you’ll discover that routine DIY repair is both cost-effective and rewarding.

PAA: Are There Appliances Where DIY Home Maintenance is Not Advised?

Safety Considerations: When to Call an Appliance Professional and Avoid DIY Repair

High-voltage or gas appliances, such as water heaters and gas ovens, should generally be serviced by professionals for safety reasons. In these cases, improper repair attempts could void warranties, damage the appliance, or put your safety at risk. Always consult an expert when in doubt or when the repair involves critical systems.

FAQ on DIY Home Maintenance for Appliances

  • What tools do I need for basic DIY home appliance maintenance?
    Most basic maintenance tasks require a screwdriver set, pliers, a coil brush, measuring cup (for cleaners like citric acid), microfiber cloths, and a small vacuum or dusting brush. For certain tasks, specialty cleaners like lemi shine or diluted baking soda are useful.
  • What are the signs of major appliance failure?
    Persistent leaks, electrical sparks, burning odors, unusual loud noises, and repeated error codes are all signs that an appliance may need professional repair or replacement. If you see these, stop use and seek expert help.
  • Does performing regular maintenance affect warranty coverage?
    Regular DIY home maintenance for appliances is typically encouraged and does not void warranties, provided you follow manufacturer guidelines and use recommended cleaning products. Always document your maintenance with photos or notes.
  • Are there resources for learning more about appliance care?
    Yes! Many manufacturers and home improvement advocates—including Tim Jones, respected social media influencers, and certified appliance technicians—share detailed guides and videos online to help you take better care of your appliances.

Discover the Time and Money Savings of DIY Home Maintenance for Appliances—Get Started Today! Take Control of Your Home Maintenance Routine for Maximum Appliance Longevity

Start your DIY home maintenance for appliances today to boost efficiency, save money, and extend appliance life— your next small victory is just a checklist away!

DIY Projects & Repairs

Write A Comment

*
*
Related Posts All Posts
12.13.2025

DIY Faux Frost Greenery: The Two-Ingredient Trick Instagram Is Obsessed With

Did you know that social media DIY trends for faux frost have surged 300% this holiday season? If you’re scrolling through Instagram or TikTok, chances are you've seen gorgeous, sparkly greenery draped over mantels and interwoven into wreaths—crafted not in expensive studios, but in everyday living rooms with a clever two-ingredient hack. Curious how to capture this viral magic for your own holiday decor? You’re about to discover the simple secret fueling the internet’s most dazzling holiday trend: DIY faux frost greenery that looks luxe, lasts all season, and is completely customizable. Whether you’re a seasoned crafter or a holiday enthusiast, this guide will teach you everything from supplies to expert styling tips, ensuring your décor sparkles with festive flair."Did you know that social media DIY trends for faux frost have surged 300% this holiday season?"Transforming Holiday Decor: The DIY Faux Frost Greenery CrazeThe landscape of holiday decor is rapidly changing, thanks to a creative and accessible trend: DIY faux frost greenery. Across social media, crafters and home stylists are showcasing their take on frosted pine branches, shimmering garlands, and crystallized wreaths. What sets this movement apart is its do-it-yourself nature, offering an affordable, authentic-looking alternative to pricey store-bought decorations. This approach not only allows you to personalize your space with unique, textured arrangements that add depth and sparkle but also makes it easier to adapt to evolving trends—without breaking the bank. Imagine being able to adjust the intensity of the frost, choose the shimmer of your choice, and create centerpieces for your holiday wreath or dining table that express your unique style.This surge in creativity is also a response to the push for sustainability and reuse. Many opt for reusable faux greenery as a base, giving them the freedom to refresh or update their decor annually, all while keeping costs and environmental impact low. Whether you’re transforming pine branches into icy works of art for garlands you hang or laying shimmering sprigs across the top of your mantle, the DIY faux frost method puts you in control—no specialized skills required. With this guide, you’ll get step-by-step instructions, essential supply checklists, pro secrets for achieving the most realistic faux frost finish, and safety guidelines so your projects are not just beautiful, but also safe for children and pets.What You'll Learn About DIY Faux Frost GreeneryHow to craft realistic diy faux frost greenery with two simple, inexpensive ingredientsProven techniques to add texture and depth to faux frost arrangementsExpert insights on the best products and applications for holiday decorCreative styling ideas and professional secrets for flawless resultsThe Best Two-Ingredient DIY Faux Frost Greenery MethodWhen it comes to achieving that magical, dewy winter look, the internet’s favorite two-ingredient method reigns supreme. The real beauty of this diy faux frost greenery trick is its simplicity: just Epsom salts or coarse glitter for the icy texture, and a clear-drying craft glue or spray adhesive to keep your frost securely in place. Whether you want to frost pine branches for a holiday wreath or give your tabletop centerpieces a glistening touch, you’ll find this approach both effective and budget-friendly. With these everyday items in hand, you’ll be set to create jaw-dropping, customizable decor that far surpasses what you’ll find on store shelves. Let’s unpack the essentials and walk through the simple steps to bring a winter wonderland vibe into any room.Essential Supplies for Faux Frost and Holiday DecorIngredient 1: Epsom salts or coarse glitterIngredient 2: Clear-drying craft glue or spray adhesiveOptional supplies: Faux greenery, paintbrushes, protective glovesStep-by-Step Tutorial: How to Make DIY Faux Frost GreeneryPrepare your workspace for easy cleanup. Lay down newspaper or a disposable tablecloth to catch stray salts or glitter. Make sure your supplies are within reach and set up in a well-lit area so you can see all the details.Apply adhesive generously to your selected faux greenery. Use a paintbrush for even, detailed coverage, especially around leaf edges and branch tips where natural frost tends to gather. Spray adhesive can speed things up for larger branches or garlands you hang along banisters.Sprinkle the faux frost mixture (Epsom salts or glitter) evenly to add texture. Hold the greenery over a tray, then gently sprinkle your chosen frost material, rotating the branch for a natural, random look that mimics real snowflakes before dipping.Let pieces dry thoroughly, then shake off any excess. Allow at least 1–2 hours, longer if you’ve used thicker glue. Hold your frosted item upside down and gently tap to remove loose crystals, ensuring the result looks like authentic, crystalized greenery and not overly clumped.Style directly into your holiday decor arrangements. Simply lift the dowel or branch and integrate into wreaths, centerpieces, or garlands for an instant wintry ambiance—perfect for christmas decorations to bring your space to life.Table: DIY Faux Frost Greenery Tools and AlternativesRequired ItemWhy It WorksPossible SubstitutesEpsom saltsCreates icy, crystalline effectCoarse sugar, clear glitterClear glueAdheres frost securelyMod Podge, spray adhesiveFaux greeneryRealistic baseReal branches (with caution)PaintbrushPrecise applicationFoam brush, fingersExpert Insight: Why DIY Faux Frost Outshines Store-Bought OptionsAccording to home decor specialists, nothing compares to the handcrafted touch in diy faux frost greenery. Not only does it look more natural and integrate seamlessly with your unique holiday decor, but it also empowers you to add texture, dial up (or down) the shimmer, and experiment with sparkle intensity to fit your style. Plus, making your own pieces is a perfect way to create lasting memories and traditions with family and friends, and offers the satisfaction of knowing you crafted something truly your own. Bonus: You’re able to control the safety and quality of materials, avoiding questionable chemicals sometimes found in mass-produced decorations. Whether you lean toward subtle, snowy touches or crave full-on, glitzy glamour, this technique lets you custom-blend results tailored precisely to your taste and home aesthetic."Handmade diy faux frost greenery not only looks more authentic, but allows you to tailor texture and shimmer intensity exactly how you want it." – Amanda Lee, Interior Styling SpecialistChoosing the Best Greenery for DIY Faux Frost ProjectsPopular faux plants: pine, eucalyptus, boxwoodHow to select greenery for maximum realism and longevityWhile pine branches may be the classic choice for frosted holiday decor, don’t overlook other faux foliage options such as eucalyptus or boxwood. Each plant offers unique shapes and leaf textures, allowing you to create arrangements that pop with visual contrast and realism. When selecting greenery for diy faux frost greenery projects, prioritize branches with sturdy stems and flexible leaves, as these hold adhesive and salts or glitter more effectively. Realistic detailing in faux greenery, such as subtle green variations and natural leaf veining, enhances the final frosted look, making it nearly impossible to distinguish from nature’s own handiwork—from garlands you hang on staircases to ornaments or hanging decor for your front door. Opt for high-quality faux materials to ensure your projects last from year to year, minimizing the need for frequent replacements and reducing waste compared to disposable, single-season decorations.Watch our short, step-by-step video for a clear visual guide to crafting your own diy faux frost greenery—supplies, technique, and expert styling tips included. Bright holiday setting and engaging pacing make this the perfect visual companion!Creative Ways to Use DIY Faux Frost Greenery in Holiday DecorWreaths and swags for doors and mantelsCenterpieces and tabletop arrangementsFestive garlands for staircases and banistersOutdoor planters for a wintry touchThe applications for diy faux frost greenery in holiday decor are truly endless. A frosted pine wreath or festive swag can instantly transform your front door or living room mantel into a winter wonderland. For a cozy dining table, design lush, frosted centerpieces that glimmer in candlelight, making every meal feel like a special occasion. Draping frosted garlands on banisters or open shelving adds elegant, snowy charm, especially when paired with metallic ornaments or soft twinkling lights. Don’t hesitate to extend your creativity outdoors: Arrange frosted branches in porch planters or along windowsills for curb appeal that’s both sophisticated and inviting. Each project presents an opportunity to showcase your personal style and spread festive cheer—all while controlling the color, texture, and placement of your faux frost.Safety Tips When Crafting DIY Faux Frost GreeneryMake sure to use non-toxic ingredients for indoor use.Work in a ventilated space if using spray adhesives.Keep faux frost greenery away from open flames or heat sources.Safety matters, especially when creating decorations that may be touched by children and pets or displayed near heat. Choose adhesive products and “frost” ingredients labeled as non-toxic to reduce the risk of accidental ingestion or allergic reactions. Always craft in a well-ventilated room when using spray adhesives, and consider wearing gloves to protect your skin from irritation. For households with small kids, avoid areas where food will be served and keep diy faux frost greenery out of reach to avoid accidentally ingesting any materials. Finally, since many adhesives and decorative elements are flammable, never position your frosted creations near candles, open flames, or heating vents—this care using these frosted pieces keeps the season safe and festive for everyone.How to Create Fake Frost?Creating fake frost is simple with the right ingredients: Epsom salts or coarse glitter for natural sparkle, plus clear-drying glue or spray adhesive for secure, even coverage. Just brush adhesive over your chosen greenery, sprinkle on your sparkling frost, and allow it to dry before using. For extra realism, blend a sprinkle of clear glitter with your salts or add tiny hints of light blue dye to mimic the blue glint of real ice—just remember: a little goes a long way. This technique is quick and easy and doesn’t require hot water, a borax solution, or any complicated steps—perfect for anyone from beginners to seasoned crafters looking to make the frost in under an hour.How to Frost Artificial Leaves?For the most lifelike, frosted effect on artificial leaves, use a paintbrush to coat edges and surfaces with a thin layer of clear glue or Mod Podge. While still sticky, softly dust with Epsom salts or a mixture of clear glitter, focusing on spots where snowflakes or frost would naturally form. Gently shake to remove extra material after drying. This is especially effective for eucalyptus and boxwood, where the texture and contour allow you to add texture and shimmer that’s easily customized, whether you prefer a heavy snowy look, or a subtle, glistening accent that will eventually fall gracefully for cleanup at season’s end.How to Make Icy Branches?Transforming branches into icy decor is a fun and accessible holiday project. For faux or real branches, lightly brush clear glue along each twig, making sure to cover the tips where frost typically collects. Generously sprinkle Epsom salts or clear glitter for a crystalized, frosty look. Let dry completely, then tap off the excess. For added dimension, try temporarily dipping your branches into a borax solution—this will form larger, striking crystals that catch light for true wintry magic. Whether you want to shape small twigs into standalone ornaments or incorporate icy branches into large centerpieces for your holiday table, this method offers the perfect way to create festive, custom decor.How to Make Fake Snow for Outdoor Decorations?Creating safe, realistic fake snow for outdoor use calls for durability. Mix Epsom salts and coarse sugar—this combination withstands moisture and can be easily cleaned up. Adhere the mixture to faux greenery or outdoor-safe branches with a robust outdoor adhesive, ensuring it can handle the elements. If you need bulk quantity for large displays or planters, look for biodegradable snow alternatives at craft stores. Always keep away from real fruit or greenery where children and pets might have access, and avoid placing near entryways where slipping could occur. The results? Outdoor displays with wintry elegance and minimal environmental impact.FAQs: DIY Faux Frost GreeneryWill faux frost greenery last year to year?Yes! If stored in a cool, dry place and handled gently, most faux frost decorations will last multiple seasons. To prolong life, store each piece in a protective container to avoid crushing and periodically refresh any frost or glitter that might wear off.Are the materials pet and child safe?When you use non-toxic glue and salts or craft glitter, the method is generally safe for homes with children and pets. However, always display out of reach and avoid using in areas where food will be served. Supervise any craft activities with younger kids.Can I use this method on real plants?While the focus is on faux greenery, you can frost real branches if you avoid harsh adhesives that could damage the plant. Real branches are best for short-term display only, as organic material will eventually fall or degrade.What is the best base for diy faux frost greenery?Durably constructed faux greenery—especially pine, eucalyptus, or boxwood—offers the best base for longevity and realism. Choose stems with varied shades and natural veining for the most life-like results.Learn what to avoid! See the five most common mistakes crafters make with faux frost—from overapplication to incorrect glue use—and how to fix them for flawless results.Key Takeaways: Mastering the DIY Faux Frost Greenery TrendDIY faux frost greenery is simple, affordable, and fully customizable.The two-ingredient trick delivers stunning, realistic results.With the right materials, you can transform any holiday decor with effortless elegance.Elevate Your Holiday Decor—Share Your DIY Faux Frost Greenery CreationsReady to transform your home with festive sparkle and handmade charm? Try out these tips, and don’t forget to share your diy faux frost greenery ideas and results on social media to inspire fellow holiday decorators.To enhance your DIY faux frost greenery projects, consider exploring the following resources:“This DIY Faux Frost Is the Easiest Holiday Decor Hack (It’s Just Two Ingredients!)” offers a straightforward method using Borax to create realistic frosted effects on various decorations. (shopping.yahoo.com)“DIY Frosted Greenery Floral Arrangement” provides a step-by-step guide to crafting elegant frosted floral displays, complete with a video tutorial for visual learners. (bloomsbythebox.com)

11.21.2025

Prepare Your Home for the Holidays: Essential Tips for Hosts

Update Getting Your Home Ready for Holiday Gatherings The holiday season is fast approaching, bringing with it a flurry of guests, cooking, and the much-anticipated festivities. For homeowners, this period can bring a mix of excitement and stress. To help alleviate that stress, it's crucial to prepare your home for entertaining. In the recent episode of the Money Pit podcast, Leslie Segretti and Jim Kenzie delve into effective strategies for prepping your kitchen and dining areas while ensuring your space is warm and welcoming for guests.In #2566 – Holiday Kitchen Prep | Refresh Your Dining Room | Making Space for Guests | Winterize Pipes, the discussion dives into essential strategies for preparing your home for the bustling holiday season. Sprucing Up the Kitchen for Holiday Cooking Your kitchen often becomes the hub of holiday activity, so it's important to keep it organized and functional. Start by deep cleaning your kitchen appliances, ensuring they are ready for the hustle. A clean oven before Thanksgiving can save you last-minute panic. Clear out expired items from your fridge and pantry, restock essential ingredients like spices and baking supplies, and reorganize for easy access during meal prep. Consider designating a 'holiday zone' for cooking tools and serving dishes. This simple act can streamline your cooking experience, allowing you to efficiently whip up your favorite meals without rummaging through clutter. By being proactive about kitchen organization, you set yourself up for success and enjoyment during the busy holiday season. Transforming Your Dining Room into a Festive Gathering Space The dining room often serves as the focal point—whether for Thanksgiving dinner or casual gatherings. To refresh this space quickly and affordably, start with the lighting. Warm, cozy lighting can transform the atmosphere; consider adding battery-operated puck lights or stylish floor lamps. A simple centerpiece, like a bowl of seasonal fruits or a cluster of mini pumpkins, can also add a festive touch without the need for expensive decorations. Also, don’t overlook repairs and updates. Tighten loose chairs, address squeaks, and perhaps reupholster or cover old dining chairs to breathe new life into them. These minor adjustments can instantly enhance your dining experience, making guests feel welcomed and comfortable. Creating Cozy Guest Spaces Without a Spare Room If you’re short on guest rooms, you can still make visitors feel at home. With a little creativity, even a corner of your living room can be transformed into a cozy sleeping space. Consider using a high-quality air mattress or a sleeper sofa to provide comfort. Adding a folding screen or curtain can create a sense of privacy that guests will appreciate. Ensure guests have bedside essentials like a small side table, a charging station for devices, and water. Adding decorative touches like cozy throws or holiday-themed decorations can enhance their experience, demonstrating your hospitality and thoughtfulness. Preparing Your Exterior for Winter and Holiday Guests As guests arrive, the exterior of your home is the first impression. Spend some time sprucing up your entryway. Clean your front door, add a fresh coat of paint if necessary, and consider seasonal decorations that welcome guests in style. Ensure outdoor areas are well-lit and safe; fix any cracks in walkways and check outdoor faucets to prevent winter freeze damage. These exterior preparations not only improve curb appeal but also contribute to a warm welcome that sets the tone for the entire holiday experience. By taking these steps, you can ease the stress of the holiday season while making your home an inviting and functional space. With careful preparation of your kitchen, dining room, and guest areas, you can focus on what really matters—spending quality time with friends and family during this festive time. So, roll up your sleeves, start planning, and turn your home into the perfect holiday haven! If you're unsure where to begin with your preparations, consider reaching out to local home improvement experts. They can provide additional insights tailored to your specific needs, ensuring your holiday preparations go off without a hitch.

11.14.2025

Last-Minute Halloween Décor Ideas: Affordable Yard Frights to Impress

Update Transform Your Home with Last-Minute Halloween Décor Ideas If Halloween seems to have crept up on you this year, fear not! With a few household items and a little creativity, it's still possible to produce terrifyingly delightful decorations that impress trick-or-treaters and neighbors alike.In #2565 – Last-Minute Halloween Décor, the discussion dives into budget-friendly decoration techniques and spooky lighting ideas, exploring key insights that sparked deeper analysis on our end. Spooktacular Decoration Hacks Using Everyday Items One easy yet frighteningly effective method involves making floating ghosts. All you need are cheesecloth and balloons. Simply drape the cheesecloth over a balloon, spray it with starch or diluted glue, and let it dry. Once completed, pop the balloon, and you have a ghostly form to hang from branches or doorways—add black felt eyes for an extra eerie touch! Another tried-and-true Halloween favorite is the homemade spider and spiderwebs. Cut black trash bags into large web shapes and stick them to your windows or porch railings. To make it even spookier, create a spider using rolled socks or newspapers wrapped in black duct tape. This guarantees you’ll have an eye-catching display without resorting to expensive store-bought options. Lighting to Set the Mood The power of lighting can elevate any spooky décor. Create glowing eyes in bushes using toilet paper rolls lined with colored cellophane and equipped with small battery-operated lights. These simple additions can transform your yard into a chilling nighttime wonderland, providing just the right amount of creepiness. Want to dazzle your visitors? Consider using glow sticks or LED tea lights in mason jars or painted containers. Wrap them in gauze for a mummy effect, which can illuminate your pathway and guide trick-or-treaters. Post-Halloween Cleanup Made Easy Once Halloween is over, it’s time to pack it all away. But don't rush—your decorations deserve proper care. Start by sorting the decorations into categories, such as indoor and outdoor. Lights should be wrapped carefully around cardboard to prevent tangling. When it comes to pumpkins, consider composting if they’re rotten, while uncut ones can serve as natural décor for Thanksgiving. For inflatable decorations, ensure they are completely dry before storing to avoid mildew. Batteries should be removed from any decorations that light up to extend their lifespan. Utilizing clear bins with labels can help make future decorating swift and effortless. DIY Projects to Engage the Family Beyond just decorating, these DIY projects offer a great way for families to bond while getting into the Halloween spirit. They can also provide opportunities to teach younger members about crafting and decorating on a budget. In the throes of spooky season, getting crafty can be as important as outfitting your home to look haunted. By using what you have on hand mixed with a little imagination, you can create unforgettable Halloween magic in virtually no time. As fall gives way to winter, tackle the cleanup and prepare your home for the holidays. Halloween may be wrapping up, but your décor lifestyle doesn’t have to end! This time of year is about creativity, family participation, and having a little fun along the way. Packing Up for Next Year: A Smart Move Remember, with just a few smart tricks and a seasonal mindset, you can make future Halloweens even more efficient and enjoyable. Take these decorative tips to heart and enjoy a frightfully fun Halloween this year!

Terms of Service

Privacy Policy

Core Modal Title

Sorry, no results found

You Might Find These Articles Interesting

T
Please Check Your Email
We Will Be Following Up Shortly
*
*
*