Add Row
Add Element
American Yard and Home Logo
update
American Yard & Home
American Yard & Home Logo
update
Add Element
  • Home
  • Categories
    • Ask an Expert
    • DIY Projects & Repairs
    • Featured Businesses
    • Home Renovation & Remodeling
    • Interior Design & Styling
    • Landscaping & Curb Appeal
    • Outdoor Living
    • Smart Home & Tech
July 30.2025
3 Minutes Read

Unleash Your Garden's Potential with 'Hopi Red Dye' Amaranth

Vibrant Hopi Red Dye amaranth with burgundy leaves in sunlight.

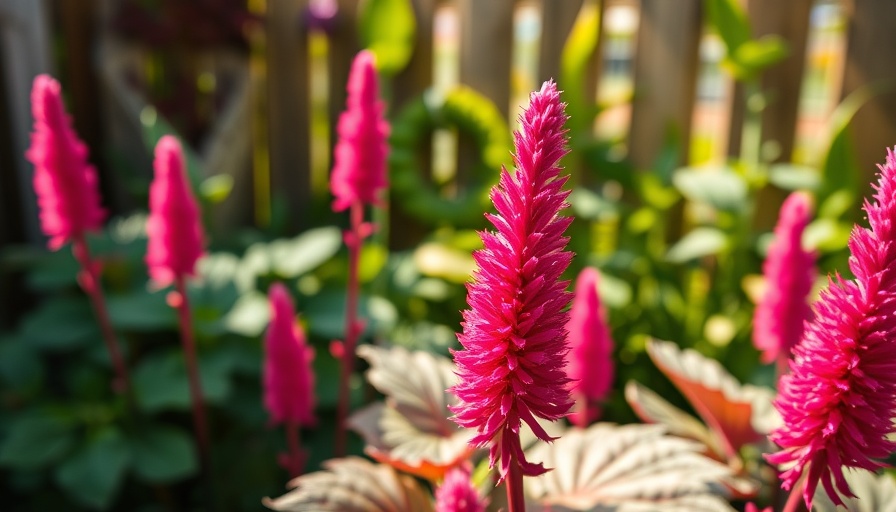
Discover the Allure of 'Hopi Red Dye' Amaranth

For gardening enthusiasts, few plants boast the rich history and versatile uses of the 'Hopi Red Dye' amaranth. This heirloom variety is not just an eye-catching addition to your garden; it also connects us to the heritage of the Hopi Tribe, which has cultivated this stunning annual for generations. With vibrant maroon leaves and striking red flower spikes, 'Hopi Red Dye' makes a statement in any outdoor space.

The Unique Benefits of Growing Amaranth

Amaranth is a remarkable plant that serves multiple purposes. Beyond its ornamental beauty, the seeds and leaves are edible and can be incorporated into various dishes. As a high-protein grain, amaranth is an excellent choice for those seeking wholesome, nutritious food sources. The vibrant flower spikes can be dried and transformed into a natural dye, lending both aesthetic appeal and practical uses to this garden favorite.

Ideal Growing Conditions for 'Hopi Red Dye' Amaranth

This hardy plant thrives in full sun and prefers well-drained soil, making it ideal for various backyard setups. Whether you're contemplating a backyard makeover or simply looking to beautify your existing landscape, consider adding 'Hopi Red Dye' amaranth to your garden planning tips. Not only is it low maintenance, but its adaptability also enables it to flourish alongside vegetables and herbs, enhancing the overall productivity of your garden.

Step-by-Step Guide to Plant 'Hopi Red Dye' Amaranth

  • Site Preparation: Choose a sunny location in your garden, ensuring the soil is well-drained. Amend with compost to enrich nutrients.
  • Sowing Seeds: Seeds can be sown directly in garden beds after the last frost, or started indoors about six weeks before transplanting outside.
  • Watering Needs: Regular watering is essential, especially during dry spells. Ensure the soil remains damp but not waterlogged.
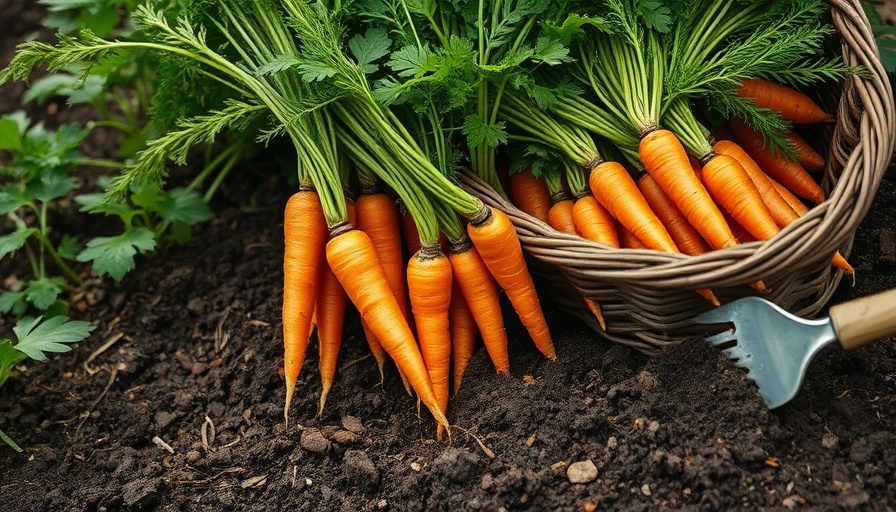
  • Harvesting: Leaves can be harvested as needed, while the flower spikes can be collected once fully matured for dyeing or decoration.

Companion Planting with 'Hopi Red Dye' Amaranth

Integrating 'Hopi Red Dye' amaranth into your garden not only enhances visual appeal but can also benefit neighboring plants. It pairs beautifully with other colorful varieties, creating dynamic textures and visual interest in flower beds. Consider incorporating these companion plants:

  • Basil: The aromatic herbs can thrive alongside amaranth, deterring pests and enhancing your culinary experiences.
  • Tomatoes: Both plants appreciate similar growing conditions, making them perfect companions in your garden layout.
  • Marigolds: These vibrant flowers can deter bugs and encourage pollination.

Inspiring People Behind the 'Hopi Red Dye' Amaranth

Jerad Bryant, a native plant grower, has dedicated his work to educating others on the value of heirloom crops and their role in local culture. By cultivating 'Hopi Red Dye' amaranth, he not only contributes to biodiversity but also revives traditional methods of gardening and dye-making.

Actionable Tips to Enhance Your Garden

This season, make the most of your outdoor living space by planting 'Hopi Red Dye' amaranth. Incorporate ideas for a fire pit or seasonal planting guides that complement the rich textures and colors of your garden. As you cultivate this unique plant, consider the ecological impact of your gardening practices. Engage in eco-friendly yard care strategies by utilizing natural fertilizers and organic pest control methods.

Whether you're looking to create a harmonious outdoor kitchen or simply desire beautiful flower bed layouts, 'Hopi Red Dye' amaranth can enhance your gardening experience while connecting you to nature and community. As you grow this special variety, you not only cultivate a stunning plant but also partake in the journey of preserving cultural heritage.

Outdoor Living

Write A Comment

*
*
Related Posts All Posts
07.31.2025

Unlock the Secrets to Making Cut Dahlia Flowers Last Longer

Update Preserving the Beauty of Dahlias: An Overview Dahlias are a favorite among gardening enthusiasts for their vibrant colors and stunning forms. However, their shorter vase life presents a challenge. This article provides vital insights and tips on how to extend the longevity of cut dahlia flowers. By implementing expert advice from seasoned flower gardeners, you can enhance your flower arrangements and enjoy their beauty longer. Harvesting at the Right Time: The Secret to Freshness The timing of your dahlia harvest can make a world of difference. The best time to cut your dahlias is early in the morning, just after the dew has dried but before the sun has fully risen. At this time, the flowers are most hydrated and robust. When freshly cut while in peak condition, your dahlias can flourish in a vase for up to a week! If morning isn’t an option, consider cutting them in the evening once the heat has subsided, allowing the flowers to perk up after a hot day. Remember, collecting your blooms during the peak hours ensures they have the best chance to thrive in their new floral home. Choosing the Right Blooms: Fully Open Vs. Buds Unlike some flowers, dahlias must be fully open to truly shine in arrangements. Harvesting buds leads to a lackluster display, as they won’t flourish like their open counterparts. Opt for flowers that are at full bloom with vibrant colors and visible textures—the reward will be an eye-catching nature-inspired centerpiece. Watering Wisely: The Role of Hydration After cutting your dahlias, immediately place them in water. But not just any water—fresh, clean water. Keep the stems submerged while you prepare your vase, and be sure to cut your stem ends at a 45-degree angle. This technique encourages better water absorption, which is crucial for keeping your flowers lively and blooming. Preventing Bacteria: The Importance of Cleanliness Keeping your vase clean is essential for maintaining dahlia freshness. Remove any lower leaves on the stem that may end up submerged in the water, as they can promote bacterial growth. Regularly change the water every few days and clean the vase to prevent residual bacteria from sapping the life from your flowers. Adding Sugar and Acids: A Recipe for Longevity Some florists swear by adding sugar or a floral preservative to their flower water to prolong freshness. A sugar solution mimics the plant's natural nutrients, aiding in hydration and promoting Brightness. A few teaspoons mixed in can do wonders for your dahlia display. Additionally, a drop of white vinegar can help balance the pH and keep the water clear of bacteria. However, it's crucial not to overdo it—too much can do more harm than good. Bonus Care Tips for Cut Flowers Beyond the basic upkeep of your dahlias, implementing a few additional care strategies can lead to even longer vase life. Try adding a few drops of bleach to the water to inhibit any bacterial growth, ensuring your dahlias stay fresh longer. Additionally, avoid placing your arrangement in direct sunlight or near heat sources—it seems simple, but this common mistake can shorten their lifespan. Creating a Dahlia Display in Your Home In addition to caring for your cut dahlias, consider incorporating them into your home decor. Use them as a statement piece on a dining table or as a bright addition to your kitchen countertop. Their natural hues can transform the ambiance of a room, making flowers an invaluable addition to your home. In conclusion, embracing the tips and techniques shared here can help you keep your dahlia blooms looking stunning and vibrant for days. With their rich colors and unique shapes, dahlias are truly a gift from nature. Remember, investing a little time in their care leads to flowering rewards. To create a beautiful home filled with splendid blooms, start implementing these tips today!

07.29.2025

Unlock the Secrets of Flavorful Herbs by Pinching Off Blooms Now!

Update Why Pinching Off Herb Blooms is Essential for Your Garden If you want the best-tasting herbs growing in your garden, developing the habit of pinching off blooms is a vital practice. Gardening expert Melissa Strauss emphasizes that not only does this technique enhance flavor, but it also contributes to healthier plant growth. From aesthetic appeal to culinary excellence, maintaining your herbs properly can elevate your gardening experience. About Herbs: Characteristics and Care Most herbs flourish in conditions that include full sun and well-drained soil, whether planted in raised beds, containers, or directly in the ground to create a quaint cottage garden. These plants not only provide a feast for the palate but also attract beneficial pollinators when they bloom. However, allowing herbs to flower has its downsides. While the blooms benefit the bees, they can drastically alter the herb's flavor for the worse. Therefore, pinching off blooms is key to preserving the quality of your harvest. What Happens When You Pinch Off Blooms? The immediate advantage of pinching your herbs' blooms is that it encourages a bushier, more vigorous plant. When you pinch the tips of the stems, the energy shifts from growing upwards to forming new branches at the lower nodes. This branching leads to more usable leaves and results in stronger, more resilient plants. You’ll find that your herbs will withstand adverse weather conditions better, which is crucial for outdoor gardening. Understanding Plant Energy and Bolting As intuitive as it may seem, understanding what it means for herbs to bolt is important for every gardener. When herbs flower, or 'bolt', they divert a considerable amount of energy into producing those blossoms and, eventually, seeds. This consumption hampers leaf development, often resulting in bitter, tough foliage, especially in sensitive herbs like basil. By pinching off the flowers early, you're guiding your plant to focus on foliage, ultimately ensuring a more flavorful herb for your culinary endeavors. The Benefits of Maintaining Your Herb Garden In the realm of backyard makeover ideas, an herb garden holds a special place. Not only does it offer fresh ingredients for daily cooking, but enhancing your garden with fragrant herbs can transform the visual aspect of your outdoor space. Imagine stepping into your garden and being enveloped in the aromatic scents of basil, thyme, and mint. Pairing herbs will make every culinary project exciting and multifaceted. Don’t just plant—plan! Use garden planning tips to create a space where all your plants thrive. Designing Your Outdoor Space Around Herbs For those committed to fine-tuning their gardens, consider incorporating your herbs into outdoor kitchen designs. Fresh herbs are a barometer of seasonal change, readily available for grilling, marinades, and salads. Plan your container gardening with seasonal planting guides to ensure that your herb selection is always vibrant and fresh. Adding landscape lighting ideas can also enhance your outdoor ambiance, allowing you to enjoy your herb-laden garden even as the sun sets. Actionable Tips for Optimal Herb Growth Now, let's look at practical insights that can help you nurture your herbs effectively: Pinch off blooms regularly throughout the growing season. Regularly harvest leaves to encourage new growth. Consider mulching tips to retain moisture and nutrients. Use raised garden beds for improved drainage and organization. For extra privacy and aesthetics, integrate your garden with backyard privacy ideas. Conclusion: Cultivating a Flavorful Future When your herbs are healthy, not only does your culinary output improve, but your backyard becomes an inviting place for family and friends. Investing time in understanding how to best care for your herbs can return a lush bounty in flavor and visual appeal. So the next time you step into your garden, remember: a few tiny pinches can lead to a bigger, more flavorful harvest. Embrace the art of herb cultivation by incorporating these insightful strategies into your gardening regimen. By nurturing your plants and understanding their needs, you can create an outdoor oasis where taste and beauty converge!

07.29.2025

Unlock Sweetness: When to Plant Carrots for a Delicious Fall Harvest

Update Why Fall Is the Best Time to Grow CarrotsAs the scorching summer sun gives way to cool autumn breezes, savvy gardeners know it's not just time for pumpkin spice lattes; it’s also the perfect opportunity to plant carrots. The cooler weather uniquely contributes to the enhanced sweetness and texture of fall carrots, making them tender and flavorful. Unlike their spring counterparts, these roots thrive as temperatures drop, turning starch into sugar and giving your homegrown harvest a delicious edge over store-bought options.Perfect Timing for Maximum HarvestSuccessful carrot cultivation hinges on timing. To cultivate those sought-after fall carrots, gardeners must consider their local climate and the first frost date. Carrots typically take about 70 days from seed to harvest, but earlier-maturing varieties, like the popular ‘Little Finger,’ can be ready in just 60 days.Start with your average first frost date—an essential marker in your gardening calendar. For instance, if you know your region typically experiences its first frost in mid-October, you’ll want to plant your carrot seeds by early August at the very latest. To be on the safe side, add a buffer of about two weeks to accommodate slower growth as the season begins to cool.Regional Planting RecommendationsDifferent regions have varying climates, which can significantly influence the timing of your carrot planting. A general rule of thumb is to work backwards from your localized frost date—but this can be adjusted based on the anticipated growing conditions. For instance, northern climates may require more planning and earlier planting dates due to their shorter growing seasons.Benefits of Leaving Carrots in the GroundOne of the remarkable features of fall carrot gardening is the ability to leave carrots in the ground during winter. In many climates, once winter frost arrives, it doesn't harm the carrots as much as one might think. In fact, as temperatures drop, many pathogens become less active, leading to healthier root crops that can be harvested as needed throughout the winter months. This removes the rush to process the entire harvest at once, promising fresh flavors all winter long.Enhancing Your Fall Garden ExperienceWant to elevate your gardening game even further? Pair your fall carrots with eco-friendly yard care and low-maintenance landscaping techniques that support a thriving garden without overwhelming commitment. Consider integrating paver patio designs or adding garden planning tips that maximize your space. With these features, your yard can transform into an inviting outdoor kitchen space, perfect for those cozy fall evenings.Conclusion: Are You Ready to Get Your Hands Dirty?Now that you know the ins and outs of planting carrots for a fall harvest, it's time to roll up your sleeves and dig in! Whether you're new to gardening or a seasoned pro, the joy of harvesting sweet, crunchy carrots during the colder months awaits you. So grab your seeds and start planning; your homegrown feast is just a few weeks away!

Terms of Service

Privacy Policy

Core Modal Title

Sorry, no results found

You Might Find These Articles Interesting

T
Please Check Your Email
We Will Be Following Up Shortly
*
*
*