Add Row
Add Element
American Yard and Home Logo
update
American Yard & Home
American Yard & Home Logo
update
Add Element
  • Home
  • Categories
    • Ask an Expert
    • DIY Projects & Repairs
    • Featured Businesses
    • Home Renovation & Remodeling
    • Interior Design & Styling
    • Landscaping & Curb Appeal
    • Outdoor Living
    • Smart Home & Tech
August 08.2025
3 Minutes Read

Why August Is the Best Month for Exterior Painting and Home Repairs

Podcast ad for exterior painting tips, best month for exterior painting.

August: The Optimal Time for Exterior Painting

As the summer sun begins to dip, homeowners often think about outdoor projects before the cooler fall weather sets in. One of the most rewarding DIY projects you can undertake is painting the exterior of your home. August, in particular, provides ideal conditions for achieving a long-lasting paint job. The key lies in rates of humidity and temperature, both of which can significantly influence the outcome of your work.

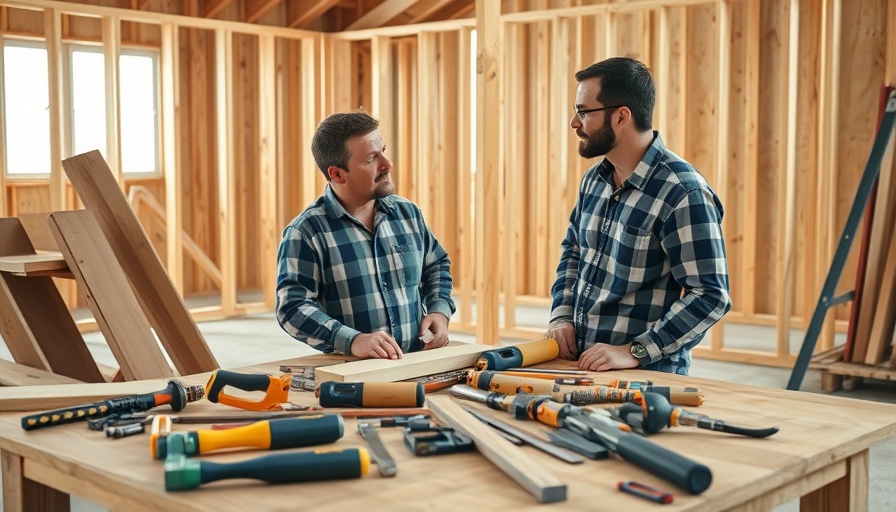
In #2540 – Exterior Painting Like a Pro | Stop Roof Leaks Before They Start | Water Heater Replacement, the discussion dives into essential home projects for this summer, exploring key insights that sparked deeper analysis on our end.

Why Timing Matters in Home Renovation

During late summer, average temperatures hover between 70°F and 85°F, maximizing the chances that the paint will cure perfectly—not too hot and certainly not too cold. This is crucial, as paint requires specific temperatures to fully adhere and dry without cracking or bubbling. Hence, if painting has been on your summer to-do list, now is the perfect time to roll up your sleeves.

Preparation: The Secret to Success

Every successful exterior painting job begins with preparation. Start by cleaning the surface of your home to remove dirt, mildew, and old, flaking paint. A gentle power wash often does the trick. Next, opting for a primer can significantly improve the durability of your paint's finish while enhancing its vibrancy. Choose a product that fits your specific exterior materials—like 100% acrylic latex paint for wood and vinyl surfaces—for optimal results.

Staying Ahead of Home Repairs: The Importance of Roof Maintenance

In home improvement discussions, many homeowners neglect the health of their roofs until they appear in dire need of attention. "A stitch in time saves nine," is especially applicable here. Regular roof check-ups can help catch small issues before they become costly repairs. Companies like RoofMax offer valuable roof tune-up services that can help maintain your roof's integrity while saving you money long-term.

Water Heater Woes: When to Act

Water heaters are often taken for granted—until things go wrong. If your system is over ten years old or showing signs like rust-colored water or unusual noises, it might be time for a replacement. There are energy-efficient options available today, including tankless models that can give you hot water on demand, potentially saving you money in the long run. Regular maintenance, such as flushing the tank annually, can extend the life of existing units.

Take Action: Embrace the Season's Opportunities

With the summer months winding down, this is an opportune moment to tackle those home improvement projects. Whether you're finally getting around to painting your house, checking in on your roof, or considering a water heater upgrade, staying proactive not only elevates your home's appearance and functionality but can also yield significant long-term savings.

Don't wait for emergencies to prompt action; tackle these issues now and enjoy a fresh and functional living environment. Each step, no matter how small, contributes immensely to the maintenance and beauty of your home.

DIY Projects & Repairs

Write A Comment

*
*
Related Posts All Posts
08.04.2025

How Modern Framing Tools Revolutionize Home Renovations

Update The Evolution of Framing Tools: A Look Back In the world of home improvement, there's nothing quite as satisfying as putting up a wall. As seen in A Personal History of Framing Tools, the art of framing has transformed significantly over the years. From using traditional wooden mallets and pegs to modern pneumatic framing guns, the industry has witnessed remarkable innovations that enhance both efficiency and accuracy. For homeowners embarking on renovation projects, understanding these tools is essential to improve project outcomes.In A Personal History of Framing Tools, the discussion dives into the evolution and impact of modern framing tools, exploring key insights that sparked deeper analysis on our end. Why Choose Modern Tools for Your DIY Projects? Homeowners might wonder why they should invest in modern framing tools. First and foremost, the speed and efficiency offered by pneumatic and battery-powered guns allow for quick completion of tasks. For example, in the video, it's illustrated how much faster framing can be when using air-powered tools as opposed to manual hammering techniques, which can be time-consuming and laborious. Adjustability and Versatility: Key Features Modern framing tools are not only faster; they also come equipped with features that enhance usability. Adjustable depth settings allow users to control how deeply a nail goes into the material, a valuable feature for different types of projects. This flexibility ensures that whether you’re building a shed or framing a room, your work can be precise and tailored to the specific needs of the job. Embracing Technology: A Step Towards Efficiency The development of battery-operated and gas-powered tools has revolutionized the framing process. These advancements mean that homeowners no longer need to rely solely on electrical cords or air compressors, making tools more portable and accessible for small projects or tight spaces. Embracing technological improvements can significantly enhance your DIY capabilities. Common Misconceptions About Framing Tools Despite the clear advancements, some homeowners remain hesitant to adopt modern tools due to misconceptions. One common myth is that such tools are only for professionals. In reality, many contemporary framing tools are designed with the DIY community in mind, allowing anyone to achieve professional-quality results with a bit of practice. Your Next Steps in Home Improvement Armed with knowledge of modern framing tools, homeowners can feel more confident taking on renovation projects. Whether framing a new room addition or updating existing ones, integrating these tools can lead to not only faster completion but also a more polished outcome. It's essential to explore the various tools available in stores or online, considering factors such as balance, weight, and ease of use before making a purchase. Educating oneself about the best practices for tool usage can also add to your skill set, ensuring that each project is a successful endeavor.

08.03.2025

Innovative Underbed Storage Drawer: A Step-By-Step DIY Guide

Update Maximizing Space: The Benefits of Underbed Storage As many homeowners know, finding innovative ways to maximize space is essential for clutter-free living. Underbed storage solutions have gained popularity for their ability to efficiently utilize often-neglected areas. Creating an underbed storage drawer, like the one showcased in the video, can not only help you organize your belongings but also create a tidier living space.In 'How to Make an Underbed Storage Drawer | House One | This Old House', the discussion dives into innovative storage solutions, exploring key insights that sparked deeper analysis on our end. Tools and Materials: What You Need to Get Started Before diving into your woodworking project, it’s essential to gather the right tools. For crafting an underbed storage drawer, you’ll need: 1x6 and 1x8 boards for the structure Plywood for the base Miter saw and circular saw for precise cuts A jig for drilling pocket holes Wood glue and screws for assembly With these materials on hand, you're ready to start building your drawer! A Step-by-Step Guide to Building Your Drawer Building the underbed storage drawer requires a few straightforward steps: Measure and cut your boards as directed by the provided cut list. Use a jig to drill pocket holes in the boards, ensuring you have secure joints. Assemble the box by attaching the back wall to the sidewalls using screws and glue. Create the drawer by attaching sides to the plywood bottom before securing the front. This hands-on approach not only empowers you with skills but also results in a functional and stylish underbed storage solution. Emotional Connection: The Joy of Creating a Personalized Space Beyond mere functionality, projects like this one provide a sense of accomplishment and personalization to your home. Crafting an item for your space allows you to tap into your creativity, providing both a practical benefit and a fulfilling experience. It also fosters a connection with your living environment, making it feel truly yours. Explore More DIY Projects If you're intrigued by the idea of building your own furniture and storage solutions, consider exploring more do-it-yourself projects. From organizing your garage to revamping your living room, This Old House offers a wealth of resources to inspire your next project. Creating a welcoming space for you and your family is within reach! To dive deeper into your home improvement journey, check out more videos and tutorials available at This Old House. Their wealth of information can turn your household dreaming into reality, making even novice DIYers feel confident in their creations.

07.29.2025

Automatic vs. Manual Pool Cleaners: Which One Is Right for You?

Update The Importance of Keeping Your Pool CleanFor any homeowner, maintaining a pool goes beyond aesthetics; it’s a commitment to ensuring the safety and enjoyment of all who swim in it. A clean pool shows off its inviting turquoise waters and protects valuable equipment from the damaging effects of debris accumulation. Skimming and emptying the filter is merely the surface of what it takes to keep your pool pristine. Caring for your pool, much like flossing for your teeth, requires a close-up approach. Any pool owner will testify that allowing a little grime to build up can lead to trouble, from cloudy water to costly repairs. Regular cleaning is crucial, serving not just the visual appeal but acting as a safeguard against invasive algae and unnecessary strain on your filtration system.What’s Your Cleaning Style? Understanding Manual Pool CleanersManual pool cleaners are likened to a classic home cleaning routine—think of vacuuming your carpet. While they provide hands-on control, these cleaners require time and effort. By attaching a vacuum head to a telescoping pole and connecting it to your pool's system, homeowners become directly involved in the cleaning process. This method might take 30 to 90 minutes, depending on factors like size and debris, and appeals to those who enjoy the ritual of upkeep. You control the cleaning, seeing immediate results and honing in on areas that could be neglected by automatic options, like the corners of steps.However, there is a caveat: if neglected for even a week, you may find your pool transformed into an obstacle course of dirt and debris. In short, manual cleaning can promote a sense of accomplishment but demands a significant investment of time and energy.Modern Solutions: The Rise of Automatic Pool CleanersOn the opposite spectrum lie the automatic pool cleaners, which offer convenience at the touch of a button. These devices, ranging from suction-side to robotic cleaners, have modernized pool care. Suction-side cleaners are the budget-friendly option, utilizing the pool's existing suction energy to capture dirt while moving around. However, this simpler form can sometimes drain your pump’s efficiency and is more prone to clogging.For those interested in advanced technology, robotic pool cleaners shine like the latest gadgets. Equipped with their motors and filters, these units require minimal supervision; once activated, they tackle everything from scrubbing the waterline to scaling walls—all while separate from the pool’s system.Comparative Efficiency and Bottom LineWhen pitting automatic against manual pool cleaners, several factors influence your decision. Budget plays a significant role; while manual cleaners are typically cheaper, the labor involved—and potential buildup—could lead to costly repairs down the line. Automatic cleaners, on the other hand, usually come at a higher up-front cost, but they often pay for themselves in the time and effort saved.Another critical consideration: energy efficiency. As homeowners look toward reducing their utility bills and carbon footprints, automatic options like robotic cleaners tend to consume less energy compared to the ongoing demands of running a pool pump during manual cleaning sessions. Making the Right Choice for Your PoolUltimately, the choice for pool cleaning—manual or automatic—boils down to lifestyle. If you relish hands-on tasks, enjoy direct control over cleaning, and spend adequate time at home, the manual route could complement your lifestyle. Alternatively, if you desire more leisure time to make the most of your pool investment, then an automatic cleaner might be more up your alley.Conclusion: Choosing the Best Fit for Your LifestyleIn today’s fast-paced world, the luxury of enjoying your pool shouldn’t be hindered by the burden of cleaning. By understanding the strengths and weaknesses of both manual and automatic pool cleanliness solutions, you can make an informed decision that aligns with your lifestyle and helps transform your pool into the serene oasis you envision.

Terms of Service

Privacy Policy

Core Modal Title

Sorry, no results found

You Might Find These Articles Interesting

T
Please Check Your Email
We Will Be Following Up Shortly
*
*
*