Add Row
Add Element
American Yard and Home Logo
update
American Yard & Home
American Yard & Home Logo
update
Add Element
  • Home
  • Categories
    • Ask an Expert
    • DIY Projects & Repairs
    • Featured Businesses
    • Home Renovation & Remodeling
    • Interior Design & Styling
    • Landscaping & Curb Appeal
    • Outdoor Living
    • Smart Home & Tech
July 04.2025
4 Minutes Read

Stay Safe This Hurricane Season: 7 Essential Preparation Steps

Suburban home with storm preparedness, highlighting hurricane preparedness tips for homeowners.

How to Stay Ahead This Hurricane Season: Preparation Strategies

As hurricane season commences, homeowners must take proactive measures to safeguard their homes and families. While it may seem daunting, being prepared for a storm doesn't have to be overwhelming. By implementing a few thoughtful strategies, you can significantly reduce risks and navigate the challenges that come your way more efficiently.

Make Technology Your Best Friend

Downloading a trusted weather app can be a game changer in preparation efforts. Apps such as the National Oceanic and Atmospheric Administration (NOAA) Live Weather Radar provide up-to-the-minute updates on hurricane activities and weather conditions. Your device becomes an essential lifeline for information during unpredictable weather events, allowing you to make quick decisions about your safety based on current data.

Additionally, don't underestimate the power of social media and local news apps that can keep you abreast of the latest emergency alerts and advisories from local authorities. Following the right channels can make all the difference when it comes to implementing timely actions—whether that means evacuating or sheltering in place.

Safeguarding Your Home Against the Elements

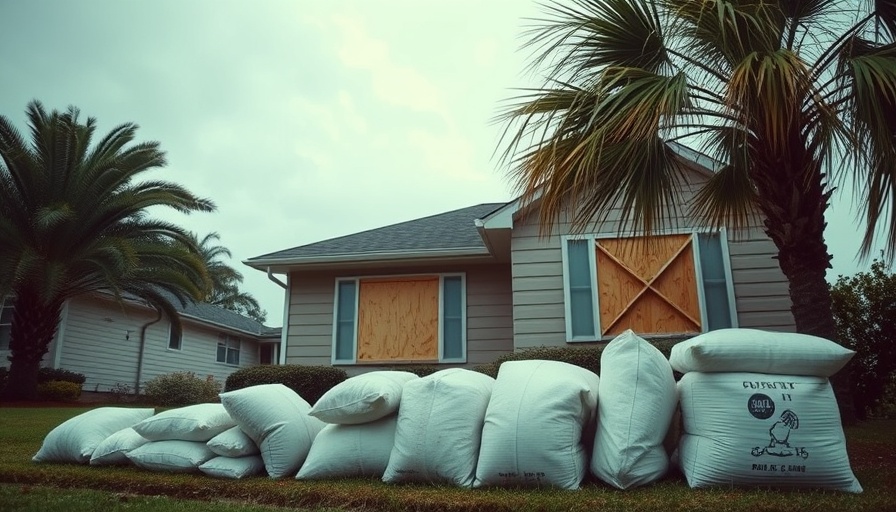
No home is completely hurricane-proof, but securing your property can drastically mitigate damage. If you haven’t installed permanent hurricane shutters, now is the time to acquire plywood and hardware for temporary boarding. Check state regulations for shutter installation, which may help you avoid fines.

Moreover, maintaining your landscape proves vital. Trees should be assessed for stability, and branches close to your home must be trimmed. Clearing your yard of any items that could become projectiles in high winds, like patio furniture, can also reduce potential hazards. Taking these steps not only protects your home but also eases the burden on emergency responders during chaos.

The Lifesaver: An Emergency Kit

Every household should have an emergency kit that contains crucial supplies. Refresh yours annually to include fresh water, non-perishable food, a first aid kit, flashlights with batteries, cell phone chargers, and necessary personal items. Resources like Ready.gov offer checklists to streamline building your kit.

If your area frequently loses power during storms, consider keeping a high-quality cooler with ice packs to store perishables. Make it a family project to restock and check this kit every season—this act not only prepares you for natural disasters but also fosters a sense of community solidarity.

Powering through Outages: Backup Solutions

Power outages are a common aftermath of hurricanes, and having a reliable backup power solution is indispensable. The Anker SOLIX F3000 Portable Power Station is an excellent option, featuring rapid recharging and compatibility with both AC and solar power sources. With a capacity of 3,072Wh, it keeps essential appliances running, such as refrigerators and medical devices, during prolonged outages.

By investing in a backup power supply, not only do you secure your power needs, but you also provide peace of mind for your family. This resource could make all the difference in ensuring your comfort and safety during a storm.

Community Awareness and Building Connections

While personal preparedness is essential, community awareness plays a crucial role in whether families can weather storms safely. Connect with neighbors to discuss collective preparedness measures or consider joining local community groups focused on disaster preparedness. Utilizing local resources can enhance your support system.

Engaging with your community also leads to opportunities for collaborative efforts such as neighborhood watch programs or workshops on emergency preparation. Sharing knowledge-and resources can empower others while fortifying the resilience of your area as a whole.

Making the Most of Local Expertise

Don’t hesitate to reach out to local professionals or emergency management agencies for advice tailored to your local landscape. Understanding the specific risks posed by hurricanes in your region—such as localized flooding or wind patterns—can help you make more informed decisions when preparing.

In tumultuous times, having access to expert advice can save lives and possessions. Engage with your local emergency services and keep their contact information readily accessible; they can provide real-time information on evacuations, shelters, and safety protocols.

Final Thoughts: Empower Yourself and Your Community

Preparation isn’t just about fortifying your home; it’s about building resilience within your community. Share these strategies with neighbors to ensure everyone is covered this hurricane season. The more proactive we are as individuals and as a community, the better prepared we will be to face whatever nature may throw our way.

Now is a crucial time to take action—don’t wait for the storm to start your preparations. Address these recommendations to foster a sense of security and awareness in your home and community.

DIY Projects & Repairs

Write A Comment

*
*
Related Posts All Posts
09.24.2025

Upgrade Your Garage Door: Smart, Stylish, and Quiet Options

Update Transforming Your Garage Door: A Functional and Stylish Upgrade Your garage door is more than a mere entrance; it’s the gateway to your home that sets the tone for your property's overall aesthetic. When it comes to home renovation tips, a well-planned upgrade to your garage door can enhance curb appeal, maintain energy efficiency, and add a touch of modern elegance to your home. Whether you're looking for functional improvements or design upgrades, small changes can lead to significant results. Design with Intent: The First Step to Curb Appeal Begin by treating the garage opening as a critical part of your home's facade. Instead of viewing it as just a utility space, embrace your creative side. Choose garage door finishes that harmonize with your home’s exterior or add an intentional contrasting touch that reflects your personal style. For example, sleek aluminum or steel panels offer a clean, modern look, while vertical slat designs evoke traditional carriage-style doors without the maintenance of wood. If sustainability is a concern, consider insulated sandwich panels that not only look great but also enhance energy efficiency. Quieting the Noise: Smart Upgrades for a Peaceful Home One of the common complaints homeowners have is the noise created by garage doors. A loud door can disrupt the tranquility of nearby rooms, but simple upgrades can create a quieter environment. Switching to a belt-drive opener—it’s a fantastic way to avoid that loud racket. Additionally, look for sealed nylon rollers for a smooth glide compared to metal wheels. These choices, paired with fresh perimeter seals, can dramatically reduce vibrations and improve overall functionality. Creating a Maintenance Routine That Works for You A seasonal home maintenance plan is key to keeping your garage door operating smoothly. Aim for quick check-ups on the first weekend of spring and fall. Spend just 15 minutes wiping tracks, tightening loose brackets, and applying silicone spray to vital areas. You’ll be surprised at how these simple maintenance tasks can extend the life and beauty of your garage door. Plus, testing the safety reverse feature is a simple yet vital precaution—ensuring your family's safety is always non-negotiable. Enhancing Safety Features: Putting Peace of Mind First Garage doors carry significant weight and can pose safety risks if not properly maintained. Remind the household to keep remotes out of children's reach and educate them about the importance of never walking under a moving door. Photo-eye sensors are essential for safety; make sure that your garage opener includes these features to prevent accidents. If you notice any wear or damage—like frayed cables or misaligned panels—don't hesitate to call in the professionals. Remember, some DIY tasks should stop for safety! Tech Meets Style: Smart Solutions for Your Garage In the digital age, smart home technology should be part of your garage door upgrades. Intelligent wifi-enabled openers not only provide peace of mind by allowing you to check the status of your garage door from your phone but also include security features like integrated cameras to monitor deliveries. Motion-activated lights illuminate your pathway, ensuring you never fumble in the dark. Setting geofencing or quiet hours allows for automation that seamlessly integrates with your daily routine. Embrace Vertical Space: Garage Organization Tips Finally, consider not just the door itself but the overall organization of your garage. Utilizing vertical storage helps maximize space. Wall-mounted shelves or hooks can transform your garage from a cluttered mess to an organized haven. This not only improves functionality but also gives the area a polished look that complements your upgraded door. Investing time into your garage door not only increases your home's curb appeal but can also lead to moments of pride while effortlessly supporting your lifestyle. Start planning your upgrade today, and see just how impactful these changes can be to your home! For more transformative home renovation tips and ideas, dive into our leading resources and get inspired!

09.23.2025

Mastering Hardwood Floor Installation: Tips for Homeowners

Update The Art of Transition: Managing Flooring Choices in Historic Homes When it comes to home renovation, few projects ignite the imagination quite like installing hardwood floors. In the video Installing Hardwood Floors | This Old House, the challenges of merging modern touches with historic charm are laid bare, particularly when dealing with an 1880s house where old meets new. Homeowners often grapple with aesthetic and structural decisions when deciding how to lay their floors. The angle at which we lay the boards can drastically affect the visual flow and overall ambiance of each room in the house.In Installing Hardwood Floors | This Old House, the discussion dives into the complexities of flooring installation in a historic home, exploring key insights that sparked deeper analysis on our end. Embracing the Challenge of Uneven Floors Charlie, the expert in the video, highlights the importance of directionality in flooring. This speaks to a common challenge in older homes—uneven subflooring. By running new flooring perpendicular to old boards, homeowners can ensure a level installation, which is crucial not only for aesthetics but also for the longevity of the flooring itself. While it might seem counterintuitive, taking the structural integrity of existing floorboards into account is a smart move for anyone considering flooring renovations. Strategic Planning: The Control Row Technique The video also introduces a key strategy when laying new floors: the control row. This method involves placing a row of boards down the middle of the room to establish a point of reference. It’s a technique that not only aligns the flooring with the walls but also serves to create a visually striking centerpiece in the room. For homeowners DIYing their flooring, leveraging techniques like these can help to avoid common pitfalls and ensure professional-looking results. Why Direction and Flow Matter Running flooring in a long hallway—for instance—creates a sense of cohesion and flow, making spaces feel larger and more opened up. In the video, Kevin discusses running the boards with the hallway for this very reason. However, what happens when the hallway meets an old bedroom with different flooring directions? Transition points are essential here; they can be practical and visually pleasing if executed correctly. Homeowners should consider these details as they plan their installations, as transitions naturally lead the eye and influence how spaces are perceived. The Takeaway: Don’t Overlook Details Successfully installing hardwood flooring in older homes involves navigating a host of challenges, particularly when old and new elements converge. Decisions on layout, direction, and how to tackle transitions can impact both function and style. As Charlie mentions in the video, planning for transitions is a step many might overlook, but it is these small details that tie the aesthetic harmony of a home together. For those hoping to dive into their own installation project, the insights shared in Installing Hardwood Floors | This Old House provide a solid foundation that anyone can apply. Remember, each choice you make—from the first board laid to the last transition—tells a part of your home's story. When embarking on such projects, it’s essential to stay informed and think ahead. Take your time, plan strategically, and don’t hesitate to consult professionals when necessary. Happy renovating!

09.18.2025

How Seasonal Wood Care and DIY Projects Prepare Your Home for Spring

Update Protecting Your Home with Seasonal Wood Care As the fall season rolls in, it's vital for homeowners to give their outdoor wooden surfaces some TLC before winter arrives. Whether you have a deck, railing, or fence, these elements are exposed to moisture and cold, making them vulnerable to wear and tear. Taking preventive measures now can save money and effort in the spring.In #2552 – Seasonal Wood Care | DIY Concrete Landscape Borders | Fall Planting for Spring Gardens, the discussion dives into essential home care tips for the fall season, exploring key insights that have inspired our analysis. Begin by conducting a thorough inspection of your wooden areas. Look for signs of damage such as faded stains, peeling paint, or soft spots. Using a screwdriver to probe for weakness can help identify areas that need repair. If you encounter soft or crumbling wood, this signals that moisture has seeped in, and immediate action is required. Your Essential Guide to Cleaning and Sealing The next step is to clean the wood surfaces thoroughly. Utilize a deck cleaner or a suitable bleach solution to eliminate grime, algae, and mildew. A pressure washer can be effective, but it's essential to adjust the pressure to avoid damaging softer wood. After cleaning, allow the surface to dry completely before sealing. Your choice of sealant is crucial. Opt for a water-repellent sealer or a semi-transparent stain that adds both UV protection and color to your wood. Oil-based products generally provide longer-lasting results, while water-based options dry quicker and are easier to clean up. Timing is everything; aim for a dry weather window of at least 24-48 hours to ensure proper adhesion of the sealant. Ideal temperatures for application range from 50° to 80°F. Creating Functional and Decorative Landscape Borders Another excellent fall project is installing concrete landscape borders, which can enhance the appearance and functionality of your yard. Concrete borders are not only decorative but also provide lasting definition to flower beds and driveways. The task is manageable for even novice DIYers, thanks to step-by-step instructions often provided by products like Quickrete. To embark on this project, gather basic tools such as a shovel, drill, and stakes. Plan your design using a garden hose to visualize curves and shapes. Set up your forms with plywood or flexible materials, and secure them with stakes. Mix and pour the concrete mixture, ensuring a smooth finish. Fake control joints into the surface to prevent cracking, and apply a curing compound to boost durability. Maximizing the Grace of Your Spring Garden Finally, autumn is the perfect season to plant spring-blooming bulbs. Timing is essential; planting daffodils, tulips, and hyacinths during fall allows them to establish roots before the ground freezes, leading to a colorful display when spring arrives. For successful planting, choose a sunny spot with good drainage. Mix compost into the soil and plant the bulbs deep enough to ensure they can thrive. Cover them with mulch to retain moisture and combat weeds. Engaging in seasonal maintenance like wood sealing and planting bulbs is not only beneficial but also enhances your home's overall appeal. With just a bit of effort now, homeowners can enjoy a beautiful and well-maintained property come springtime. For any specific home improvement questions, don’t hesitate to reach out to expert resources or your local DIY community. With the right guidance, you can tackle these projects confidently!

Terms of Service

Privacy Policy

Core Modal Title

Sorry, no results found

You Might Find These Articles Interesting

T
Please Check Your Email
We Will Be Following Up Shortly
*
*
*