Add Row
Add Element
American Yard and Home Logo
update
American Yard & Home
American Yard & Home Logo
update
Add Element
  • Home
  • Categories
    • Ask an Expert
    • DIY Projects & Repairs
    • Featured Businesses
    • Home Renovation & Remodeling
    • Interior Design & Styling
    • Landscaping & Curb Appeal
    • Outdoor Living
    • Smart Home & Tech
July 24.2025
1 Minute Read

Fix Drywall Cracks Yourself: Easy Steps for a Flawless Wall

Ever wondered if you can fix drywall cracks yourself and achieve professional results without calling in costly contractors?

Are unsightly wall cracks making your home look older than it really is? What if you could restore your walls to a flawless finish—all with tools from your local hardware store? This guide empowers you to fix drywall cracks yourself with simple, effective steps trusted by both DIYers and pros alike. By the end, you’ll be equipped to identify crack types, choose the right materials, and make repairs that last—all while saving time and money.

Why Fix Drywall Cracks Yourself? Time, Cost, and Satisfaction

Cracks in your wall can be more than a mere cosmetic annoyance—left untreated, they may signal foundation issues or lead to more extensive damage over time. Addressing these problems promptly, especially if you fix drywall cracks yourself , has significant benefits. For one, taking DIY action often reduces repair costs typically associated with hiring specialists for drywall repair or foundation wall maintenance. Moreover, learning to make these repairs boosts your confidence, provides a crucial home improvement skill, and often delivers results that rival professional work.

By tackling drywall cracks and performing your own drywall repair , you maintain greater control over your home’s appearance and its structural integrity. Practical know-how not only helps you keep minor issues from becoming major headaches, but it also allows you to monitor the condition of your foundation wall and intervene before real problems develop. Tackling a fix yourself, no matter how simple or complex, offers a sense of pride and accomplishment that’s hard to match.

  • Discover the benefits of DIY drywall crack repair

  • Save money with practical home improvement

  • Enjoy a sense of accomplishment and maintain your foundation wall integrity

confident homeowner preparing materials to fix drywall cracks yourself in an organized workspace

What You Need: Essential Tools and Materials to Fix Drywall Cracks Yourself

Before tackling those pesky wall cracks , arm yourself with the right tools and materials. For most jobs, you’ll need a putty knife —invaluable for applying and smoothing joint compound . Additional must-haves include a sanding block, dust mask, utility knife, mesh or paper tape (for cracks wider than a hairline), primer, and matching paint for that seamless finish. For foundations or larger cracks, more robust implements like a wide taping knife and heavy-duty filler might be necessary.

While professionals often use advanced gear for large-scale repairs or when foundation cracks indicate deeper structural problems, most minor cracks and typical drywall crack repairs can be expertly completed with affordable DIY supplies from your local home improvement store. The following table breaks down what's truly essential for do-it-yourselfers compared to what the pros rely on in bigger jobs.

DIY Tool/Material

Function

Professional Equipment

Function

Putty Knife (3"-6")

Applying & smoothing joint compound

Professional taping knife (12"+)

Wider coverage for large repairs

Joint compound (premixed or powder)

Filling cracks, smoothing surface

Setting-type joint compound

Fast drying, high-durability repairs

Mesh or paper tape

Reinforcing cracks

Fiberglass tape

Extra strength for wide/structural cracks

Sanding block/paper

Smoothing repair area

Electric sander

Quick, uniform sanding for large surfaces

Primer & paint

Finishing, color matching

Commercial-grade paint sprayer

Even, efficient application across rooms

Understanding Drywall Cracks: Identifying Types and Causes for Accurate Repair

Recognizing the specific pattern and cause of your drywall cracks is crucial for a repair that lasts. Not all cracks in your wall mean the same thing—some stem from natural settlement, while others may indicate foundation wall or even foundation cracks that require more serious attention. By learning to distinguish between hairline cracks , vertical cracks , horizontal cracks , and more, you’ll be able to select the correct fix and prevent further damage to your home.

Let’s break down the most common types of drywall crack patterns you might encounter, what they can signal about your home’s structure, and why accurate identification is the first step toward a professional result. Whether you’re facing a single small fissure or multiple intersecting cracks, attention to detail now ensures a more beautiful and enduring fix.

Drywall Crack Patterns: Hairline, Vertical, Horizontal, Diagonal & Wall Cracks

Hairline cracks are thin and surface-level, often caused by minor settling or subtle movements in the wall itself. Most hairline cracks aren’t structural threats, but they can mar an otherwise pristine paint job. Vertical cracks often run parallel to the wall studs and may signal normal expansion, but if they spread across both drywall and the foundation wall, further inspection is warranted.

Horizontal cracks are typically more serious, especially if they appear on your foundation walls —these can be a red flag for ongoing foundation settlement or pressure from soil conditions outside the home. Diagonal cracks may indicate foundation movement and need to be assessed carefully, while widespread wall cracks —especially those that branch or form “stair-step” patterns—could point to underlying issues with your foundation wall .

Regardless of the type, understanding your crack’s pattern helps determine whether you need basic drywall repair or a deeper look into your home’s structural integrity .

Foundation Wall and Foundation Crack Issues: When Wall Cracks Indicate Structural Problems

Sometimes, foundation cracks and foundation wall issues make themselves known through shifting, widening cracks in the drywall above them. If cracks are growing, recurring after each repair, or accompanied by sticking doors and windows, floors sloping, or visible gaps in baseboards or crown molding, there could be a structural problem at play. The source may be related to soil conditions , water damage, or prolonged foundation settlement .

Be cautious: not every crack in your wall is a red flag, but large horizontal cracks, wide gaps, or significant bowing demand professional assessment. Acting quickly protects your home’s long-term structural support ; if signs point to underlying movement, a visit from a structural engineer or foundation repair specialist is your safest option.

“Not all drywall cracks are the same. Learning to identify the type of crack is your first step to a lasting repair.”

Step-by-Step Guide: How to Fix Drywall Cracks Yourself Like a Pro

Armed with the right tools and a clear understanding of your crack’s type and cause, you’re ready to begin the repair process! Each type of wall crack deserves particular attention—what follows is a step-by-step method you can trust for lasting results. Meticulous preparation, the right application of joint compound , and a professional finish are the keys to success, whether you aim to repair drywall in a small bedroom or tackle larger jobs that straddle your foundation wall .

Follow these essential steps to ensure your wall cracks don't come back—and enjoy a seamless, perfectly blended finish once you’re done.

Preparation: Setting Up Your Workspace Before Drywall Repair

Preparation is critical when you fix drywall cracks yourself . Move furniture away from the work area and cover floors with drop cloths to catch dust and debris. Use painter’s tape to protect nearby trim or fixtures, and wear protective gear—including gloves and a dust mask—to ensure safety during sanding and compound mixing.

Lay out all your tools (putty knife, joint compound, sanding block, tape, etc.) in the order you’ll need them. Keep good lighting on hand, either through a nearby window or a portable work lamp, so every crack and flaw is visible. A neatly organized workspace not only reduces mess but also helps keep your repair on track for the flawless result you envision.

organized workspace with homeowner preparing tools for fixing drywall cracks yourself

Repair Drywall: Filling Hairline Cracks with Joint Compound

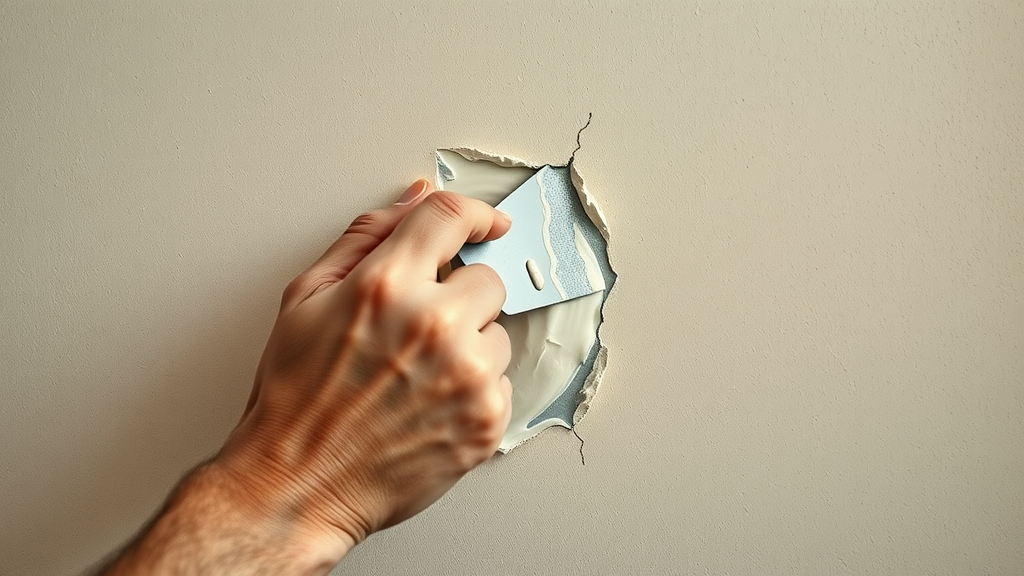
To fix a hairline crack , start by gently scraping the crack with a utility knife to widen it just enough for the compound to adhere. Dust away any loose debris. Next, use your putty knife to apply a thin layer of joint compound directly over the crack, pressing it firmly into the groove. Smooth the compound so it extends an inch or two beyond the crack on all sides.

Allow this first coat to dry completely, then sand it lightly with fine-grit sandpaper. If the crack remains visible, apply a second, even thinner coat of joint compound for a perfectly smooth finish. Once dry, sand again. This two-layer method ensures your drywall crack is properly filled and ready to vanish under a fresh coat of paint .

Fixing Vertical, Horizontal, and Diagonal Cracks in Foundation & Drywall

For vertical cracks , horizontal cracks , or diagonal cracks wider than a hairline, reinforce the repair with mesh tape before applying joint compound. After cleaning and widening the crack, embed a strip of mesh tape over it. Use your putty knife to apply a generous coat of joint compound, feathering the edges for a seamless transition to the rest of the wall.

Pay extra attention to cracks on or near a foundation wall . These may require two or three coats of compound, with sanding between each application. Sometimes, a foundation crack may warrant inspection by a professional—especially if the crack continues to lengthen after repairs, or returns frequently. For typical cases, patience and multiple thin layers are your best strategies for an invisible fix.

close-up of putty knife smoothing joint compound over foundation wall crack during DIY drywall repair

Finishing Touches: Sanding, Priming, and Painting After Drywall Crack Repair

Once your repair is fully dry, sand the area with a fine-grit sanding block until it feels flush with the surrounding wall. Wipe away all residual dust with a damp cloth. Before painting, apply a quality primer over the patch—this is crucial to ensure a uniform finish and to prevent flashing through the topcoat.

Finish with a matching coat of paint to blend the repaired area perfectly with the rest of your wall. Step back and admire your work—a smooth, crack-free result that will last for years, achieved entirely on your own!

homeowner admiring flawless seamless painted wall after fixing drywall cracks yourself

How to Prevent Future Drywall Cracks: Foundation Walls & Seasonal Movement

Once you’ve learned to fix drywall cracks yourself, a proactive approach helps prevent cracks from returning. Foundation settlement and seasonal changes can cause subtle shifting in walls, prompting cracks even after a flawless repair. Monitoring these conditions will safeguard your work and your home.

Consider installing a humidity monitor in your home. High humidity can cause drywall to expand and contract, leading to new cracks. Additionally, visually inspect your foundation wall a few times yearly: catching early signs of foundation settlement lets you intervene before bigger issues develop.

  • Monitor foundation settlement

  • Control indoor humidity to protect drywall

  • Regularly inspect foundation wall for new cracks

Common Mistakes to Avoid When You Repair Drywall Yourself

A flawless finish is possible when you avoid classic pitfalls. One common mistake is failing to properly clean and widen cracks before applying joint compound—this can cause the repair to fail prematurely. Skimping on sanding or forgetting to prime before painting also leads to visible patches, even if the crack is gone.

Never rush between coats of compound; each needs to dry thoroughly to prevent bubbling, shrinkage, or future cracking. Finally, for foundation wall cracks, don’t ignore signs of structural problem : repeated patching without addressing underlying movement almost guarantees the crack will come back. Address both the cosmetic and the root cause for lasting results.

A perfect drywall repair isn’t difficult—if you know what to avoid.

Drywall Repair or Foundation Repair? Deciding When to Call a Professional

Most cosmetic drywall repair tasks are well within reach for handy homeowners. However, cracks wider than a quarter inch, cracks that reappear after multiple fixes, or signs of movement in your foundation wall may point to a significant structural issue requiring a professional’s expertise. Recognizing when to seek help protects your home’s long-term value and safety.

While a DIY fix works for hairline and minor cracks, consult a foundation repair specialist or structural engineer for problems involving bowing walls, heavy diagonal cracks, or symptoms of persistent foundation movement . This ensures you address both cosmetic and structural concerns for true peace of mind.

Warning Signs in Foundation Cracks and Foundation Walls That Need a Specialist

Be alert for expanding foundation wall cracks, step-like cracking in brick or block, water intrusion after rain, or doors and windows that suddenly jam. These warning signs may indicate foundation settlement or shift, and demand an immediate professional assessment to prevent further damage and ensure ongoing structural integrity .

Cracks that run horizontally across your foundation walls are especially concerning, as they often result from pressure due to soil conditions or water buildup outside the home. Don’t attempt to patch these without first confirming the root cause is stable—otherwise, no amount of joint compound will keep the crack away for long.

Home Improvement Tips for Lasting Results After Drywall Repair

After completing a repair, keep your home’s environment stable for the long-term health of your walls. Monitor humidity, keep gutters and downspouts clear to divert water away from your foundation, and patch minor wall cracks as soon as they appear to prevent them from turning into bigger problems.

Don’t forget to keep a record of all major repairs, and periodically re-inspect older fixes for new movement. Stay proactive in your home improvement efforts and you’ll keep your walls crack-free and beautiful for years.

People Also Ask: Answers to Common Drywall Repair Questions

What causes drywall cracks to keep coming back?

Persistent drywall cracks usually result from ongoing foundation movement, improper original repair, or fluctuating humidity levels. Without addressing root causes such as foundation settlement or water damage, cracks are likely to reappear—even after careful repair.

How do you fix drywall cracks in a foundation wall?

To repair cracks in a foundation wall, start by cleaning the area, then fill with a specialty masonry or epoxy filler designed for foundation cracks. Reinforce with mesh tape if needed, apply joint compound, and finish with primer and paint. For wide or repeating cracks, consult a foundation repair expert.

Is it normal for drywall cracks to appear in new homes?

Some small cracks are normal in new construction as the home settles over its first few years. These minor cracks often appear near doorways or windows and are usually cosmetic—but any large or widening cracks should be inspected by a professional.

Do I need to repair minor cracks in my drywall or foundation walls?

Yes, even minor cracks should be repaired promptly to prevent them from growing or admitting moisture, which can lead to water damage or larger repairs down the line. Regular maintenance keeps small problems from becoming big headaches.

How can I tell if a wall crack is structural and requires a foundation repair?

If your crack is over 1/4 inch wide, runs horizontally or diagonally, or repeats after repeated repairs, it may suggest foundation movement. Additional signs such as sticking windows or doors, uneven floors, or cracks in exterior bricks signal it’s time for a foundation or structural specialist’s opinion.

Frequently Asked Questions About How to Fix Drywall Cracks Yourself

diy expert explaining how to fix drywall cracks yourself in workshop with wall samples and tools
  • Can drywall cracks indicate foundation problems?

    Yes. Large horizontal, stair-step, or diagonal cracks—especially wider than 1/8 inch—can indicate foundation movement and may require a professional inspection. Small vertical or hairline cracks are usually caused by normal settling or humidity changes and are generally not serious.

  • What are the best products for joint compound?

    Great options include all-purpose joint compound (like Sheetrock All Purpose) for general use, setting-type compounds (like Durabond or Easy Sand) for fast, durable repairs, and lightweight or midweight compounds for easier sanding and smoother finishes. Many pros favor CertainTeed Lite-AllPurpose or Beadex Lite for their workability.

  • How quickly can you fix drywall cracks yourself?

    Small cracks can usually be repaired in a few hours with spackle or joint compound—dry, sand, and paint all in one day. Larger cracks may require taping and multiple coats of compound, with drying time between layers. In that case, expect the process to take 1 to 2 days.

  • Should I paint immediately after drywall repair?

    No. You should wait for the joint compound to fully dry, usually about 24 hours. Then sand the surface smooth, apply a primer to seal the area, and only then should you paint. Skipping the primer can lead to visible patches or uneven paint texture.

Quick-Reference Table: Troubleshooting Common Wall Cracks While You Fix Drywall Cracks Yourself

Type of Crack

Probable Cause

Recommended Repair Method

Risk Level

Prevention Tips

Hairline Crack

Normal settling, humidity changes

Apply joint compound, sand, paint

Low

Maintain stable indoor humidity

Vertical Crack

Minor settling or framing movement

Reinforce with mesh tape, joint compound

Medium

Monitor for changes, inspect foundation wall

Horizontal Crack

Foundation wall pressure, soil conditions

Masonry filler or call professional if expanding

High

Ensure proper grading, check drainage

Diagonal Crack

Foundation movement, settlement

Reinforce with mesh tape, monitor changes

Medium-High

Address foundation settlement early

Widespread Wall Cracks

Significant structural issues

Call structural engineer/foundation repair

Very High

Monitor house movement, act promptly

Take Action: Start Your Home Improvement Journey and Fix Drywall Cracks Yourself

Don’t wait for small cracks to become major repairs—gather your supplies, follow these steps, and enjoy flawless walls with the satisfaction of a true DIY home improvement success!

DIY Projects & Repairs

Write A Comment

*
*
Related Posts All Posts
12.13.2025

DIY Faux Frost Greenery: The Two-Ingredient Trick Instagram Is Obsessed With

Did you know that social media DIY trends for faux frost have surged 300% this holiday season? If you’re scrolling through Instagram or TikTok, chances are you've seen gorgeous, sparkly greenery draped over mantels and interwoven into wreaths—crafted not in expensive studios, but in everyday living rooms with a clever two-ingredient hack. Curious how to capture this viral magic for your own holiday decor? You’re about to discover the simple secret fueling the internet’s most dazzling holiday trend: DIY faux frost greenery that looks luxe, lasts all season, and is completely customizable. Whether you’re a seasoned crafter or a holiday enthusiast, this guide will teach you everything from supplies to expert styling tips, ensuring your décor sparkles with festive flair."Did you know that social media DIY trends for faux frost have surged 300% this holiday season?"Transforming Holiday Decor: The DIY Faux Frost Greenery CrazeThe landscape of holiday decor is rapidly changing, thanks to a creative and accessible trend: DIY faux frost greenery. Across social media, crafters and home stylists are showcasing their take on frosted pine branches, shimmering garlands, and crystallized wreaths. What sets this movement apart is its do-it-yourself nature, offering an affordable, authentic-looking alternative to pricey store-bought decorations. This approach not only allows you to personalize your space with unique, textured arrangements that add depth and sparkle but also makes it easier to adapt to evolving trends—without breaking the bank. Imagine being able to adjust the intensity of the frost, choose the shimmer of your choice, and create centerpieces for your holiday wreath or dining table that express your unique style.This surge in creativity is also a response to the push for sustainability and reuse. Many opt for reusable faux greenery as a base, giving them the freedom to refresh or update their decor annually, all while keeping costs and environmental impact low. Whether you’re transforming pine branches into icy works of art for garlands you hang or laying shimmering sprigs across the top of your mantle, the DIY faux frost method puts you in control—no specialized skills required. With this guide, you’ll get step-by-step instructions, essential supply checklists, pro secrets for achieving the most realistic faux frost finish, and safety guidelines so your projects are not just beautiful, but also safe for children and pets.What You'll Learn About DIY Faux Frost GreeneryHow to craft realistic diy faux frost greenery with two simple, inexpensive ingredientsProven techniques to add texture and depth to faux frost arrangementsExpert insights on the best products and applications for holiday decorCreative styling ideas and professional secrets for flawless resultsThe Best Two-Ingredient DIY Faux Frost Greenery MethodWhen it comes to achieving that magical, dewy winter look, the internet’s favorite two-ingredient method reigns supreme. The real beauty of this diy faux frost greenery trick is its simplicity: just Epsom salts or coarse glitter for the icy texture, and a clear-drying craft glue or spray adhesive to keep your frost securely in place. Whether you want to frost pine branches for a holiday wreath or give your tabletop centerpieces a glistening touch, you’ll find this approach both effective and budget-friendly. With these everyday items in hand, you’ll be set to create jaw-dropping, customizable decor that far surpasses what you’ll find on store shelves. Let’s unpack the essentials and walk through the simple steps to bring a winter wonderland vibe into any room.Essential Supplies for Faux Frost and Holiday DecorIngredient 1: Epsom salts or coarse glitterIngredient 2: Clear-drying craft glue or spray adhesiveOptional supplies: Faux greenery, paintbrushes, protective glovesStep-by-Step Tutorial: How to Make DIY Faux Frost GreeneryPrepare your workspace for easy cleanup. Lay down newspaper or a disposable tablecloth to catch stray salts or glitter. Make sure your supplies are within reach and set up in a well-lit area so you can see all the details.Apply adhesive generously to your selected faux greenery. Use a paintbrush for even, detailed coverage, especially around leaf edges and branch tips where natural frost tends to gather. Spray adhesive can speed things up for larger branches or garlands you hang along banisters.Sprinkle the faux frost mixture (Epsom salts or glitter) evenly to add texture. Hold the greenery over a tray, then gently sprinkle your chosen frost material, rotating the branch for a natural, random look that mimics real snowflakes before dipping.Let pieces dry thoroughly, then shake off any excess. Allow at least 1–2 hours, longer if you’ve used thicker glue. Hold your frosted item upside down and gently tap to remove loose crystals, ensuring the result looks like authentic, crystalized greenery and not overly clumped.Style directly into your holiday decor arrangements. Simply lift the dowel or branch and integrate into wreaths, centerpieces, or garlands for an instant wintry ambiance—perfect for christmas decorations to bring your space to life.Table: DIY Faux Frost Greenery Tools and AlternativesRequired ItemWhy It WorksPossible SubstitutesEpsom saltsCreates icy, crystalline effectCoarse sugar, clear glitterClear glueAdheres frost securelyMod Podge, spray adhesiveFaux greeneryRealistic baseReal branches (with caution)PaintbrushPrecise applicationFoam brush, fingersExpert Insight: Why DIY Faux Frost Outshines Store-Bought OptionsAccording to home decor specialists, nothing compares to the handcrafted touch in diy faux frost greenery. Not only does it look more natural and integrate seamlessly with your unique holiday decor, but it also empowers you to add texture, dial up (or down) the shimmer, and experiment with sparkle intensity to fit your style. Plus, making your own pieces is a perfect way to create lasting memories and traditions with family and friends, and offers the satisfaction of knowing you crafted something truly your own. Bonus: You’re able to control the safety and quality of materials, avoiding questionable chemicals sometimes found in mass-produced decorations. Whether you lean toward subtle, snowy touches or crave full-on, glitzy glamour, this technique lets you custom-blend results tailored precisely to your taste and home aesthetic."Handmade diy faux frost greenery not only looks more authentic, but allows you to tailor texture and shimmer intensity exactly how you want it." – Amanda Lee, Interior Styling SpecialistChoosing the Best Greenery for DIY Faux Frost ProjectsPopular faux plants: pine, eucalyptus, boxwoodHow to select greenery for maximum realism and longevityWhile pine branches may be the classic choice for frosted holiday decor, don’t overlook other faux foliage options such as eucalyptus or boxwood. Each plant offers unique shapes and leaf textures, allowing you to create arrangements that pop with visual contrast and realism. When selecting greenery for diy faux frost greenery projects, prioritize branches with sturdy stems and flexible leaves, as these hold adhesive and salts or glitter more effectively. Realistic detailing in faux greenery, such as subtle green variations and natural leaf veining, enhances the final frosted look, making it nearly impossible to distinguish from nature’s own handiwork—from garlands you hang on staircases to ornaments or hanging decor for your front door. Opt for high-quality faux materials to ensure your projects last from year to year, minimizing the need for frequent replacements and reducing waste compared to disposable, single-season decorations.Watch our short, step-by-step video for a clear visual guide to crafting your own diy faux frost greenery—supplies, technique, and expert styling tips included. Bright holiday setting and engaging pacing make this the perfect visual companion!Creative Ways to Use DIY Faux Frost Greenery in Holiday DecorWreaths and swags for doors and mantelsCenterpieces and tabletop arrangementsFestive garlands for staircases and banistersOutdoor planters for a wintry touchThe applications for diy faux frost greenery in holiday decor are truly endless. A frosted pine wreath or festive swag can instantly transform your front door or living room mantel into a winter wonderland. For a cozy dining table, design lush, frosted centerpieces that glimmer in candlelight, making every meal feel like a special occasion. Draping frosted garlands on banisters or open shelving adds elegant, snowy charm, especially when paired with metallic ornaments or soft twinkling lights. Don’t hesitate to extend your creativity outdoors: Arrange frosted branches in porch planters or along windowsills for curb appeal that’s both sophisticated and inviting. Each project presents an opportunity to showcase your personal style and spread festive cheer—all while controlling the color, texture, and placement of your faux frost.Safety Tips When Crafting DIY Faux Frost GreeneryMake sure to use non-toxic ingredients for indoor use.Work in a ventilated space if using spray adhesives.Keep faux frost greenery away from open flames or heat sources.Safety matters, especially when creating decorations that may be touched by children and pets or displayed near heat. Choose adhesive products and “frost” ingredients labeled as non-toxic to reduce the risk of accidental ingestion or allergic reactions. Always craft in a well-ventilated room when using spray adhesives, and consider wearing gloves to protect your skin from irritation. For households with small kids, avoid areas where food will be served and keep diy faux frost greenery out of reach to avoid accidentally ingesting any materials. Finally, since many adhesives and decorative elements are flammable, never position your frosted creations near candles, open flames, or heating vents—this care using these frosted pieces keeps the season safe and festive for everyone.How to Create Fake Frost?Creating fake frost is simple with the right ingredients: Epsom salts or coarse glitter for natural sparkle, plus clear-drying glue or spray adhesive for secure, even coverage. Just brush adhesive over your chosen greenery, sprinkle on your sparkling frost, and allow it to dry before using. For extra realism, blend a sprinkle of clear glitter with your salts or add tiny hints of light blue dye to mimic the blue glint of real ice—just remember: a little goes a long way. This technique is quick and easy and doesn’t require hot water, a borax solution, or any complicated steps—perfect for anyone from beginners to seasoned crafters looking to make the frost in under an hour.How to Frost Artificial Leaves?For the most lifelike, frosted effect on artificial leaves, use a paintbrush to coat edges and surfaces with a thin layer of clear glue or Mod Podge. While still sticky, softly dust with Epsom salts or a mixture of clear glitter, focusing on spots where snowflakes or frost would naturally form. Gently shake to remove extra material after drying. This is especially effective for eucalyptus and boxwood, where the texture and contour allow you to add texture and shimmer that’s easily customized, whether you prefer a heavy snowy look, or a subtle, glistening accent that will eventually fall gracefully for cleanup at season’s end.How to Make Icy Branches?Transforming branches into icy decor is a fun and accessible holiday project. For faux or real branches, lightly brush clear glue along each twig, making sure to cover the tips where frost typically collects. Generously sprinkle Epsom salts or clear glitter for a crystalized, frosty look. Let dry completely, then tap off the excess. For added dimension, try temporarily dipping your branches into a borax solution—this will form larger, striking crystals that catch light for true wintry magic. Whether you want to shape small twigs into standalone ornaments or incorporate icy branches into large centerpieces for your holiday table, this method offers the perfect way to create festive, custom decor.How to Make Fake Snow for Outdoor Decorations?Creating safe, realistic fake snow for outdoor use calls for durability. Mix Epsom salts and coarse sugar—this combination withstands moisture and can be easily cleaned up. Adhere the mixture to faux greenery or outdoor-safe branches with a robust outdoor adhesive, ensuring it can handle the elements. If you need bulk quantity for large displays or planters, look for biodegradable snow alternatives at craft stores. Always keep away from real fruit or greenery where children and pets might have access, and avoid placing near entryways where slipping could occur. The results? Outdoor displays with wintry elegance and minimal environmental impact.FAQs: DIY Faux Frost GreeneryWill faux frost greenery last year to year?Yes! If stored in a cool, dry place and handled gently, most faux frost decorations will last multiple seasons. To prolong life, store each piece in a protective container to avoid crushing and periodically refresh any frost or glitter that might wear off.Are the materials pet and child safe?When you use non-toxic glue and salts or craft glitter, the method is generally safe for homes with children and pets. However, always display out of reach and avoid using in areas where food will be served. Supervise any craft activities with younger kids.Can I use this method on real plants?While the focus is on faux greenery, you can frost real branches if you avoid harsh adhesives that could damage the plant. Real branches are best for short-term display only, as organic material will eventually fall or degrade.What is the best base for diy faux frost greenery?Durably constructed faux greenery—especially pine, eucalyptus, or boxwood—offers the best base for longevity and realism. Choose stems with varied shades and natural veining for the most life-like results.Learn what to avoid! See the five most common mistakes crafters make with faux frost—from overapplication to incorrect glue use—and how to fix them for flawless results.Key Takeaways: Mastering the DIY Faux Frost Greenery TrendDIY faux frost greenery is simple, affordable, and fully customizable.The two-ingredient trick delivers stunning, realistic results.With the right materials, you can transform any holiday decor with effortless elegance.Elevate Your Holiday Decor—Share Your DIY Faux Frost Greenery CreationsReady to transform your home with festive sparkle and handmade charm? Try out these tips, and don’t forget to share your diy faux frost greenery ideas and results on social media to inspire fellow holiday decorators.To enhance your DIY faux frost greenery projects, consider exploring the following resources:“This DIY Faux Frost Is the Easiest Holiday Decor Hack (It’s Just Two Ingredients!)” offers a straightforward method using Borax to create realistic frosted effects on various decorations. (shopping.yahoo.com)“DIY Frosted Greenery Floral Arrangement” provides a step-by-step guide to crafting elegant frosted floral displays, complete with a video tutorial for visual learners. (bloomsbythebox.com)

11.21.2025

Prepare Your Home for the Holidays: Essential Tips for Hosts

Update Getting Your Home Ready for Holiday Gatherings The holiday season is fast approaching, bringing with it a flurry of guests, cooking, and the much-anticipated festivities. For homeowners, this period can bring a mix of excitement and stress. To help alleviate that stress, it's crucial to prepare your home for entertaining. In the recent episode of the Money Pit podcast, Leslie Segretti and Jim Kenzie delve into effective strategies for prepping your kitchen and dining areas while ensuring your space is warm and welcoming for guests.In #2566 – Holiday Kitchen Prep | Refresh Your Dining Room | Making Space for Guests | Winterize Pipes, the discussion dives into essential strategies for preparing your home for the bustling holiday season. Sprucing Up the Kitchen for Holiday Cooking Your kitchen often becomes the hub of holiday activity, so it's important to keep it organized and functional. Start by deep cleaning your kitchen appliances, ensuring they are ready for the hustle. A clean oven before Thanksgiving can save you last-minute panic. Clear out expired items from your fridge and pantry, restock essential ingredients like spices and baking supplies, and reorganize for easy access during meal prep. Consider designating a 'holiday zone' for cooking tools and serving dishes. This simple act can streamline your cooking experience, allowing you to efficiently whip up your favorite meals without rummaging through clutter. By being proactive about kitchen organization, you set yourself up for success and enjoyment during the busy holiday season. Transforming Your Dining Room into a Festive Gathering Space The dining room often serves as the focal point—whether for Thanksgiving dinner or casual gatherings. To refresh this space quickly and affordably, start with the lighting. Warm, cozy lighting can transform the atmosphere; consider adding battery-operated puck lights or stylish floor lamps. A simple centerpiece, like a bowl of seasonal fruits or a cluster of mini pumpkins, can also add a festive touch without the need for expensive decorations. Also, don’t overlook repairs and updates. Tighten loose chairs, address squeaks, and perhaps reupholster or cover old dining chairs to breathe new life into them. These minor adjustments can instantly enhance your dining experience, making guests feel welcomed and comfortable. Creating Cozy Guest Spaces Without a Spare Room If you’re short on guest rooms, you can still make visitors feel at home. With a little creativity, even a corner of your living room can be transformed into a cozy sleeping space. Consider using a high-quality air mattress or a sleeper sofa to provide comfort. Adding a folding screen or curtain can create a sense of privacy that guests will appreciate. Ensure guests have bedside essentials like a small side table, a charging station for devices, and water. Adding decorative touches like cozy throws or holiday-themed decorations can enhance their experience, demonstrating your hospitality and thoughtfulness. Preparing Your Exterior for Winter and Holiday Guests As guests arrive, the exterior of your home is the first impression. Spend some time sprucing up your entryway. Clean your front door, add a fresh coat of paint if necessary, and consider seasonal decorations that welcome guests in style. Ensure outdoor areas are well-lit and safe; fix any cracks in walkways and check outdoor faucets to prevent winter freeze damage. These exterior preparations not only improve curb appeal but also contribute to a warm welcome that sets the tone for the entire holiday experience. By taking these steps, you can ease the stress of the holiday season while making your home an inviting and functional space. With careful preparation of your kitchen, dining room, and guest areas, you can focus on what really matters—spending quality time with friends and family during this festive time. So, roll up your sleeves, start planning, and turn your home into the perfect holiday haven! If you're unsure where to begin with your preparations, consider reaching out to local home improvement experts. They can provide additional insights tailored to your specific needs, ensuring your holiday preparations go off without a hitch.

11.14.2025

Last-Minute Halloween Décor Ideas: Affordable Yard Frights to Impress

Update Transform Your Home with Last-Minute Halloween Décor Ideas If Halloween seems to have crept up on you this year, fear not! With a few household items and a little creativity, it's still possible to produce terrifyingly delightful decorations that impress trick-or-treaters and neighbors alike.In #2565 – Last-Minute Halloween Décor, the discussion dives into budget-friendly decoration techniques and spooky lighting ideas, exploring key insights that sparked deeper analysis on our end. Spooktacular Decoration Hacks Using Everyday Items One easy yet frighteningly effective method involves making floating ghosts. All you need are cheesecloth and balloons. Simply drape the cheesecloth over a balloon, spray it with starch or diluted glue, and let it dry. Once completed, pop the balloon, and you have a ghostly form to hang from branches or doorways—add black felt eyes for an extra eerie touch! Another tried-and-true Halloween favorite is the homemade spider and spiderwebs. Cut black trash bags into large web shapes and stick them to your windows or porch railings. To make it even spookier, create a spider using rolled socks or newspapers wrapped in black duct tape. This guarantees you’ll have an eye-catching display without resorting to expensive store-bought options. Lighting to Set the Mood The power of lighting can elevate any spooky décor. Create glowing eyes in bushes using toilet paper rolls lined with colored cellophane and equipped with small battery-operated lights. These simple additions can transform your yard into a chilling nighttime wonderland, providing just the right amount of creepiness. Want to dazzle your visitors? Consider using glow sticks or LED tea lights in mason jars or painted containers. Wrap them in gauze for a mummy effect, which can illuminate your pathway and guide trick-or-treaters. Post-Halloween Cleanup Made Easy Once Halloween is over, it’s time to pack it all away. But don't rush—your decorations deserve proper care. Start by sorting the decorations into categories, such as indoor and outdoor. Lights should be wrapped carefully around cardboard to prevent tangling. When it comes to pumpkins, consider composting if they’re rotten, while uncut ones can serve as natural décor for Thanksgiving. For inflatable decorations, ensure they are completely dry before storing to avoid mildew. Batteries should be removed from any decorations that light up to extend their lifespan. Utilizing clear bins with labels can help make future decorating swift and effortless. DIY Projects to Engage the Family Beyond just decorating, these DIY projects offer a great way for families to bond while getting into the Halloween spirit. They can also provide opportunities to teach younger members about crafting and decorating on a budget. In the throes of spooky season, getting crafty can be as important as outfitting your home to look haunted. By using what you have on hand mixed with a little imagination, you can create unforgettable Halloween magic in virtually no time. As fall gives way to winter, tackle the cleanup and prepare your home for the holidays. Halloween may be wrapping up, but your décor lifestyle doesn’t have to end! This time of year is about creativity, family participation, and having a little fun along the way. Packing Up for Next Year: A Smart Move Remember, with just a few smart tricks and a seasonal mindset, you can make future Halloweens even more efficient and enjoyable. Take these decorative tips to heart and enjoy a frightfully fun Halloween this year!

Terms of Service

Privacy Policy

Core Modal Title

Sorry, no results found

You Might Find These Articles Interesting

T
Please Check Your Email
We Will Be Following Up Shortly
*
*
*