Add Row
Add Element
American Yard and Home Logo
update
American Yard & Home
American Yard & Home Logo
update
Add Element
  • Home
  • Categories
    • Ask an Expert
    • DIY Projects & Repairs
    • Featured Businesses
    • Home Renovation & Remodeling
    • Interior Design & Styling
    • Landscaping & Curb Appeal
    • Outdoor Living
    • Smart Home & Tech
December 14.2025
15 Minutes Read

Front Porch Christmas Decorating Ideas to Wow Guests Before They Knock

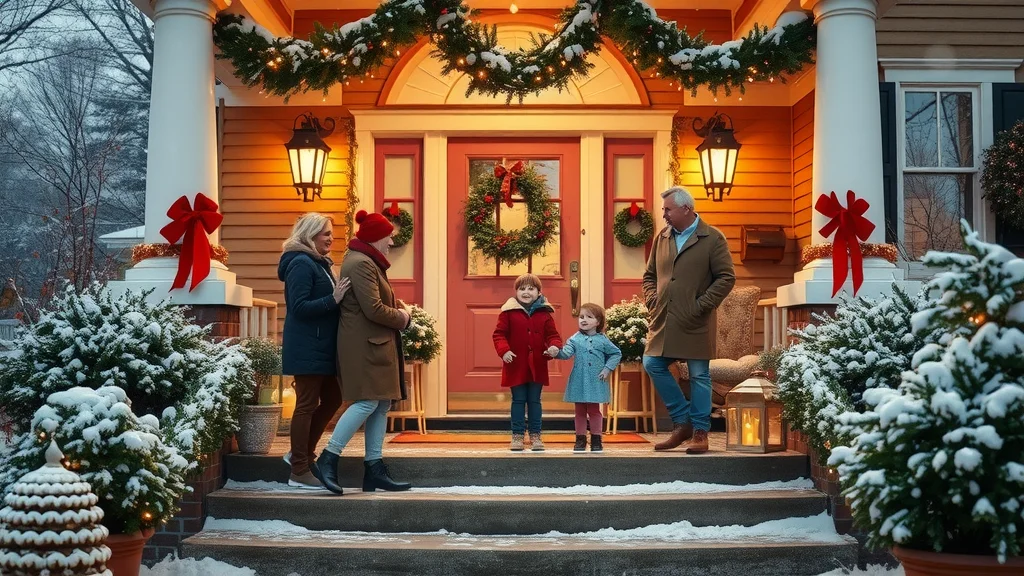
There’s a certain magic that happens the moment holiday guests step onto your front porch — even before they ring your doorbell. A beautifully styled porch radiates warmth, excitement, and cheer, setting the tone for festive gatherings inside. Imagine a snowy evening, twinkling Christmas lights, and the aroma of fresh cedar garland as loved ones arrive, greeted by a scene that feels straight out of a classic holiday movie. Creating this wow factor doesn’t require a design degree — just a blend of thoughtful inspiration and a few clever front porch Christmas decorating ideas. Ready to transform your entryway into a showstopping holiday masterpiece that makes hearts skip a beat? Let’s capture the spirit together!

Evoking the Spirit: Why Front Porch Christmas Decorating Ideas Matter

The front porch is more than just an architectural feature; it’s the soul of your home’s holiday welcome. Decorating your porch for Christmas is the ultimate way to share the joy, excitement, and togetherness of the season not just with guests, but with anyone who passes by. Front porch Christmas decorating ideas help set your home apart, immediately signaling your holiday spirit and hospitality before guests even knock. Curb appeal matters especially during this time of year, as your porch becomes a joyful extension of your indoor holiday décor and the starting point of your winter home tour.

A thoughtfully decorated front porch doesn’t just inspire your neighbors; it boosts your own mood every time you come home. A lush pine and cedar garland, sparkling Christmas lights, and a cheerful wreath on the front door can remind your family of joyful childhood memories and the anticipation that comes with the holidays. Whether your style is more southern porch charm or you admire Martha Stewart’s classic holiday decor, these moments of delight start right on your doorstep. So, as you plan your holiday entertaining and tinsel-trimmed activities, consider how front porch Christmas decorating ideas can help craft the warmest first impression of the season.

The Emotional Impact of a Welcoming Christmas Decor

When your guests approach your front porch, their senses are immediately engaged. The soft glow from string lights, the vibrant reds and greens, and the scent of fresh pine cones and cedar transport them into the heart of the holidays. An inviting porch doesn’t just impress — it wraps visitors in a cozy embrace, reassuring them that joy, comfort, and celebration await inside. Attention to porch decor tells your guests—and yourself—that you are eager to spread the cheer. It’s about so much more than pine cones and ornaments; it’s about feeling home for the holidays, even before the door opens.


Inviting front porch scene with Christmas decor, family admiring a beautifully decorated front porch, lush garlands, twinkling lights, and seasonal props—front porch Christmas decorating ideas

What You'll Learn: Mastering Front Porch Christmas Decorating Ideas

  • How to choose the perfect Christmas decor for your front porch

  • Step-by-step styling tips for showcasing southern porch charm

  • Simple Christmas designs that create wow moments for guests

  • Ways to incorporate Martha Stewart-inspired decor for the porch

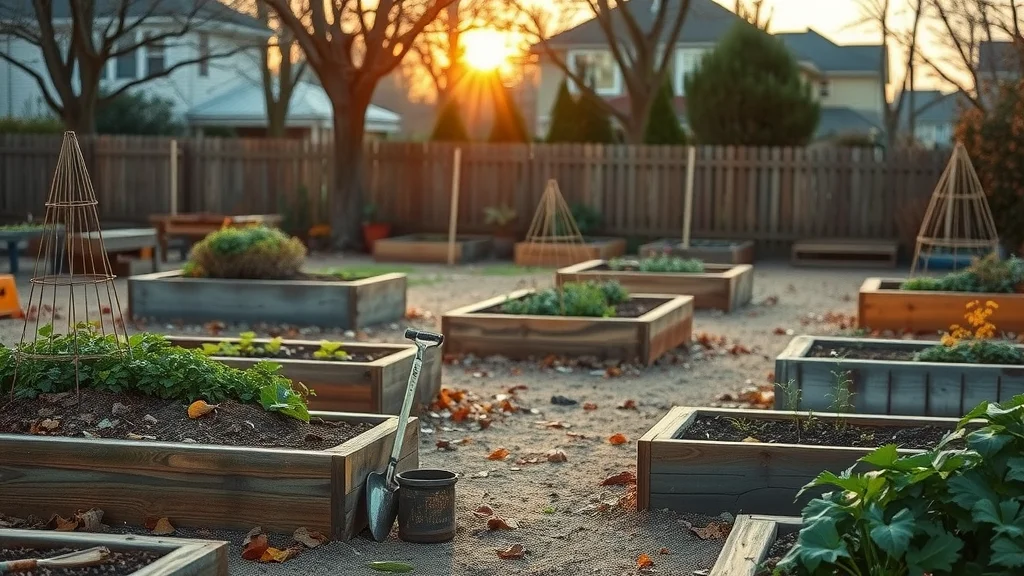
Essential Planning for Front Porch Christmas Decorating Ideas

Before you start shopping for string lights or gathering faux pine, it’s important to step back and plan your ultimate holiday porch experience. By assessing your porch space, setting a budget, and selecting a cohesive theme, your decorative efforts can yield dramatic, effortless results. Well-planned front porch Christmas decorating ideas save both time and money and ensure your overall look is harmonious—not haphazard.

Begin with honest measurements of your space and think about the main focal points—perhaps the front door, railings, or window boxes. From there, match your personal style and the architectural vibe of your home, regardless of whether you want a rustic retreat or a modern festive entry. Incorporating key elements like garlands, lanterns, and planters are all classic examples of decor for the porch that make an impact. Finally, outline your budget to determine which Christmas decor projects you can DIY and where it’s worth investing in quality pieces—especially for outdoor Christmas decor that will brave the elements all season long.

As you plan your holiday porch transformation, it's also wise to consider the durability of your outdoor space. For homeowners looking to protect their investment, exploring key strategies for waterproofing your concrete foundation can help ensure your festive decor stands strong against winter weather.

Assessing Your Porch: Space, Style, and Layout

Start by taking a clear look at your porch’s size and shape. Is it wide and southern-style, perfect for grand displays and layered greenery? Or maybe your entryway is compact, where every inch counts. Whatever your setup, measure every nook and cranny, including the area around your front door, pillars, and nearby window boxes. This enables you to map out where a lush garland, festive doormat, or window box of mini evergreens will fit best. Choose decor elements that work in harmony with your porch size. For example, oversized ornaments and dramatic bows look best with tall columns and ample space, while a collection of smaller planters and space-saving vertical garlands suit a narrower porch.

Next, inventory your porch’s permanent features. Brick, wood, and stone all contribute to your holiday home’s curb appeal and may affect how lights and decorations are displayed. Consider your home’s existing style: A classic colonial calls for traditional red and green, while a modern façade might benefit from sleek metallics or minimal accents. Make sure that your front porch Christmas decorating ideas tell a cohesive visual story, enhancing—not clashing with—your home’s natural character.

Setting a Budget for Simple Christmas Decor

Gorgeous front porch Christmas decorating ideas do not require breaking the bank. Begin by setting a sensible budget. List must-have items—perhaps a standout wreath for your front door, a roll of faux pine garland, or key accents like string lights and planters. Next, look for affordable ways to source seasonal materials, such as collecting pine cones, utilizing window boxes for greenery, or reusing ornaments from past holiday home tours. If you’re crafty, DIY options like handmade ornaments or repurposed items can add charm without a hefty price tag.

Allocate a portion of your budget for weatherproof materials, since outdoor Christmas decor needs to withstand winter winds and snow. Seek out savings on affiliate links or holiday home closeouts for higher-end items like lanterns or pre-lit garlands. And don’t forget—sometimes simple Christmas decor, such as an artfully arranged basket of pine cones or a string of twinkling lights, delivers the biggest wow factor for the smallest investment.

Choosing a Theme: Modern, Rustic, or Classic Holiday Decor

To achieve a polished effect, choose a decorating theme before you begin. Are you drawn to the nostalgia of traditional red and green, pine cones, and holly berries? Or do you crave the tranquil vibes of rustic burlap, oversized lanterns, and earthy tones? Modernists may prefer sleek metallics, unique orbs, and artistic arrangements with a bold twist. By picking a theme early on, you can shop, DIY, and arrange your front porch Christmas decorating ideas with a clear vision—preventing excess clutter or conflicting styles.

Remember that consistency is key. Even within one theme, look for opportunities to add texture, contrast, and height. Mix fresh cedar garland with faux pine, metallic ornaments with natural wood, or bold lighting with classic ribbon bows to keep your porch decor layered and visually interesting. No matter your chosen style, the most impressive holiday homes balance personal touches with tried-and-true traditions.

Comparison of Front Porch Christmas Decorating Ideas Themes

Theme

Color Palette

Key Elements

Difficulty

Traditional

Red & Green

Pine Cones, Garland

Easy

Rustic

Earthy

Burlap, Lanterns

Medium

Modern

Metallics

Sleek Lights, Orbs

Advanced

Classic Front Porch Christmas Decorating Ideas to Captivate

There’s timeless charm in the classics. Think lush evergreen garlands, oversized bows, and glowing window boxes. By drawing on iconic elements of front porch Christmas decorating ideas, you can make your entryway a scene straight out of a holiday card. Layering textures and colors suits both wide southern porches and cozier spaces, drawing the eye to features like the front door and steps. Whether you opt for a single standout feature or a full porch makeover, classic holiday decor never goes out of style—and it instantly delivers that heartwarming curb appeal.

Don’t be afraid to add personal touches: a custom wooden sign, handmade ornaments or window boxes brimming with red and white berries and bright greenery. Classic styles delight all ages, sync beautifully with a holiday home tour, and announce to every guest, “You’re welcome here—let the festivities begin!”

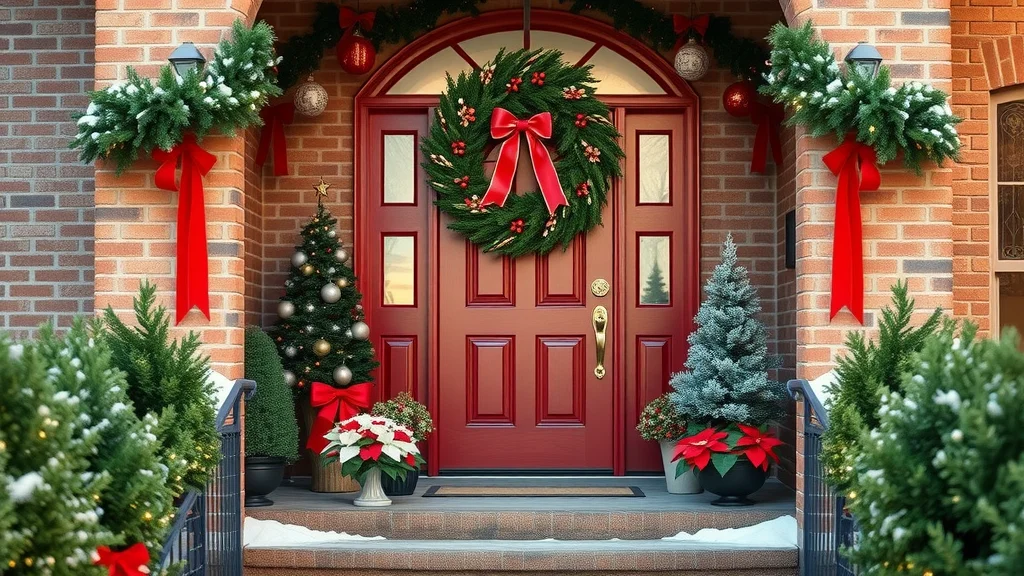
Festive Front Door Christmas Ideas: Wreaths, Ribbons, and More

The front door is the natural centerpiece of your porch decor. Start with a grand, lush wreath—choose classic red and white berries, pine cones, and sprigs of fresh cedar for a traditional feel, or opt for a modern look with metallic orbs and oversized bows. Consider layering your wreath over a large mirror or decorative wooden sign for extra impact during your holiday home tour. Add cascading ribbons in deep green, red, or gold, and hang coordinating ornaments or bells from the porch ceiling or nearby window boxes for a cohesive look.

Don’t let the space around your front door go to waste. Flank your entry with potted poinsettias, faux pine trees wrapped in twinkling lights, or decorative doormats that mirror your chosen theme. These door Christmas touches help create a seamless transition from the outdoors in—making guests feel the holiday joy before stepping inside.


Elegant festive front door with oversized Christmas wreath, ribbons, ornaments—front door Christmas ideas for front porch holiday decor

Garlands and Greenery: Southern Porch Christmas Decor

Southern porches are famous for their generous spans and cozy rocking chairs—perfect for layering on an abundance of garlands and greenery. Drape fragrant cedar garlands along railings, stair banisters, and above windows for a classic, full-bodied look. If you have window boxes, fill them with faux pine cuttings, twinkling string lights, and clusters of pine cones to maximize the lush holiday home feeling.

For a true southern porch vibe, weave strands of Christmas lights through your garlands and top off newel posts with big, festive bows. The addition of burlap, oversized lanterns, and extra planters filled with mini evergreens and berries can transform your porch into a captivating entrance that’s both warm and grand. Southern porch decor exudes a gracious, welcoming spirit—one that encourages holiday guests to linger a moment longer just to soak it all in.

Lanterns, Planters, and Poinsettias: Martha Stewart Porch Decor

No one captures holiday ambiance quite like Martha Stewart. Channel her signature style by artfully arranging lanterns of varying heights along your front porch steps and stacking planters filled with festive poinsettias or miniature Christmas trees next to your door. Layer winter greenery, pine cones, and metallic ornaments in window boxes or baskets for additional visual interest.

Think of porch decor as equal parts lighting and greenery—a combination that Martha Stewart often employs with finesse. Cluster pillar candles (real or battery-operated) inside glass lanterns or hurricane holders. Mix in rustic elements like wooden crates and burlap wraps, then finish with wire-edged ribbon bows for a sophisticated, photogenic look. This curated approach exudes timeless charm while still feeling fresh and personal.

"Your front porch is the handshake of your home during the holidays." – Expert Decorator

Simple Christmas Decor: Effortless Front Porch Upgrades

Not every front porch Christmas decorating idea needs to be elaborate or expensive. Sometimes, the most memorable arrangements come from simple, thoughtful upgrades that require little time or resources. Pine cones, handmade ornaments, and subtle string lights can turn an everyday porch into an inviting winter retreat. These easy enhancements work for both large southern porches and compact entries, proving that a handful of strategic choices can bring the season’s magic right to your doorstep.

Focus on what matters most: a cozy glow, welcoming greenery, and accents that reflect your style. Add fresh cedar to window boxes, drape a string of red and white twinkle lights, or sprinkle antique ornaments along the banister. These subtle touches often stand out more than an over-stuffed display, adding warmth and heart to your holiday home.

Affordable DIY Decor for the Porch

Adding affordable, do-it-yourself decor to your front porch is easier than you think. Gather pine cones during autumn walks or use leftover ornaments to create custom garlands for your railings. Upcycle old holiday decor by spray-painting pine cones metallic gold or silver, or by attaching sprigs of winter greenery to old window boxes for a rustic, fresh look. Making your own handmade ornaments can be a fun family project—and these unique touches bring special character to your outdoor Christmas decor.

  • Pine cones and natural elements

  • Handmade ornaments for railings

  • Simple string lights accents


Quick-Tip List: Five-Minute Porch Decor Makeovers

If you’re short on time, these five-minute upgrades will make a huge splash:

  • Swap in a holiday-themed doormat for instant curb appeal

  • Hang a classic wreath on the front door

  • Wrap porch columns with string lights

  • Cluster lanterns or mini trees near the entry steps

  • Fill a window box with fresh cedar, red and white ornaments, and faux pine sprigs for a seasonal pop

These quick fixes instantly refresh your front porch Christmas decorating ideas and bring joy to all who visit.

Sophisticated Outdoor Christmas Decor for Every Style

Elevate your holiday style with elegant upgrades that feel custom and curated. Incorporate metallic ornaments, clean-lined planters, or tailored bows for a fresh yet timeless look. Don’t forget to extend your front porch Christmas decorating ideas to balconies and French doors for homes with multiple entryways or levels, ensuring your entire exterior radiates cheerful sophistication.

Try mixing classic elements with contemporary accents, like pairing traditional spruce garlands with modern string lights or placing window boxes with a monochromatic color scheme. The result is a holiday home that feels thoroughly of-the-moment, yet brimming with coziness and style.

Balconies and French Doors: Expanding Front Porch Appeal

Your front porch isn’t the only space that deserves festive attention. Balconies and French doors present unique opportunities to boost your home’s holiday curb appeal. Adorn balcony railings with lush garlands or drape mini twinkle lights to create a romantic, elevated look. French doors can be decorated with matching holiday wreaths and potted plants on each side—tying the whole look together for your holiday home tour.

Coordinating your decor theme across porches, balconies, and French doors achieves a harmonious flow and elevates your outdoor Christmas decor game. Don’t forget—balconies can also benefit from window boxes filled with evergreens, ornaments, and a dusting of faux snow for a truly magical touch!


Refined balcony Christmas setting with garlands around French doors, potted evergreens, ribbon bows—outdoor Christmas decor inspiration

Smart Use of Christmas Lights, Ornaments, and String Lights

The right lighting transforms any porch into a glowing, festive greeting. Layer various types of Christmas lights—large bulbs, delicate fairy lights, and string lights—for dimension and continuous illumination. Highlight focal points by wrapping lights around columns, draping them over garlands, and accenting window boxes for added sparkle.

Use oversized ornaments for modern impact or scatter simple, classic baubles throughout evergreen garlands for traditional flair. Don’t be afraid to mix textures; metallic or matte-finish ornaments blend beautifully with lush greenery and burlap accents. Creative use of Christmas lights and ornaments ensures your front porch Christmas decorating ideas shine bright long after sunset.

Standout Front Porch Christmas Decorating Ideas for Small Spaces

Small porches or apartment stoops can have just as much holiday pizzazz as sprawling southern porches—it simply requires a bit of ingenuity. Concentrate on vertical space by hanging garlands or stacking planters to add depth and impact even in tight quarters. Space-saving wreath displays, like layered mini wreaths or a single statement piece, work wonders for narrow entryways.

  • Vertical garlands for narrow porches

  • Space-saving wreath displays

  • Mini trees and creative planters


Creative small porch decor with vertical garland, mini Christmas trees, inventive planters—front porch Christmas decorating ideas

Don’t overlook the value of window box arrangements, stacked mini trees, or creative planters that double as decor storage. Choose quality over quantity for your small porch Christmas decor; just a few thoughtfully chosen elements will go a long way and keep your space feeling uncluttered but endlessly festive.

Incorporating Holiday Decor Trends in Your Front Porch Christmas Decorating Ideas

Trends come and go, but incorporating a few on-point touches can keep your porch looking fresh year after year. One of the most prominent developments is the shift toward sustainability and natural inspirations, like recycled materials and locally sourced evergreens. Oversized, statement-making ornaments and layered, glowing lights continue to dominate the holiday home tour scene. Mixing classic elements with trending details will keep your front porch Christmas decorating ideas feeling both on-trend and timeless.

What is Trending This Year in Christmas Decor?

This season, expect to see a blend of eco-friendly materials and maximalist influences—think oversized bows, wool or felt crafts, hand-dyed ribbons, and a resurgence of traditional red and white. Layered lighting, from Edison bulbs to cascading string lights, steal the show in both classic and contemporary settings. Window boxes filled with fresh cedar, pine cones, and handmade wooden stars are also getting well-deserved attention on social media and in glossy home décor magazines. The emphasis is on coziness, personality, and sustainability.

Eco-Friendly Porch Decor Inspirations

Sustainability is taking center stage in holiday decor, and your front porch is the perfect place to go green. Try arranging garlands from locally foraged greenery, using burlap bows, or crafting ornaments from recycled paper, wood, or metal. Fill window boxes with organic materials and opt for battery-operated or solar-powered Christmas lights to reduce your carbon footprint.

Upcycling is easier than you may think—transform last year’s holiday decor into fresh new accents, or repurpose household items as quirky planters for mini evergreens. By focusing on eco-friendly and upcycled elements, your front porch Christmas decorating ideas will look beautiful and reflect your commitment to sustainability.


Sustainable holiday porch decor with recycled materials and natural greenery—eco-friendly front porch Christmas decorating ideas

Watch our exclusive, step-by-step video tutorial: See how decorating experts transform a blank porch into a festive masterpiece, from choosing a theme to adding the final ribbon. Close-ups guide you through DIY details, with real-time tips for arranging garlands, lights, planters, and more—everything you need to bring these front porch Christmas decorating ideas to life!

People Also Ask: Front Porch Christmas Decorating Ideas

How do I decorate my outdoor porch for Christmas?

Begin by choosing a theme that matches your home’s architecture. Layer garlands and lights, add a festive doormat, use weatherproof ornaments, and finish with a welcoming wreath on the front door to create inviting front porch Christmas decorating ideas.

What is trending this year for Christmas decor?

This year, trending front porch Christmas decorating ideas include sustainable materials, oversized ornaments, nature-inspired decorations, and layered lighting for a cozy yet modern feel.

What is the traditional Christmas porch decor?

Traditional front porch Christmas decorating ideas feature classic red and green color schemes, lush garlands, natural pine cones, vintage lanterns, and festive wreaths.

How to decorate a front porch in the winter?

To decorate your front porch in winter, focus on durable greenery, weather-resistant decorations, layered textiles, and warm lighting, all key to effective front porch Christmas decorating ideas.

Expert Tips and Tricks for Enhancing Your Front Porch Christmas Decorating Ideas

  1. Layer textures for warmth – Use garlands, throws, and cushions for inviting depth.

  2. Use symmetry for classic appeal – Pair planters or lanterns on both sides of the front door for timeless balance.

  3. Mix lighting types for ambiance – Combine string lights, lanterns, and candles for a cozy glow.

  4. Add personalized touches for uniqueness – Incorporate monogrammed items or homemade ornaments.

Explore a stunning video gallery showcasing a variety of front porch Christmas decorating ideas—perfect for sparking creativity and helping you make the most of your holiday home tour.

FAQs: Front Porch Christmas Decorating Ideas

  • How do I keep decorations weatherproof?
    Choose outdoor-rated lights and ornaments, secure items with weatherproof fasteners, and spray greenery with protective sealant to extend their festive life.

  • What are the best plants to use for porch Christmas decor?
    Evergreens, boxwood, cedar garlands, and winterberry holly are excellent choices for robust holiday porch decor. Arrange them in planters or window boxes for maximum effect.

  • Can I reuse last year’s decor creatively?
    Absolutely! Refresh old ornaments with a coat of spray paint, repurpose garlands as window box fillers, or mix and match decor for a new theme each year.

Key Takeaways for Perfect Front Porch Christmas Decorating Ideas

  • Plan your front porch Christmas decorating ideas early for best results

  • Embrace personal style with mix-and-match décor

  • Lighting is essential for festive curb appeal

Spread the Cheer: Try These Front Porch Christmas Decorating Ideas and Share Your Results!

The magic of the season begins before the first knock on your door. With these creative front porch Christmas decorating ideas, your home will become a beacon of festive joy for every guest and passerby. Showcase your style, spread the holiday cheer, and inspire your community—one beautifully decorated porch at a time!

To enhance your front porch Christmas decorations and create a welcoming atmosphere for your guests, consider incorporating these expert-recommended ideas:

  • Festive Porch Displays for Cold Winters: Professional designers suggest using frost-hardy materials like cut evergreen foliage, berry-laden branches, and pinecones to craft vibrant arrangements that withstand cold temperatures. (homesandgardens.com)

  • DIY Kissing Ball Decorations: Embrace the tradition of “kissing balls”—spherical arrangements of evergreen sprigs and herbs—as a creative alternative to mistletoe. Crafting your own adds a personal touch and brings a piece of nature to your holiday decor. (gardeningknowhow.com)

  • Candice Brathwaite’s Elegant Doorway Display: Take inspiration from Candice Brathwaite’s Christmas doorway, adorned with cascading baubles in soft champagne, bronze, and gold tones, complemented by lush greenery and velvet accents for a luxurious ambiance. (womanandhome.com)

  • Top Christmas Plants for Your Porch: Incorporate plants like holly, hellebores, dwarf conifers, cyclamen, and Skimmia japonica to add natural beauty and festive color to your porch, as these thrive in containers and cold weather. (idealhome.co.uk)

  • Smart Lighting with Philips Hue Festavia String Lights: Utilize customizable string lights that allow you to set colors and sync to music via your phone, offering a versatile and modern approach to holiday lighting. (homesandgardens.com)

  • Stacey Solomon’s DIY Christmas Door Display: Create a stunning entrance with a giant red bow made from chicken wire, foam, and fabric, accompanied by garlands, fairy lights, and a wooden sleigh filled with flowers for a magical touch. (womanandhome.com)

By integrating these ideas, you can transform your front porch into a festive and inviting space that captures the holiday spirit and impresses your guests before they even step inside.

Landscaping & Curb Appeal

Write A Comment

*
*
Related Posts All Posts
12.19.2025

The December Lawn Care Mistake Everyone Makes Right Before Winter

Did you know that up to 40% more patchy growth can happen in spring if you make common December lawn care mistakes? As winter approaches, most homeowners unknowingly put their lawns at risk—often by skipping just a few small steps. If you want to greet the new season with a lush, green yard, pay close attention to these crucial winter lawn care mistakes and discover expert-backed methods to avoid regret come spring. What You'll Learn About December Lawn Care Mistakes Gain insight into the most common winter lawn care mistakes and how to avoid them. Understand why winter lawn health sets the tone for spring. Discover actionable strategies used by lawn care experts. Shocking Statistic: The Startling Impact of December Lawn Care Mistakes "Most homeowners commit at least three major winter lawn care mistakes each December, resulting in up to 40% more patchy growth the following spring." – National Turf Institute This fact underscores the importance of addressing critical care mistakes before winter sets in. Simple missteps like skipping the final mow, overlooking leaf removal, or using the wrong fertilizer can lead to common winter lawn issues—like brown patch, dead patches, and a weak root system. Addressing these care mistakes now not only protects your yard through the coldest months but ensures your spring lawn flourishes. The following list reveals the most frequent and damaging errors people make and offers the guidance you need to avoid these traps. Mistake #1: Ignoring Pre-Winter Lawn Care Too often, homeowners delay or skip essential December lawn care, believing the growing season is over and their lawn can fend for itself. In reality, pre-winter preparation is the foundation for a healthy winter lawn. Neglect can result in compacted soil, brown patch, and a weakened root system, making spring recovery slow or sometimes impossible. Critical mistakes at this stage can significantly hurt your lawn’s ability to stay resilient during freezing temperatures and fluctuating weather, increasing the risk of dead patches next year. Why Proper December Lawn Care Sets the Stage for Winter Lawn Health Effects of poor preparation Signs your winter lawn is at risk Essential lawn care tips for December A poorly prepared lawn is prone to more than just surface-level problems—it’s also vulnerable to underlying soil compaction and fungal diseases. Watch for early signs like patchy areas, discoloration, or visible thatch buildup, which indicates your winter lawn may already be at risk. Expert tips include clearing leaves, adjusting watering, and applying the right nutrients. Adopting these best practices now prevents common winter lawn care mistakes, strengthens grass roots before dormancy, and kickstarts a vibrant spring lawn. While addressing these December lawn care mistakes, it's also important to consider how your lawn's health can impact other aspects of your property. For example, proper drainage and soil management not only benefit your grass but can also help prevent issues like water pooling near your home's foundation. If you're interested in learning more about protecting your property from moisture damage, explore these key strategies for waterproofing your concrete foundation that every homeowner should know. Mistake #2: Skipping the Final Winter Lawn Mowing One of the top critical mistakes people make in December lawn care is skipping the final mow before winter. Many assume it’s best to let grass grow longer for extra insulation, but leaving it too tall actually traps moisture, fosters fungal diseases, and can smother grass roots under snow. Conversely, cutting it too short before a freeze exposes roots and can increase brown patch. Season grass needs precise attention to blade height at this stage for optimal protection. The Role of Mower Blade Height in Preventing Common Winter Lawn Issues How to set mower blade for winter Dangers of long grass in winter lawns Experts agree the mower blade should be set about one half-inch lower than the regular growing season height for cool-season grass—typically 2.5 to 3 inches. This height discourages brown patch and fungal disease while still shielding the root system from severe cold. Letting grass grow too long encourages matting and disease, while too short increases vulnerability to freezing temperatures. Always plan your final mow before the ground fully freezes to avoid compacted soil from heavy machinery and foot traffic during winter. Mistake #3: Applying Too Much (or Too Little) Winter Lawn Fertilizer Optimal timing for winter lawn fertilizer Dangers of over-fertilization or skipping fertilization How to tailor care to your region The arrival of cold weather tempts many to guess about fertilizer needs, but incorrect applications are a leading cause of winter lawn care mistakes. Applying too much fertilizer can cause excessive leaf growth that’s vulnerable to frost and fungal infections (especially brown patch), while skipping it altogether starves your lawn and weakens its defenses. The secret lies in choosing a product with higher potassium and lower nitrogen and applying it while grass roots can still absorb nutrients, usually right after the final mow in late fall or early December for cool-season lawns. Tailor amounts to your grass species and region, following label directions carefully to avoid runoff and wasted product. Fertilizer Type Best For Application Timing Potassium Content Key Benefit High-Potassium Granular Cool-Season Grass Late Fall/Early December High Strengthens root system Low Nitrogen Liquid Warm-Season Grass Before first frost Moderate Minimizes frost burn Organic Compost All Lawns After final mow Variable Improves soil health Mistake #4: Overlooking Soil Aeration in December Lawn Care Benefits of late-season aeration Easy aeration techniques for winter lawn care Compacted soil is a silent threat to lawn health in winter. When the soil becomes dense from summer activity or fall leaf accumulation, it prevents water, air, and nutrients from reaching grass roots. Many people forget that December—right after your final mow but before heavy snow—is still a good time to aerate. Plug or spike aerators break up compacted soil, ensuring a healthier root system and boosting resilience to freezing temperatures. The result: fewer brown patches and a stronger spring lawn. Remember, even small yards benefit from hand-held aerators or rental plug machines, making it easy to sustain winter lawn health with just a little extra effort. Mistake #5: Neglecting Leaves and Debris Removal – A Major Lawn Care Mistake Impact of debris on winter lawn health Best practices for leaf management Letting leaves, branches, and lawn debris accumulate smothers your grass throughout winter. This creates a breeding ground for pests and fungal diseases, not to mention increasing the likelihood of brown patch and dead patches under the spring thaw. As one of the most overlooked winter lawn care mistakes, debris buildup blocks sunlight, reduces air circulation, and raises humidity at the soil level. Make it a weekly routine in December to clear leaves and broken branches, and try mulching them into the lawn if possible. This not only prevents disease but also returns organic matter to the soil for lasting nutrient benefits. Mistake #6: Watering Too Late or Too Little for Proper Winter Lawn Care How soil moisture impacts winter lawn survival Proper watering schedules in December December may feel too late for lawn watering, but skipping this task is among the most common care mistakes. Dry winter winds and lower evaporation rates can leave roots parched beneath the surface. Over-watering is equally risky, encouraging shallow roots and ice formation, both damaging to your grass. The best practice is to water deeply and infrequently until the ground freezes, mimicking natural rainfall patterns. Check soil moisture weekly—grass roots need hydration to survive dormancy and rebound in spring. Avoid watering late in the day to reduce the risk of freezing temperatures creating dangerous ice patches overnight. Mistake #7: Failing to Address Lawn Compaction Before Winter Causes and signs of lawn compaction in winter Remedies to improve root health Lawn compaction is often overlooked because its damage isn’t immediately visible. Heavy summer foot traffic, equipment, or even prolonged leaf cover can compress the soil, stifling the root system and reducing air and water movement. Watch for pooling water, thinning grass, or visible compacted soil patches—these are all signs your winter lawn is at risk. Simple aeration or topdressing before winter increases soil permeability and promotes stronger growth in spring. By addressing compaction in December, you prevent issues like brown patch and dead patches from sabotaging your lawn’s potential. Mistake #8: Overlooking pH Levels—A Hidden December Lawn Care Mistake Why pH matters before winter lawn care Simple soil tests and amendments Soil pH directly influences nutrient availability; an incorrect balance can render even the best fertilizers ineffective. Many homeowners skip winter lawn pH testing, unintentionally locking away nutrients needed for a healthy spring lawn. Most grasses prefer a pH between 6.0 and 7.0. Test your soil with a home kit in early December. If the pH is off, lime or sulfur amendments can gradually balance it during dormancy, improving the root system’s resilience against freezing temperatures. This often-missed step ensures your lawn takes full advantage of every other care effort you make. Mistake #9: Using the Wrong Grass Seed Type for Common Winter Lawns Identifying cool-season and warm-season grass Selecting the right seed for December lawn success Many people make critical mistakes by overseeding with the wrong type of grass seed in December. Cool-season grasses like fescue and rye thrive in lower temperatures, while warm-season grasses go dormant. Using the wrong seed leads to sparse or failed germination, wasting effort and money. Identify your existing lawn type before choosing a seed; overseed your lawn with cool-season varieties if you want faster spring results. If overseeding isn’t suitable for your region, focus on strengthening existing grass roots through other proven winter lawn care strategies. Mistake #10: Skipping Pre-Emergent Weed Control in Winter Lawn Care Why winter weed management is critical Choosing effective pre-emergent treatments Ignoring pre-emergent weed control is among the most common winter lawn care mistakes. Weeds like poa annua and crabgrass take root during winter dormancy and erupt in early spring, choking out grass. Apply a pre-emergent in December, before freezing temperatures, to disrupt weed growth cycles. Choose products suited to your lawn’s grass species and climate; granular and liquid formulas can both be effective. This simple step sets your lawn up for a weed-free start, maximizing the benefits of other winter lawn care treatments. Watch Now: Demonstration: Step-by-Step Walkthrough for Ideal December Lawn Care Mistake #11: Failing to Reduce Foot Traffic on Dormant Lawns Impact of traffic on winter lawn recovery Tips to protect your yard during dormancy Heavy foot traffic during winter is a silent destroyer of dormant lawns, crushing grass blades and compacting soil at a time when the root system is least able to recover. Stepping on frozen grass can cause direct damage, leading to brown patch and dead patches that appear with spring growth. Mark walkways, shovel paths, and post reminders for your family to avoid unnecessary crossings. Simple changes to foot traffic flow during winter go a long way in reducing the lasting impact on your yard’s health and visual appeal. Mistake #12: Relying on Short-Term Lawn Care Solutions Instead of Sustainable Practices Long-term planning for optimal winter lawn care Sustainable tips for greener results next spring There are no shortcuts to a beautiful lawn. Quick fixes and gimmicky products might produce visual results, but they rarely address the underlying causes of issues like brown patch or compacted soil. Sustainable winter lawn care includes proper mowing, fertilization, debris management, and routine pH checks. Adopt eco-friendly products and focus on strengthening grass roots, not just treating symptoms. Every effort in December lays the groundwork for healthy, resilient grass and fewer headaches throughout the next growing season. Summary Table: The 12 Most Common Winter Lawn Care Mistakes and Their Solutions Mistake Common Issue Actionable Solution Ignoring Pre-Winter Lawn Care Dead patches, weak growth Start prep early; remove debris Skipping Final Winter Lawn Mowing Fungal disease, smothered lawn Adjust mower blade height; mow before freeze Improper Fertilization Brown patch, slow spring growth Apply correct winter fertilizer after final mow Overlooking Soil Aeration Compacted soil, poor water uptake Aerate after last mow in late fall Neglecting Leaf/Debris Removal Pest/fungal problems, suffocated grass Rake and mulch leaves weekly Incorrect Winter Watering Weak roots, ice damage Water sparingly before ground freezes Not Addressing Compaction Stunted growth, pooling water Aerate, reduce heavy lawn use Ignoring pH Levels Poor nutrient uptake Test and amend soil as needed Wrong Grass Seed Type Sparse/failed germination Match seed to season grass type Skipping Pre-Emergent Weed Control Spring weed explosion Apply pre-emergent before freeze High Foot Traffic Smashed/damaged turf Limit use, protect dormant areas Short-Term Fixes Recurring issues Adopt sustainable, seasonal care "A winter-ready lawn is made in December, not March. Start smarter to avoid springtime regret." – Turf Science Specialist People Also Ask: December Lawn Care Mistakes FAQ What can I put on my lawn in December? Appropriate winter lawn fertilizers Compost and soil amendments Pre-emergent weed control options In December, it’s best to use a fertilizer formulated for winter lawn care, such as a product with higher potassium content and lower nitrogen. Light topdressing with compost improves soil health while supporting beneficial microbes. Apply a pre-emergent weed control suited for your grass type, but avoid putting down new grass seed unless specifically recommended for your region. These steps help your lawn enter dormancy strong and minimize common winter lawn care mistakes. What is the 150 rule for lawns? Explaining the '150 Rule' for soil and fertilizer The "150 Rule" states that lawns generally need about 1.5 pounds of nitrogen per 1,000 square feet annually. For winter lawn care, apply no more than 0.5 pounds per 1,000 square feet in late fall or December, with the rest distributed throughout the growing season. Following this rule prevents over-fertilization, minimizes brown patch and other care mistakes, and ensures a well-fed, resilient lawn without risking runoff or nutrient burn. Why does my lawn look bad in winter? Common winter lawn care mistakes that affect appearance How dormancy and damage contribute A winter lawn may look dull or patchy due to natural dormancy, but neglecting critical care mistakes exacerbates the issue. Skipping the final mow, improper watering, compacted soil, and leaf accumulation are major culprits. If your yard turns brown or uneven, it’s often a combination of winter care mistakes and the grass’s normal cycle. Proactive December lawn care—mowing, debris removal, proper watering, and fertilization—gives your lawn a much healthier appearance come spring. Is December a good time to fertilize a lawn? Guidelines for winter lawn fertilizer use Timing and best products for December For many cool-season grasses, December is the last window for effective fertilization. Look for winterizing formulas with extra potassium and moderate nitrogen, applied after your last mow and before the ground freezes. Avoid fertilizing during stretches of heavy rain or freezing temperatures, as nutrients may leach away. In warmer climates, timing may vary slightly, but the principle stays: finish fertilizing before deep dormancy and always read label instructions carefully to steer clear of common winter lawn care mistakes. Watch Now: Expert Q&A: Top December Lawn Care Questions Answered Quick-Reference List: Essential December Lawn Care Mistakes to Avoid Ignoring final mow Overlooking leaf removal Improper winter fertilizer use Inadequate aeration Wrong grass seed Skipping weed control Neglecting pH levels Too much or too little water High traffic on dormant lawn Chasing quick fixes Key Takeaways on December Lawn Care Mistakes Preparation is the foundation for a healthy winter lawn. Avoid the most common winter lawn care mistakes to ensure lush growth in spring. Consult with a lawn care professional for tailored advice. Further December Lawn Care FAQs How often should I mow in December? Can I overseed during winter? Are organic winter lawn care products effective? Ready for a Greener Spring? Take Action Against December Lawn Care Mistakes Today Download our free winter lawn care checklist and start your journey to a healthier lawn! If you’re committed to creating a resilient, beautiful yard, remember that a healthy lawn is just one part of a well-protected home. Taking steps to safeguard your property from the ground up can make a significant difference, especially as winter weather approaches. For a deeper dive into how foundational care can prevent costly repairs and boost your home’s value, discover the essential homeowner strategies for waterproofing your concrete foundation in this comprehensive guide. By combining smart lawn care with proactive home maintenance, you’ll be well on your way to a greener spring and a safer, more secure home environment. Act now on these December lawn care mistakes—your spring lawn will thank you with every blade of green. To further enhance your understanding of December lawn care mistakes and how to avoid them, consider exploring the following resources: “5 mistakes you could be making with your lawn this winter”: This article outlines common winter lawn care errors, such as using incorrect fertilizers and neglecting lawn cleanliness, providing practical solutions to maintain a healthy lawn during the colder months. (tomsguide.com) “Avoid These 10 Winter Lawn Care Mistakes for a Healthier Texas Lawn”: Tailored for Texas homeowners, this guide discusses prevalent winter lawn care mistakes, including improper fertilization and overwatering, offering region-specific advice to keep your lawn in optimal condition. (gomow.com) By reviewing these resources, you’ll gain additional insights and strategies to prevent common pitfalls and ensure your lawn remains vibrant and healthy throughout the winter season.

12.18.2025

Hydrangea Winter Care Tips to Protect Next Summer’s Blooms

Did you know: A whopping 70% of hydrangea bloom losses are traced back to mistakes made during the winter months? If you want to enjoy lush, beautiful hydrangeas next summer, now is the time to learn exactly how to get winter hydrangea care tips right. In this comprehensive guide, you’ll discover actionable steps and expert insights designed to help your hydrangea bushes not just survive the cold, but thrive and burst with color when the weather warms. Startling Stat: Most Hydrangea Losses Occur from Improper Winter Care—Learn to Protect Your Blooms It’s more common than you think: Most gardeners lose their hydrangeas not because of pests or disease, but due to improper winter care. Research reveals that up to 70% of hydrangea losses in home gardens result from failing to protect flower buds and roots against harsh winter temperatures, wind, or fluctuating freezes. These critical months shape whether you’ll see beautiful flowers bloom on old wood or only sparse greenery. Understanding winter hydrangea care tips is crucial if you’re aiming for big, colorful blossoms. From the correct mulching methods to the right moment for cutting back hydrangea bushes, small details make the difference between vibrant blooms and frost-damaged disappointment. Below, we break down essential winter care to ensure your hydrangeas thrive—even after a hard winter. What You'll Learn in This Guide to Winter Hydrangea Care Tips Why winter hydrangea care tips are crucial for healthy blooms Specific winter care strategies tailored to types of hydrangea Expert advice on preserving your blue hydrangea’s vibrant color How to apply the 1 3 rule for hydrangeas through the winter Answers to the most common winter hydrangea care questions Why Winter Hydrangea Care Tips Are Critical for Beautiful Flowers If you aspire to enjoy beautiful flowers and magnificent hydrangea blooms in your garden, winter care cannot be overlooked. Proper winter hydrangea care tips serve as the foundation for strong spring growth, robust flower buds, and vibrant colors. Skipping key steps during winter months can result in lost flower buds, damaged stems, and disappointing displays even with the healthiest plants in early spring. “Hydrangeas that receive proper winter care see up to 80% more blooms in the following season.” — National Gardening Association Whether you grow mophead, lacecap, oakleaf, or panicle hydrangeas, understanding their unique needs ensures all your hard work during the growing season pays off. Even the tough hydrangea paniculata or hydrangea arborescens can suffer winter damage if root zones aren’t insulated or buds left unprotected. A season of thoughtful, informed care will set the stage for a spectacular display of beautiful hydrangeas next summer. Understanding Types of Hydrangea: Tailoring Your Winter Hydrangea Care Tips No two types of hydrangea are quite the same, and each requires slightly different winter care strategies. Mophead (Hydrangea macrophylla) and lacecap varieties, famous for their big blue or pink blooms, are particularly susceptible to winter bud loss since they bloom on old wood. Meanwhile, panicle hydrangea (Hydrangea paniculata) and oakleaf hydrangea (Hydrangea quercifolia) are more tolerant of the cold and often bloom on new wood, but can still benefit from protective winter care—especially in colder zones. For the gardener, identifying your hydrangea type is the starting point. Once you know whether you have a blue hydrangea, a panicle, smooth, or oakleaf variety, you can tailor your winter strategy. Next, let’s break down the specifics for each group to ensure you get protection—without unnecessary steps—for your unique plants. While winterizing your hydrangeas is essential for healthy blooms, it's also important to consider the overall health of your garden environment. For example, ensuring your home's foundation is protected from excess moisture can help prevent water-related issues that may impact your landscape. Discover practical strategies for waterproofing your concrete foundation to support a thriving garden year-round. Winter Hydrangea Care Tips for Mophead and Lacecap Varieties When it comes to mophead (Hydrangea macrophylla) and lacecap hydrangeas, winter care should focus on protecting next year’s flower buds, which form on old wood during late summer or early fall. These buds are especially vulnerable to winter temperatures, frost, and drying winds. To preserve your blue hydrangea and encourage strong blooms, apply a thick winter mulch of shredded leaves, pine needles, or even wood chips around the base of the hydrangea bush after the first frost, but before the ground freezes. A protective wrap of burlap or garden fleece can also shield stems and buds from the worst of the weather, improving your odds for abundant blooms next season. If you live in a particularly windy or cold climate, use stakes to create a windbreak and gently tie branches together to reduce breakage from heavy snow. Remember: Avoid heavy pruning in late autumn! Cutting back mophead or lacecap hydrangeas too severely can eliminate your spring flower buds and lead to sparse blooming even in late spring. Instead, defer major pruning to after blooming in summer, and only tidy up weak or dead wood in late winter or early spring. Winter Hydrangea Care Tips for Panicle and Oakleaf Hydrangeas Panicle hydrangeas (Hydrangea paniculata) and oakleaf hydrangeas (Hydrangea quercifolia) are cold-hardy and bloom on new wood, which means winter damage is less likely to affect next year’s flowers. Still, providing these hydrangea types a modest winter mulch protects the root zone and keeps the soil temperature even when winter months turn frigid. Mulching also prevents the freeze-thaw cycle from damaging roots or causing winter die-back. Pruning can take place in late winter or early spring for these robust varieties, as they set buds on new growth. Simply remove older stems, dead wood, or spent flower heads, and shape as desired before new shoots appear. Even though panicle and smooth hydrangeas are more forgiving, following these practical winter hydrangea care tips ensures healthy roots and even more abundant, beautiful flowers in next summer’s display. Proven Winter Hydrangea Care Tips to Ensure Healthy and Beautiful Flowers Mulching for winter care to protect roots: Apply a 3–4 inch layer of organic mulch such as shredded leaves, straw, or wood chips around the base. Keep the mulch a few inches away from the stem to prevent rot. Staking and wrapping for wind and frost protection: Use stakes and burlap to shield delicate branches and buds, particularly on blue hydrangea and mophead varieties prone to winter damage. Pruning best practices and the 1 3 rule for hydrangeas: For plants that bloom on old wood, do not cut them back in late fall. Instead, tidy up dead or weak stems in late winter or early spring, following the 1 3 rule (remove no more than one third of stems at a time). Watering schedules in late fall: Give your hydrangeas a deep drink before the ground freezes. Hydrated roots are less likely to suffer winter damage. Shielding blue hydrangea buds from harsh temperatures: For blue hydrangea (Hydrangea macrophylla), use garden fleece, burlap, or even a cardboard box over the main stems and buds on the coldest nights, removing on milder days to prevent moisture buildup and disease. For a visual walkthrough of these key winter hydrangea care tips, watch as our expert demonstrates every step—from mulching and wrapping to shaping for spring—so you can follow along in your own backyard. People Also Ask: Do Hydrangeas Need to Be Cut Back for Winter? It’s a frequent question among gardeners: Do hydrangeas need to be cut back for winter? The answer depends heavily on your hydrangea type. For those that bloom on old wood—including mophead hydrangea (Hydrangea macrophylla), blue hydrangea, and some lacecap varieties—avoid cutting them back in the fall. Pruning these in late fall or winter may remove developing flower buds and lead to a disappointing spring. Instead, prune after flowering in summer or only remove dead and damaged stems in late winter or early spring. For hydrangeas that bloom on new wood—such as panicle hydrangea (Hydrangea paniculata) or smooth hydrangea (Hydrangea arborescens)—late winter or early spring is the perfect time to cut them back and shape them. Just make sure you’re never pruning more than a third of the total plant at once, following what’s commonly known as the 1 3 rule for hydrangeas. This approach protects plant vigor and promotes healthy, beautiful blooms in the growing season to follow. Guidance on Pruning and the 1 3 Rule for Hydrangeas During Winter Applying the 1 3 rule means you remove no more than a third of the old stems in any single pruning session, targeting the oldest, least productive wood. For mophead and blue hydrangea that bloom on old wood, restrict pruning to dead or weak stems in late winter or early spring—preserving those vital flower buds for next year’s show. For paniculata or panicle hydrangea and smooth hydrangeas, cut back stems to about 12–18 inches above the ground in late winter or early spring for more vigorous growth and beautiful blooms. Remember, improper pruning at the wrong time can mean the difference between a lush, explosive flower show and sparse, disappointing blooms. With consistent application of winter hydrangea care tips, you’re setting up your plants for a season filled with color and beauty. People Also Ask: What to Do with a Hydrangea for Winter? When planning winter care for your hydrangea bush, prioritize insulation and protection. Key strategies include mulching the base of the plant, wrapping stems with burlap (especially for blue hydrangea and mophead types), and, for especially cold climates, providing a windbreak using garden stakes and fabric. These winter hydrangea care tips help prevent both root and bud damage, safeguarding your blooms for the spring. Potted hydrangea or young plants may even be moved to sheltered spots on especially bitter nights. Don’t overlook the importance of keeping mulch slightly away from main stems to avoid rot and fungal issues. Remove old flower heads only as needed, leaving most to act as natural winter shields for developing buds beneath. If you’ve covered your hydrangea, be sure to remove protection in early spring as soon as threat of deep freezes passes, allowing new shoots to emerge and the plant to come back to life swiftly. Comprehensive Winter Hydrangea Care Tips Checklist Identify your hydrangea type to tailor care (blue hydrangea, mophead, panicle, oakleaf, smooth hydrangea) Mulch the root zone after first frost with organic matter (wood chips, shredded bark, straw) Wrap delicate stems with burlap or garden fleece for added protection Prune only according to type—old wood in summer, new wood in late winter or early spring Water deeply in late fall, before the ground freezes Create windbreaks for exposed plants and sites Monitor for signs of winter damage and remove covers as spring begins People Also Ask: What is the 1 3 Rule for Hydrangeas? The 1 3 rule for hydrangeas is a guiding principle for pruning that protects both plant health and next season’s blooms. By removing no more than one third of old stems in a season, you maintain the plant’s structure and energy while eliminating the least productive wood. This reduces shock and makes recovery easier—especially crucial for hydrangeas that bloom on old wood, where over-pruning can eliminate spring flower buds. This rule applies whether you are tidying up mophead, blue hydrangea, panicle hydrangea, or even oakleaf varieties, but it’s especially important for gardeners new to hydrangea care who want to boost their chances of a beautiful, bloom-filled summer garden. How the 1 3 Rule Applies to Winter Hydrangea Care Tips During winter, apply the 1 3 rule as you remove dead, diseased, or damaged stems—keeping at least two-thirds of healthy wood intact. For hydrangea paniculata or panicle and smooth hydrangeas (Hydrangea arborescens), late winter or early spring is the ideal time for a more severe cutback, stimulating new wood growth and big floral displays. For all types, refrain from a hard prune before winter sets in, as this invites winter damage and loss of flower buds in varieties that bloom on old wood. Coupled with smart mulching and weather protection, following the 1 3 rule supports overall plant vigor and maximizes your odds of seeing those show-stopping beautiful flowers when hydrangeas bloom in late spring or early summer. People Also Ask: How Do I Winterize My Hydrangea Plant? Winterizing hydrangeas means readying them for the stress of cold weather, protecting roots, stems, and the invaluable flower buds. Start by identifying your plant type—whether it’s blue hydrangea, panicle hydrangea, oakleaf, or mophead—and use the appropriate winter hydrangea care tips. These steps involve mulching, wrapping stems, setting up windbreaks, watering late in the fall, and pruning only when it benefits next season’s blooming. Potted hydrangea will need to come inside or be clustered in sheltered areas, while in-ground bushes benefit most from heavy mulching and wind protection. Always adapt your strategy to your local climate and observe closely as the season changes, adjusting covers and supports as needed for the healthiest start next year. Winterizing Steps: Actionable Winter Hydrangea Care Tips Mulch: Lay mulch like wood chips or straw around the root area after first frost, but before the ground freezes to protect against deep cold and root damage. Wrap/Stakes: For blue hydrangea or mopheads, gently tie branches and wrap with burlap or fleece; stake taller varieties to avoid snow breakage. Prune Carefully: Only remove dead stems in winter—avoid cutting healthy stems on old wood bloomers. Water: Water hydrangea bushes deeply before ground freezes. Hydrated roots tolerate winter stress better. Monitor & Remove Covers: Remove winter protection and old mulch in early spring as new growth appears. Table: Winter Hydrangea Care Tips for Different Types of Hydrangea A comparison of winter care strategies by hydrangea type Hydrangea Type Blooms On Pruning Time Mulch Needed? Special Protection Blue Hydrangea (Hydrangea macrophylla) Old wood After blooming (summer) Yes, heavy layer Burlap wrap, windbreak Mophead/Lacecap Old wood After blooming (summer) Yes Wrap stems if exposed Panicle (Hydrangea paniculata) New wood Late winter/early spring Moderate layer Stake if heavy snow Oakleaf (Hydrangea quercifolia) New wood Late winter/early spring Moderate layer Cover if exposed Smooth (Hydrangea arborescens) New wood Late winter/early spring Moderate Only in severe cold Expert Quotes: Insights on Winter Hydrangea Care Tips and Beautiful Flowers "The secret to blue hydrangea blooms is all in the winter preparation." — Dr. Sarah Jensen, Horticulturist As Dr. Jensen underlines, winter hydrangea care tips aren’t just about surviving cold, but setting up for unparalleled beauty in the growing season. Protecting flower buds, roots, and stems ensures that when early spring and late spring arrive, your hydrangea bush delivers on color and vigor. Garden experts consistently remark that consistent winter care—mulching, wrapping, and pruning according to hydrangea type—will yield beautiful flowers and effortless maintenance as the seasons change. Winter Hydrangea Care Tips FAQs Can I leave hydrangeas uncovered in winter? In milder climates, established hydrangeas may be left uncovered, particularly panicle and oakleaf types. However, blue hydrangea and mophead hydrangeas benefit significantly from some burlap or fleece protection, especially to prevent winter damage to their delicate flower buds. Should I fertilize hydrangeas before or after winter? Fertilize hydrangeas in early fall, before winter sets in, so roots can absorb nutrients before dormancy. Do not fertilize in late fall or winter, as it can encourage late growth susceptible to frost. How can winter hydrangea care tips prevent frost damage on blue hydrangea? Mulching and wrapping blue hydrangea (Hydrangea macrophylla) with burlap keeps roots and flower buds insulated, helping these varieties avoid frost damage that often results in fewer blooms when hydrangeas flower in late spring or summer. When should I remove winter protection from hydrangeas? Remove burlap, fleece, or heavy mulch in early spring as soon as nighttime temperatures consistently stay above freezing and before new shoots break through. This timing ensures new growth isn’t smothered and helps prevent rot or fungal issues. Key Takeaways: Achieve Noticeably Beautiful Flowers With Proper Winter Hydrangea Care Tips Winter hydrangea care tips are essential for healthy, beautiful blooms. Tailor your approach based on hydrangea type—especially for blue hydrangea. Follow the 1 3 rule and best pruning practices for winter care. Protect buds and roots with effective mulching and covering techniques. Take the Next Step: Start Applying These Winter Hydrangea Care Tips for a Stunning Summer Display Apply these winter hydrangea care tips today—your garden will reward you with a spectacular show of color and robust growth when the weather warms. Get started now for a summer brimming with beautiful flowers! If you’re ready to elevate your gardening expertise even further, consider how the health of your entire outdoor space can impact your plants’ success. From soil quality to moisture management, every detail matters when cultivating a thriving landscape. Explore more advanced home and garden strategies, such as safeguarding your property with effective concrete foundation waterproofing techniques, to ensure your garden remains resilient and vibrant through every season. Taking a holistic approach now will help you enjoy not only stunning hydrangeas, but a flourishing yard for years to come. To ensure your hydrangeas thrive and produce vibrant blooms next summer, it’s essential to implement proper winter care strategies. The article “How to Protect Hydrangeas in Winter” offers comprehensive guidance on protecting your plants from harsh winter conditions, including tips on pruning, mulching, and wrapping with burlap. (bobvila.com) Additionally, “How to winterize hydrangeas and help them flourish in 2025” provides step-by-step instructions on watering schedules, compost application, and other winterization techniques to safeguard your hydrangeas during the colder months. (tomsguide.com) By following these expert recommendations, you can effectively shield your hydrangeas from winter damage and set the stage for a spectacular floral display in the coming season.

12.17.2025

How to Winterize Your Garden Beds Without Spending a Fortune

Did you know that “Up to 30% of productivity can be lost due to improper winter preparation of raised beds and garden beds,” according to the Horticultural Society? If that statistic surprises you, you’re not alone. Most gardeners overlook winterizing, thinking the cold will merely pause their gardens, but the real threat is what happens beneath the surface. If you want your garden beds (especially raised beds!) to bounce back next season with healthy plants and big harvests, it’s time to rethink your approach to winter. This comprehensive winterize garden beds guide reveals practical, budget-conscious strategies so you don’t sacrifice your garden or your wallet this season. "Up to 30% of productivity can be lost due to improper winter preparation of raised beds and garden beds." – Horticultural Society Why Winterize Your Garden Beds? Startling Facts About Winter Damage Winter is more than a season of dormancy for your garden beds; it’s a critical period that can determine your soil health, spring growth, and disease prevention. Failing to adequately prepare your garden bed or raised bed for winter can lead to erosion, compacted soil, a spike in pest and pathogen populations, and even lost productivity in your next growing season. Studies reveal that garden beds not protected from cold weather, winter wind, and fluctuating temperatures often emerge in spring riddled with dead plant residue, unhealthy soil, and stunted root crops. Raised beds are particularly vulnerable because they experience more freeze-thaw cycles than in-ground beds, making winterizing your garden a non-negotiable task. Protecting your beds for winter means your compost and mulch don’t just keep the soil warm—they insulate plant roots, encourage beneficial microbe activity, and ensure your raised garden beds and garden beds are primed for the growing season when spring arrives. This guide walks you through each step, showing how a bit of prep now pays back with more vigorous, healthy plants later. What You’ll Learn in This Winterize Garden Beds Guide Budget-friendly strategies to winterize your garden beds Specific steps tailored for raised beds and traditional garden beds The science behind winter garden preparation Essential materials you already have at home The Step-by-Step Winterize Garden Beds Guide—Preparation Essentials To get the most out of this winterize garden beds guide, you’ll want to gather your materials and take stock of what you have before winter sets in. Critical supplies for both raised beds and garden beds include: mulch (straw, leaves, or grass clippings), compost, protective covers, and basic gardening tools. Many of the most effective winterizing methods involve items already in your yard or home, meaning the process is not only practical but very affordable. Gathering mulch and compost Reusing autumn leaves Choosing affordable covers for raised bed and garden bed protection Remove Dead Plants: Essential for Any Raised Beds or Garden Bed The first key move in your winterize garden beds guide is a thorough removal of dead plant material. This is not just about tidy appearances—it’s a crucial step to prevent disease and pest problems that can overwinter in spent foliage. Leaving old stems and roots in your raised bed or garden bed provides a refuge for harmful pathogens and makes spring cleanup much harder. Whether you’re prepping a raised garden bed or a traditional bed, clearing dead plants allows your organic matter, amendments, and mulch to reach the soil directly. As you clear out old plant material and prepare to amend your soil, it's also wise to consider how moisture and drainage affect your garden beds throughout the year. For practical tips on protecting your outdoor spaces from excess water and ensuring a healthy foundation for your garden, explore these key strategies for waterproofing your concrete foundation. This can help prevent water-related issues that impact both your garden and your home's structure. Why It’s Important to Remove Dead Plant Material Reduces disease and pest risks Preps soil for healthier raised beds next season "Trimming back plants in raised beds improves winter hardiness and reduces pathogens." – Urban Gardening Expert Amend Soil in Your Garden Beds With Compost and Organic Matter Once your beds are cleared, it’s time to boost your soil with organic matter—the secret to vigorous growth next spring. Fall is the ideal time to work in compost, manure, or leaf mold, all of which are budget-friendly and packed with nutrients. Top-dressing your raised beds or garden beds with 2-3 inches of compost not only feeds microbes through the winter, but also improves water retention, aeration, and spring fertility. Building your soil over the winter is what sets successful gardeners apart. If you’ve got access to finished compost, aged manure, or even a few bags of leaf mold, you’re armed with the best amendments, often for free. The table below compares popular amendments by cost and availability: Best Compost Practices for Raised Garden & Traditional Beds Amendment Cost Best For Availability Compost Low raised bed & garden beds Home/Store Manure Low raised beds Farm/Garden Center Leaf Mold Free garden beds Yard The Role of Cover Crops in the Winterize Garden Beds Guide Cover crops are one of the most powerful, natural tools in this winterize garden beds guide. By planting quick-growing cover crops such as rye, clover, or vetch in your raised beds or garden beds, you prevent soil erosion, suppress winter weeds, and add organic matter when you turn them under in spring. While cover crops may sound like a big investment, most seed types are affordable and a handful of packets goes a long way in small gardens. If purchasing seed is out of reach, consider using leftover seeds from past seasons, or partner with gardening neighbors to split bulk packages of rye or clover. Even a small patch of winter rye improves soil texture and nutrient density for the next growing season. Cover Crop Selection and Affordable Alternatives Rye, clover, and vetch for raised beds Benefits for soil structure and weed suppression in garden beds Winter Mulch: What to Use and How to Apply to Raised Beds vs. Garden Bed Applying winter mulch is a must for any winterize garden beds guide. Mulch not only insulates the soil in raised beds and garden beds, but also prevents erosion, moderates soil temperature, and protects the root zone from drying winter wind. Straw, shredded leaves, and untreated grass clippings are cost-effective options that most gardeners can source locally—or for free. Spreading a layer of mulch (2-4 inches for beds, 3-6 inches for raised beds) acts as a protective layer to keep beneficial microbes active and your plants’ roots secure. Remember, the right thickness matters: too much mulch can smother dormant perennials, while too little exposes your soil to freezing and thawing cycles that can ruin a raised garden bed’s structure. Err on the side of generous coverage for exposed or elevated beds, where cold weather hits hardest. Affordable Winter Mulch Options Straw, shredded leaves, and grass clippings for raised garden beds Thickness recommendations based on bed type DIY Methods: Covering and Protecting Garden Beds and Raised Beds on a Budget When temperatures drop, providing a simple cover for your garden beds and raised beds can make the difference between thriving soil and winter damage. Row covers, floating row cover, reused sheets, and makeshift plastic tunnels are staple solutions in any budget-minded winterize garden beds guide. Create frames from scrap wood, old hula hoops, or stakes, then drape with breathable fabric or recycled plastic. Even household materials like clear shower curtains or bubble wrap can shield your soil from severe cold weather. Simple frames & recycled sheets for frost protection Plastic tunnels vs. row covers Reuse household materials A floating row cover requires minimal investment and is especially useful for raised beds, while a sturdy plastic cold frame offers maximum protection for overwintering crops or early spring planting. Whether you prefer a minimalist or more fortified approach, every additional protective layer turns your raised garden or vegetable garden into a fortress against winter wind and ice. How to Prepare Your Garden for Winter: Final Checklist Double-check each essential garden bed prep step before winter fully sets in to ensure you’ve done all you can to winterize your garden affordably: Remove all dead plants from raised beds Spread compost and organic material over garden beds Plant cover crops where possible Apply thick winter mulch Cover and secure beds as needed People Also Ask: Winterize Garden Beds Guide How do I winterize my garden beds? Remove dead plants, amend soil, plant cover crops, mulch, and cover raised beds if necessary. Start by eliminating all dead plant material to reduce potential disease and pests. Next, work in compost or leaf mold to recharge soil nutrients during the off-season. Plant cover crops if possible for further soil protection and fertility. Finally, apply a thick layer of mulch (such as shredded leaves or straw) and install row cover or other protection on your garden bed or raised bed to shield against harsh winter weather. What is the 70/30 rule in gardening? The 70/30 rule suggests 70% of your soil should be organic material (like compost) and the remaining 30% as soil minerals for optimal raised garden bed production. The 70/30 rule is a widely recommended ratio for mixing soil in a new or existing raised bed. By having 70% organic matter (compost, leaf mold, or other well-decomposed amendments) combined with 30% mineral soil (such as topsoil or sandy loam), you increase aeration and drainage while providing sustainable nutrient sources for your vegetable garden. This blend helps your raised beds sustain healthy plants right through spring and summer. Should you leave leaves in flower beds over winter? In most cases, yes. Leaves act as natural winter mulch and enrich raised beds and garden beds. Leaving a layer of mulch made up of shredded autumn leaves in your flower beds or raised beds can actually protect perennials, insulate roots, and add organic matter as they break down. However, be sure to spread them loosely and check for excessive matting, which can block air and trap moisture. In most scenarios, utilizing autumn leaves is a key theme in this winterize garden beds guide for a budget solution that’s also environmentally friendly. What to do with garden beds in fall? Remove spent crops, add compost, plant cover crops, mulch, and plan for winterizing your raised beds and garden bed areas. Fall is the best time to prepare your garden for winter. Remove all dead crops, add compost or organic amendments, sow a hardy cover crop, and apply winter mulch to your garden beds and raised beds. Planning for winterizing now means your beds will recover quickly when spring arrives, ensuring a strong start for next season's growing season. Step-by-step visual demonstration of winterizing raised beds, including plant removal, compost application, mulching, and DIY covering techniques, with close-ups and wide shots in a home garden, clear narration, and visual tips for affordability and efficiency. Expert Quotes on Saving Money While Winterizing Garden Beds "With homemade mulch and backyard compost, you can winterize your garden beds for almost nothing." – Sustainability Blogger FAQs: Winterize Garden Beds Guide Do I need to water my garden beds in winter? Occasionally, especially if you’re in a dry climate or have newly planted cover crops or perennials. Drought stress can occur in raised beds even during the winter, so monitor moisture after thaw cycles. How much mulch is enough for raised beds? Aim for 3-6 inches of straw, shredded leaves, or grass clippings on raised beds to create an effective protective layer. Too thin and roots risk freezing; too thick and you may promote mold—find a balance for your region’s needs. What are the fastest cover crops for winter? Rye and oats are among the fastest and most affordable cover crops for winterizing a raised bed or garden bed. They germinate quickly in cool weather, suppress winter weeds, and add biomass for next spring. Key Takeaways from the Winterize Garden Beds Guide Affordable garden prep starts with removal, amending, and mulching Raised beds and garden beds both benefit from strategic winterizing Repurpose materials to cut costs and improve sustainability Ready to Save Money and Boost Your Soil Health? Start Winterizing Your Garden Beds Today Begin your backyard transformation now with this winterize garden beds guide, and next season’s garden will thank you. If you’re inspired to take your garden’s resilience to the next level, consider how your entire outdoor environment works together to protect your investment. Beyond winterizing your beds, understanding the importance of a strong, moisture-resistant foundation can make a significant difference in your landscape’s long-term health. For a deeper dive into safeguarding your home and garden from water damage, discover the essential homeowner strategies for waterproofing your concrete foundation. This broader approach ensures your garden thrives and your home remains secure, season after season. To enhance your understanding of winterizing garden beds without overspending, consider exploring the following resources: “10 Tips for Preparing Your Garden for Winter” (almanac.com) This article offers practical advice on protecting your garden during the colder months, including steps like harvesting tender vegetables before frost and applying mulch to insulate soil. “How to Winterize Your Raised Garden Beds” (primexgardencenter.com) This guide provides a step-by-step approach to preparing raised garden beds for winter, emphasizing tasks such as cleaning out old plant material, removing garden equipment, and applying mulch to protect the soil. By consulting these resources, you’ll gain valuable insights into cost-effective methods for winterizing your garden beds, ensuring they remain healthy and productive for the next growing season.

Terms of Service

Privacy Policy

Core Modal Title

Sorry, no results found

You Might Find These Articles Interesting

T
Please Check Your Email
We Will Be Following Up Shortly
*
*
*